Author: seiifalarbe

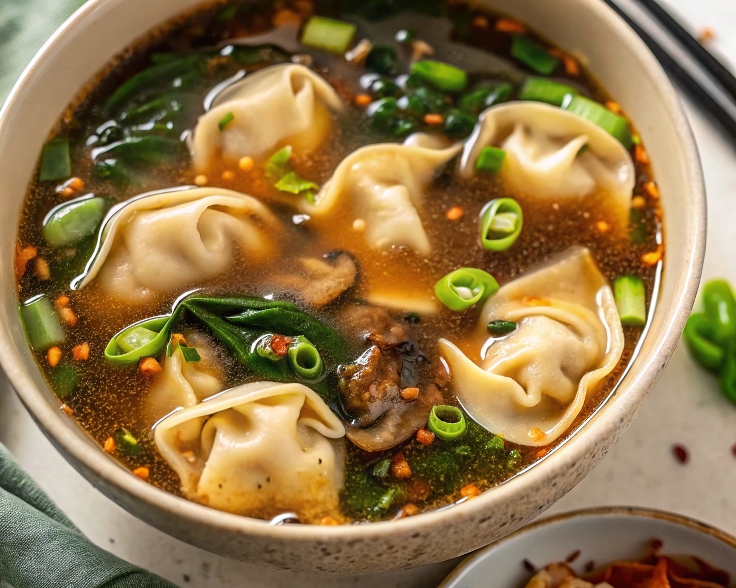
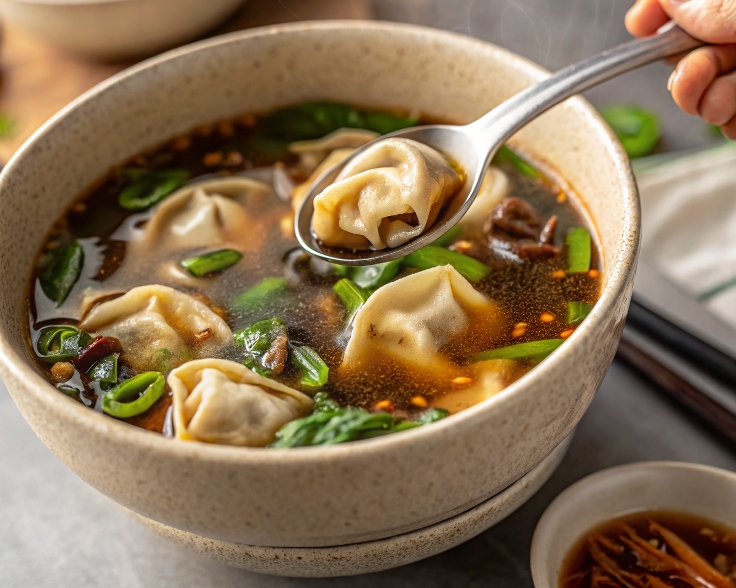
  • Potsticker Soup – A Cozy, Flavor-Packed Comfort Bowl

    Introduction

    Craving something cozy, nourishing, and ready in under 30 minutes? Look no further than this Potsticker Soup — the ultimate fusion of convenience and flavor. With tender dumplings swimming in a fragrant, ginger-garlic broth and loaded with mushrooms, spinach, and chili oil for a subtle kick, this soup hits every craving. Whether you’re feeling under the weather or just want a quick dinner that feels like takeout (but better), this recipe delivers.


    🍽️ Servings & Time

    • Yield: 3–4 servings
    • Prep Time: 10 minutes
    • Cook Time: 15 minutes
    • Total Time: 25 minutes

    🛒 Ingredients

    Produce:

    • 2 garlic cloves, minced
    • 2 tsp fresh ginger, grated
    • 2 green onions, sliced
    • ½ cup mushrooms, sliced
    • ½ cup spinach or bok choy

    Canned Goods:

    • 4 cups chicken broth

    Condiments:

    • 1 tbsp soy sauce

    Baking & Spices:

    • 1 tsp chili oil or red pepper flakes (adjust to taste)
    • Salt & pepper, to taste

    Oils & Vinegars:

    • 1 tbsp sesame oil
    • 1 tbsp rice vinegar

    Other:

    • 12–15 frozen potstickers (pork, chicken, or veggie – your choice)

    🧑‍🍳 Equipment Needed

    • Medium soup pot or saucepan
    • Ladle
    • Sharp knife
    • Cutting board
    • Spoon or spatula

    🍳 Instructions

    1. Sauté Aromatics:

    In a soup pot, heat sesame oil over medium heat. Add garlic, ginger, and white parts of green onions. Sauté for 1–2 minutes until fragrant.

    2. Add Broth & Flavor:

    Pour in chicken broth, soy sauce, rice vinegar, chili oil (or flakes), and mushrooms. Bring to a gentle simmer.

    3. Add Potstickers:

    Carefully add frozen potstickers to the simmering broth. Cook uncovered for 6–8 minutes (or according to package instructions), until heated through and slightly plumped.

    4. Finish with Greens:

    Stir in spinach or bok choy and cook for 1–2 more minutes until just wilted. Taste and adjust seasoning with salt and pepper.

    5. Garnish & Serve:

    Ladle into bowls and top with the green parts of green onions. Optional: extra chili oil, sesame seeds, or a squeeze of lime.


    🔁 Variations

    • Vegetarian Version: Use veggie broth and plant-based potstickers.
    • Noodle Soup Twist: Add rice noodles or ramen for a heartier dish.
    • Spicy Miso: Stir in 1 tbsp of miso paste for a deeper umami profile.

    🧊 Storage Tips

    • Fridge: Store leftovers for up to 3 days (potstickers may soften slightly).
    • Reheat: Warm on the stovetop. Add extra broth if needed.
    • Freeze: Not recommended after cooking, but you can prep and freeze the broth separately.

    ❓ Frequently Asked Questions

    Can I make this with homemade potstickers?
    Yes! Just be sure to seal them tightly and cook gently to avoid breakage.

    Do I need to thaw frozen potstickers first?
    Nope! Drop them straight into the broth from frozen.

    What kind of potstickers work best?
    Chicken, pork, shrimp, or veggie all work. Go with what you love!

    Potsticker Soup – A Cozy, Flavor-Packed Comfort Bowl

    Craving something cozy, nourishing, and ready in under 30 minutes? Look no further than this Potsticker Soup — the ultimate fusion of convenience and flavor. With tender dumplings swimming in a fragrant, ginger-garlic broth and loaded with mushrooms, spinach, and chili oil for a subtle kick, this soup hits every craving. Whether you’re feeling under the weather or just want a quick dinner that feels like takeout (but better), this recipe delivers.

    • Medium soup pot or saucepan
    • Ladle
    • Sharp knife
    • Cutting board
    • Spoon or spatula

    Produce:

    • 2 garlic cloves (minced)
    • 2 tsp fresh ginger (grated)
    • 2 green onions (sliced)
    • ½ cup mushrooms (sliced)
    • ½ cup spinach or bok choy

    Canned Goods:

    • 4 cups chicken broth

    Condiments:

    • 1 tbsp soy sauce

    Baking & Spices:

    • 1 tsp chili oil or red pepper flakes (adjust to taste)
    • Salt & pepper (to taste)

    Oils & Vinegars:

    • 1 tbsp sesame oil
    • 1 tbsp rice vinegar

    Other:

    • 12 –15 frozen potstickers (pork, chicken, or veggie – your choice)

    Sauté Aromatics:

    1. In a soup pot, heat sesame oil over medium heat. Add garlic, ginger, and white parts of green onions. Sauté for 1–2 minutes until fragrant.

    Add Broth & Flavor:

    1. Pour in chicken broth, soy sauce, rice vinegar, chili oil (or flakes), and mushrooms. Bring to a gentle simmer.

    Add Potstickers:

    1. Carefully add frozen potstickers to the simmering broth. Cook uncovered for 6–8 minutes (or according to package instructions), until heated through and slightly plumped.

    Finish with Greens:

    1. Stir in spinach or bok choy and cook for 1–2 more minutes until just wilted. Taste and adjust seasoning with salt and pepper.

    Garnish & Serve:

    1. Ladle into bowls and top with the green parts of green onions. Optional: extra chili oil, sesame seeds, or a squeeze of lime.

    🔁 Variations
    Vegetarian Version: Use veggie broth and plant-based potstickers.

    Noodle Soup Twist: Add rice noodles or ramen for a heartier dish.

    Spicy Miso: Stir in 1 tbsp of miso paste for a deeper umami profile.

    🧊 Storage Tips
    Fridge: Store leftovers for up to 3 days (potstickers may soften slightly).

    Reheat: Warm on the stovetop. Add extra broth if needed.

    Freeze: Not recommended after cooking, but you can prep and freeze the broth separately.

    ❓ Frequently Asked Questions
    Can I make this with homemade potstickers?
    Yes! Just be sure to seal them tightly and cook gently to avoid breakage.

    Do I need to thaw frozen potstickers first?
    Nope! Drop them straight into the broth from frozen.

    What kind of potstickers work best?
    Chicken, pork, shrimp, or veggie all work. Go with what you love!

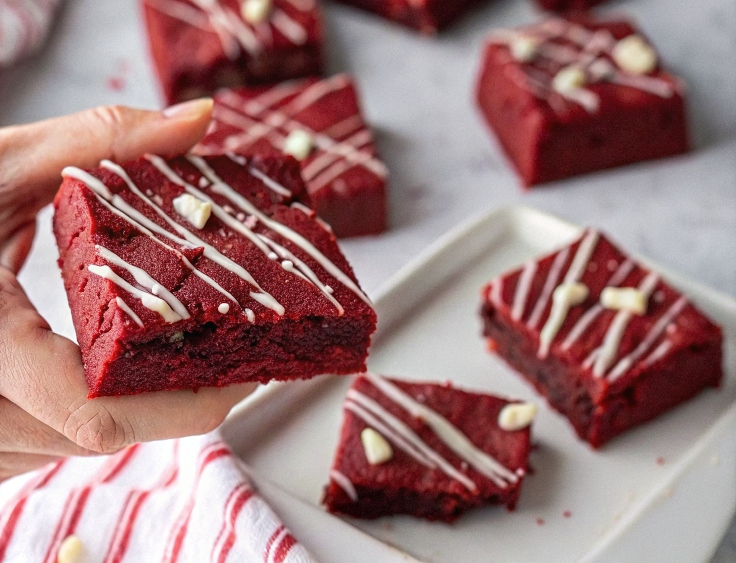
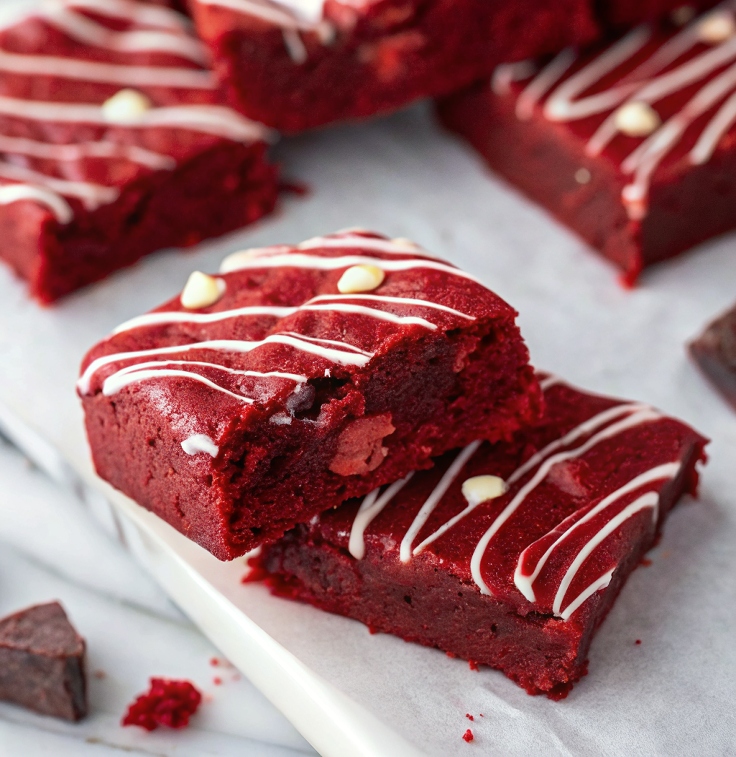
  • Red Velvet Brownies – Fudgy, Vibrant & Loaded with White Chocolate

    Introduction

    Red Velvet is more than just a flavor — it’s a mood. These Red Velvet Brownies combine the dense, fudgy richness of a classic brownie with that signature tang and deep scarlet hue you love in red velvet cake. Finished with swirls of white chocolate chips, this dessert is a guaranteed showstopper for Valentine’s Day, birthdays, or just treating yourself because… you deserve it.


    🍽️ Servings & Time

    • Yield: 9–12 brownies
    • Prep Time: 15 minutes
    • Bake Time: 30 minutes
    • Cool Time: 20 minutes
    • Total Time: ~1 hour 5 minutes

    🛒 Ingredients

    Refrigerated:

    • 2 large eggs

    Baking & Spices:

    • 1 ¼ cups all-purpose flour
    • 2 tbsp unsweetened cocoa powder
    • ½ tbsp red gel food coloring
    • 1 ¼ cups granulated sugar
    • ¼ tsp salt
    • 2 oz semi-sweet chocolate bar (chopped)
    • 2 tsp vanilla extract
    • ½ cup white chocolate chips

    Oils & Vinegars:

    • 1 tsp white vinegar

    Dairy:

    • ¾ cup unsalted butter (melted)

    🧑‍🍳 Equipment Needed

    • 8×8 inch baking pan
    • Mixing bowls
    • Whisk & spatula
    • Microwave-safe bowl or double boiler (to melt chocolate)
    • Parchment paper
    • Toothpick (for doneness test)

    🍳 Instructions

    1. Preheat & Prep:

    Preheat your oven to 350°F (175°C). Line your baking pan with parchment paper, leaving some overhang for easy lifting later.

    2. Melt the Chocolate & Butter:

    In a microwave-safe bowl, melt the chopped semi-sweet chocolate and butter together in 30-second intervals, stirring in between until smooth. Let cool slightly.

    3. Mix the Wet Ingredients:

    Whisk in the sugar, eggs, vanilla, red food coloring, and vinegar into the chocolate-butter mixture.

    4. Add the Dry Ingredients:

    Sift in flour, cocoa powder, and salt. Fold gently until just combined — don’t overmix!

    5. Add White Chocolate & Bake:

    Fold in white chocolate chips. Pour the batter into the prepared pan and smooth the top. Bake for 28–32 minutes, or until a toothpick comes out with moist crumbs.

    6. Cool & Slice:

    Let cool completely in the pan. Use the parchment overhang to lift out, slice into squares, and serve!


    🔁 Variations

    • Cream Cheese Swirl: Drop dollops of sweetened cream cheese on top and swirl with a knife before baking.
    • Nutty Crunch: Add chopped pecans or walnuts for extra texture.
    • Dark Chocolate Boost: Swap white chips for dark chocolate chunks for a richer bite.

    🧊 Storage Tips

    • Room Temp: Store in an airtight container for 3–4 days.
    • Fridge: Keeps fresh up to a week when chilled.
    • Freeze: Freeze baked brownies (cut or whole) for up to 2 months. Wrap tightly to prevent freezer burn.

    ❓ Frequently Asked Questions

    Why use vinegar in brownies?
    It enhances the red color and adds a subtle tang — a red velvet signature!

    Can I use liquid food coloring instead of gel?
    Gel is more vibrant, but liquid works too. Just use 1 ½–2 tbsp and reduce other liquids slightly.

    Do I need to melt the chocolate bar?
    Yes! It gives these brownies a richer, fudgier texture than cocoa alone.

    Red Velvet Brownies – Fudgy, Vibrant & Loaded with White Chocolate

    Red Velvet is more than just a flavor — it’s a mood. These Red Velvet Brownies combine the dense, fudgy richness of a classic brownie with that signature tang and deep scarlet hue you love in red velvet cake. Finished with swirls of white chocolate chips, this dessert is a guaranteed showstopper for Valentine’s Day, birthdays, or just treating yourself because… you deserve it.

    • 8×8 inch baking pan
    • Mixing bowls
    • Whisk & spatula
    • Microwave-safe bowl or double boiler (to melt chocolate)
    • Parchment paper
    • Toothpick (for doneness test)

    Refrigerated:

    • 2 large eggs
    • Baking & Spices:
    • 1 ¼ cups all-purpose flour
    • 2 tbsp unsweetened cocoa powder
    • ½ tbsp red gel food coloring
    • 1 ¼ cups granulated sugar
    • ¼ tsp salt
    • 2 oz semi-sweet chocolate bar (chopped)
    • 2 tsp vanilla extract
    • ½ cup white chocolate chips
    • Oils & Vinegars:
    • 1 tsp white vinegar

    Dairy:

    • ¾ cup unsalted butter (melted)

    Preheat & Prep:

    1. Preheat your oven to 350°F (175°C). Line your baking pan with parchment paper, leaving some overhang for easy lifting later.

    Melt the Chocolate & Butter:

    1. In a microwave-safe bowl, melt the chopped semi-sweet chocolate and butter together in 30-second intervals, stirring in between until smooth. Let cool slightly.

    Mix the Wet Ingredients:

    1. Whisk in the sugar, eggs, vanilla, red food coloring, and vinegar into the chocolate-butter mixture.

    Add the Dry Ingredients:

    1. Sift in flour, cocoa powder, and salt. Fold gently until just combined — don’t overmix!
    2. Add White Chocolate & Bake:
    3. Fold in white chocolate chips. Pour the batter into the prepared pan and smooth the top. Bake for 28–32 minutes, or until a toothpick comes out with moist crumbs.

    Cool & Slice:

    1. Let cool completely in the pan. Use the parchment overhang to lift out, slice into squares, and serve!

    🔁 Variations
    Cream Cheese Swirl: Drop dollops of sweetened cream cheese on top and swirl with a knife before baking.

    Nutty Crunch: Add chopped pecans or walnuts for extra texture.

    Dark Chocolate Boost: Swap white chips for dark chocolate chunks for a richer bite.

    🧊 Storage Tips
    Room Temp: Store in an airtight container for 3–4 days.

    Fridge: Keeps fresh up to a week when chilled.

    Freeze: Freeze baked brownies (cut or whole) for up to 2 months. Wrap tightly to prevent freezer burn.

    ❓ Frequently Asked Questions
    Why use vinegar in brownies?
    It enhances the red color and adds a subtle tang — a red velvet signature!

    Can I use liquid food coloring instead of gel?
    Gel is more vibrant, but liquid works too. Just use 1 ½–2 tbsp and reduce other liquids slightly.

    Do I need to melt the chocolate bar?
    Yes! It gives these brownies a richer, fudgier texture than cocoa alone.

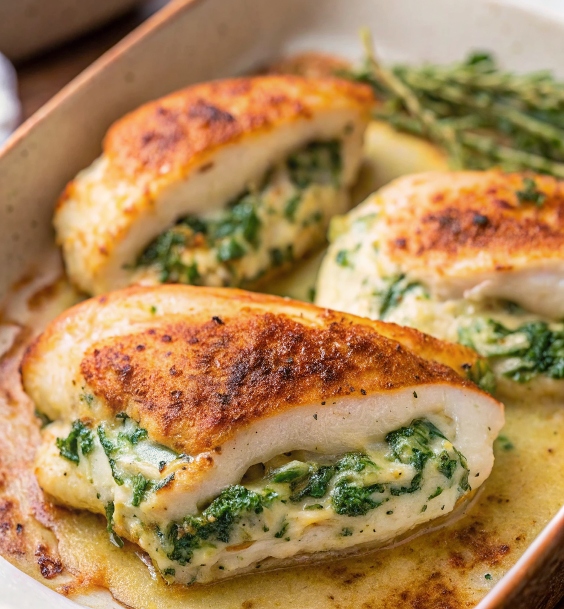
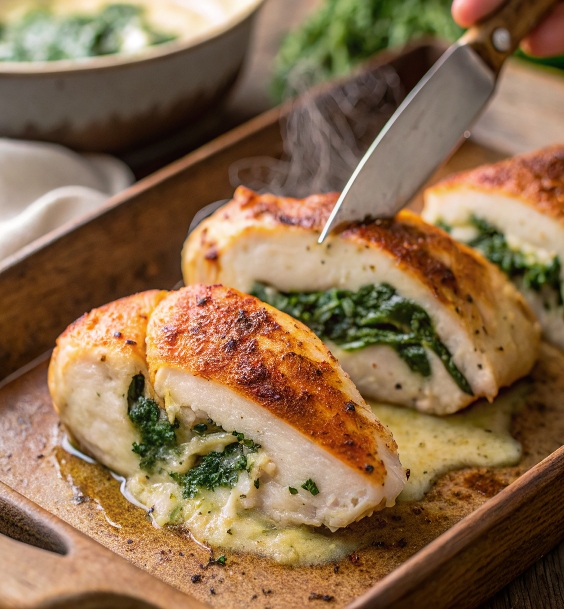
  • Spinach Stuffed Chicken Breasts – A Healthy Low Carb Dinner Option!

    Introduction

    If you’re craving a satisfying dinner that feels indulgent but fits your low-carb lifestyle, these Spinach Stuffed Chicken Breasts are the answer. Juicy chicken breasts are filled with a creamy spinach and cheese mixture, then baked to golden, melty perfection. It’s keto-friendly, gluten-free, and packed with protein — ideal for busy weeknights, meal prep, or even impressing dinner guests with something secretly simple.


    🍽️ Servings & Time

    • Yield: 4 servings
    • Prep Time: 10 minutes
    • Cook Time: 25 minutes
    • Total Time: 35 minutes

    🛒 Ingredients

    For the Chicken:

    • 4 boneless, skinless chicken breasts
    • 1 tbsp olive oil
    • 1 tsp smoked paprika
    • Salt & pepper, to taste
    • Toothpicks or cooking twine

    For the Filling:

    • 1 ½ cups fresh spinach (roughly chopped)
    • ½ cup cream cheese, softened
    • ½ cup shredded mozzarella cheese
    • ¼ cup grated Parmesan
    • 2 garlic cloves, minced
    • ½ tsp onion powder
    • Optional: red pepper flakes for heat

    🧑‍🍳 Equipment Needed

    • Sharp knife
    • Skillet or baking dish
    • Mixing bowl
    • Spoon or spatula
    • Toothpicks or twine
    • Oven-safe thermometer (optional)

    🍳 Instructions

    1. Prepare the Chicken:

    Preheat oven to 375°F (190°C). Using a sharp knife, slice a pocket horizontally into each chicken breast (do not cut all the way through). Season the outside with salt, pepper, and smoked paprika.

    2. Make the Filling:

    In a bowl, combine spinach, cream cheese, mozzarella, Parmesan, garlic, onion powder, and optional chili flakes. Mix until smooth and creamy.

    3. Stuff the Chicken:

    Spoon the filling evenly into each chicken pocket. Use toothpicks or twine to secure the openings.

    4. Sear and Bake:

    Heat olive oil in an oven-safe skillet over medium-high heat. Sear the chicken on both sides until golden (about 2–3 minutes per side). Transfer to the oven and bake for 15–18 minutes, or until internal temp reaches 165°F (74°C).

    5. Rest & Serve:

    Remove toothpicks, let rest for 5 minutes, then slice and serve with a drizzle of pan juices.


    🔁 Variations

    • Add Sun-Dried Tomatoes to the filling for a Mediterranean twist
    • Use Kale or Arugula instead of spinach
    • Add Bacon Crumbles for extra flavor and texture

    🧊 Storage Tips

    • Fridge: Store in an airtight container for 3–4 days
    • Reheat: Gently reheat in a covered skillet or in the oven at 300°F
    • Freeze: Wrap uncooked stuffed breasts in foil and freeze for up to 2 months

    ❓ Frequently Asked Questions

    Can I use frozen spinach?
    Yes — just thaw, drain, and squeeze out excess water before mixing.

    Is it good for meal prep?
    Absolutely! Just prep and bake ahead. It reheats well and pairs with any veggie or salad.

    What can I serve with it?
    Cauliflower mash, roasted broccoli, or a fresh arugula salad are perfect low-carb sides.

    Spinach Stuffed Chicken Breasts – A Healthy Low Carb Dinner Option!

    If you’re craving a satisfying dinner that feels indulgent but fits your low-carb lifestyle, these Spinach Stuffed Chicken Breasts are the answer. Juicy chicken breasts are filled with a creamy spinach and cheese mixture, then baked to golden, melty perfection. It’s keto-friendly, gluten-free, and packed with protein — ideal for busy weeknights, meal prep, or even impressing dinner guests with something secretly simple.

    • Sharp knife
    • Skillet or baking dish
    • Mixing bowl
    • Spoon or spatula
    • Toothpicks or twine
    • Oven-safe thermometer (optional)

    For the Chicken:

    • 4 boneless (skinless chicken breasts)
    • 1 tbsp olive oil
    • 1 tsp smoked paprika
    • Salt & pepper (to taste)
    • Toothpicks or cooking twine

    For the Filling:

    • 1 ½ cups fresh spinach (roughly chopped)
    • ½ cup cream cheese (softened)
    • ½ cup shredded mozzarella cheese
    • ¼ cup grated Parmesan
    • 2 garlic cloves (minced)
    • ½ tsp onion powder

    Optional: red pepper flakes for heat

    Prepare the Chicken:

    1. Preheat oven to 375°F (190°C). Using a sharp knife, slice a pocket horizontally into each chicken breast (do not cut all the way through). Season the outside with salt, pepper, and smoked paprika.

    Make the Filling:

    1. In a bowl, combine spinach, cream cheese, mozzarella, Parmesan, garlic, onion powder, and optional chili flakes. Mix until smooth and creamy.

    Stuff the Chicken:

    1. Spoon the filling evenly into each chicken pocket. Use toothpicks or twine to secure the openings.

    Sear and Bake:

    1. Heat olive oil in an oven-safe skillet over medium-high heat. Sear the chicken on both sides until golden (about 2–3 minutes per side). Transfer to the oven and bake for 15–18 minutes, or until internal temp reaches 165°F (74°C).

    Rest & Serve:

    1. Remove toothpicks, let rest for 5 minutes, then slice and serve with a drizzle of pan juices.

    🔁 Variations
    Add Sun-Dried Tomatoes to the filling for a Mediterranean twist

    Use Kale or Arugula instead of spinach

    Add Bacon Crumbles for extra flavor and texture

    🧊 Storage Tips
    Fridge: Store in an airtight container for 3–4 days

    Reheat: Gently reheat in a covered skillet or in the oven at 300°F

    Freeze: Wrap uncooked stuffed breasts in foil and freeze for up to 2 months

    ❓ Frequently Asked Questions
    Can I use frozen spinach?
    Yes — just thaw, drain, and squeeze out excess water before mixing.

    Is it good for meal prep?
    Absolutely! Just prep and bake ahead. It reheats well and pairs with any veggie or salad.

    What can I serve with it?
    Cauliflower mash, roasted broccoli, or a fresh arugula salad are perfect low-carb sides.

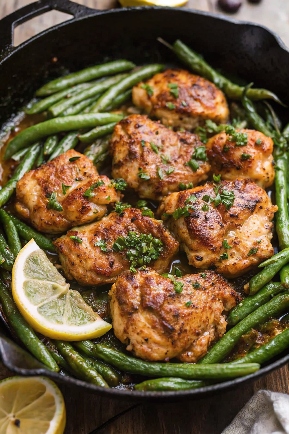
  • Lemon Garlic Butter Chicken Thighs and Green Beans Skillet

    Introduction

    This one-pan wonder is about to become your go-to weeknight hero. Lemon Garlic Butter Chicken Thighs are seared to golden perfection, then simmered with tender-crisp green beans in a zesty, buttery sauce infused with garlic and citrus. It’s quick, clean, and bursting with flavor — perfect for when you want something hearty but healthy(ish). Serve it with crusty bread, rice, or as-is for a low-carb dinner win!


    🍽️ Servings & Time

    • Yield: 4 servings
    • Prep Time: 10 minutes
    • Cook Time: 25 minutes
    • Total Time: 35 minutes

    🛒 Ingredients

    Protein & Veggies:

    • 6 bone-in, skin-on chicken thighs
    • 2 cups green beans, trimmed

    Pantry & Fridge:

    • 4 tbsp unsalted butter
    • 1 tbsp olive oil
    • 5 garlic cloves, minced
    • Juice and zest of 1 large lemon
    • ½ cup chicken broth (or white wine)
    • 1 tsp Italian seasoning
    • ½ tsp smoked paprika
    • Salt & pepper to taste
    • Optional: fresh parsley, chili flakes

    🧑‍🍳 Equipment Needed

    • Large cast iron skillet or sauté pan
    • Tongs
    • Small bowl for mixing spices
    • Knife and cutting board
    • Zester or grater

    🍳 Instructions

    1. Prep the Chicken:

    Pat chicken thighs dry and season with salt, pepper, paprika, and Italian seasoning.

    2. Sear the Chicken:

    Heat olive oil and 2 tbsp butter in a large skillet over medium-high heat. Add chicken thighs skin-side down and sear until crispy and golden brown, about 5–6 minutes per side. Remove and set aside.

    3. Sauté Garlic & Deglaze:

    In the same pan, reduce heat to medium and add garlic. Sauté until fragrant (30 seconds). Deglaze with chicken broth and stir in lemon juice, zest, and remaining butter.

    4. Simmer Everything Together:

    Return chicken to the skillet and nestle in green beans. Cover and cook on medium-low for 10–12 minutes, or until chicken is fully cooked (internal temp: 165°F/74°C) and green beans are tender-crisp.

    5. Garnish & Serve:

    Sprinkle with fresh parsley or chili flakes for a pop of color and heat. Serve hot, straight from the skillet!


    🔁 Variations

    • Low Carb Swap: Sub green beans with broccoli or zucchini.
    • Crispy Finish: Finish the skillet in a 425°F oven for 5 mins to crisp the skin.
    • Creamy Option: Add ¼ cup heavy cream to the sauce after the broth for a richer twist.

    🧊 Storage Tips

    • Fridge: Store leftovers in an airtight container for up to 4 days.
    • Reheat: Warm in a covered skillet over low heat or microwave with a splash of broth.
    • Freeze: Freeze cooked chicken (without green beans) for up to 2 months.

    ❓ Frequently Asked Questions

    Can I use boneless thighs?
    Yes, boneless thighs or breasts work too — reduce cook time by 5–7 minutes.

    Is it spicy?
    Not by default, but adding chili flakes or cayenne will kick it up!

    What sides go well with this?
    Rice, couscous, mashed potatoes, or warm bread all soak up the sauce beautifully.

    Lemon Garlic Butter Chicken Thighs and Green Beans Skillet

    This one-pan wonder is about to become your go-to weeknight hero. Lemon Garlic Butter Chicken Thighs are seared to golden perfection, then simmered with tender-crisp green beans in a zesty, buttery sauce infused with garlic and citrus. It’s quick, clean, and bursting with flavor — perfect for when you want something hearty but healthy(ish). Serve it with crusty bread, rice, or as-is for a low-carb dinner win!

    • Large cast iron skillet or sauté pan
    • Tongs
    • Small bowl for mixing spices
    • Knife and cutting board
    • Zester or grater

    Protein & Veggies:

    • 6 bone-in (skin-on chicken thighs)
    • 2 cups green beans (trimmed)

    Pantry & Fridge:

    • 4 tbsp unsalted butter
    • 1 tbsp olive oil
    • 5 garlic cloves (minced)
    • Juice and zest of 1 large lemon
    • ½ cup chicken broth (or white wine)
    • 1 tsp Italian seasoning
    • ½ tsp smoked paprika
    • Salt & pepper to taste

    Optional: fresh parsley, chili flakes

    Prep the Chicken:

    1. Pat chicken thighs dry and season with salt, pepper, paprika, and Italian seasoning.

    Sear the Chicken:

    1. Heat olive oil and 2 tbsp butter in a large skillet over medium-high heat. Add chicken thighs skin-side down and sear until crispy and golden brown, about 5–6 minutes per side. Remove and set aside.
    2. Sauté Garlic & Deglaze:
    3. In the same pan, reduce heat to medium and add garlic. Sauté until fragrant (30 seconds). Deglaze with chicken broth and stir in lemon juice, zest, and remaining butter.

    Simmer Everything Together:

    1. Return chicken to the skillet and nestle in green beans. Cover and cook on medium-low for 10–12 minutes, or until chicken is fully cooked (internal temp: 165°F/74°C) and green beans are tender-crisp.

    Garnish & Serve:

    1. Sprinkle with fresh parsley or chili flakes for a pop of color and heat. Serve hot, straight from the skillet!

    🔁 Variations
    Low Carb Swap: Sub green beans with broccoli or zucchini.

    Crispy Finish: Finish the skillet in a 425°F oven for 5 mins to crisp the skin.

    Creamy Option: Add ¼ cup heavy cream to the sauce after the broth for a richer twist.

    🧊 Storage Tips
    Fridge: Store leftovers in an airtight container for up to 4 days.

    Reheat: Warm in a covered skillet over low heat or microwave with a splash of broth.

    Freeze: Freeze cooked chicken (without green beans) for up to 2 months.

    ❓ Frequently Asked Questions
    Can I use boneless thighs?
    Yes, boneless thighs or breasts work too — reduce cook time by 5–7 minutes.

    Is it spicy?
    Not by default, but adding chili flakes or cayenne will kick it up!

    What sides go well with this?
    Rice, couscous, mashed potatoes, or warm bread all soak up the sauce beautifully.

  • Crème Brûlée Cookies – Inspired by In Bloom Bakery

    ✨ Introduction

    If crème brûlée and cookies had a delicious little baby, this would be it. These Crème Brûlée Cookies combine the soft chew of a bakery-style cookie with the rich, custardy flavor of the classic French dessert. Think vanilla bean flavor, caramelized sugar tops, and a silky interior that melts in your mouth. Inspired by the In Bloom Bakery style, these cookies are as impressive as they are addictive — perfect for dinner parties, coffee dates, or anytime you want to impress.


    🛒 Ingredients

    Refrigerated:

    • 1 egg
    • 6 egg yolks

    Condiments:

    • 2 ½ tbsp vanilla bean spread

    Baking & Spices:

    • 2 ½ cups all-purpose flour
    • ½ tsp baking powder
    • 3 ½ tbsp cornstarch
    • ⅝ tsp salt
    • 3 ⅜ cups white granulated sugar (yes, it’s a lot — you’ll use some for caramelizing)

    Dairy:

    • 19 tbsp unsalted butter (softened)
    • 2 ¼ cups whole milk

    🧑‍🍳 Equipment Needed

    • Hand or stand mixer
    • Mixing bowls
    • Piping bag (optional)
    • Baking sheet
    • Kitchen torch (for brûlée topping)
    • Whisk
    • Saucepan
    • Cookie scoop
    • Parchment paper

    🍳 Instructions

    1. Make the Custard Base:

    In a saucepan over medium heat, combine the egg yolks, vanilla bean spread, 1 ½ cups sugar, and whole milk. Stir constantly until the mixture thickens into a custard consistency. Do not boil. Once thickened, strain and chill completely.

    2. Prepare the Cookie Dough:

    Cream the butter and 1 ½ cups sugar until light and fluffy. Add the whole egg and mix until combined. Stir in the cooled custard. Then gradually add flour, cornstarch, baking powder, and salt. Mix until just combined. Chill the dough for 30 minutes.

    3. Shape and Bake:

    Preheat oven to 350°F (175°C). Scoop chilled dough onto a parchment-lined baking sheet. Slightly flatten the tops. Bake for 12–14 minutes, or until edges are golden but centers are soft. Let them cool on the tray.

    4. Brûlée the Tops:

    Sprinkle each cookie generously with the remaining sugar. Use a kitchen torch to caramelize the tops until golden and crispy, like classic crème brûlée.


    🔁 Variations

    • Filled version: Pipe a vanilla custard filling into the center for extra gooeyness.
    • Chocolate swirl: Add melted white chocolate ribbons into the dough for a twist.
    • Espresso brûlée: Mix 1 tsp of espresso powder into the custard base for a latte-style flavor.

    🧊 Storage Tips

    • Room Temp: Store in an airtight container for up to 3 days.
    • Fridge: Extend freshness to 5 days if stored cold (especially if filled).
    • Freeze: Freeze dough balls for up to 2 months. Bake directly from frozen — just add 2 extra minutes.

    ❓ Frequently Asked Questions

    Can I make them ahead of time?
    Absolutely! You can prepare the dough and custard a day in advance and assemble before baking.

    Do I have to use a kitchen torch?
    It’s ideal for that perfect caramel crust, but you can broil the sugar tops briefly in the oven — just watch closely!

    Why so many egg yolks?
    That’s what gives it that signature crème brûlée richness and golden color.

    Crème Brûlée Cookies – Inspired by In Bloom Bakery

    If crème brûlée and cookies had a delicious little baby, this would be it. These Crème Brûlée Cookies combine the soft chew of a bakery-style cookie with the rich, custardy flavor of the classic French dessert. Think vanilla bean flavor, caramelized sugar tops, and a silky interior that melts in your mouth. Inspired by the In Bloom Bakery style, these cookies are as impressive as they are addictive — perfect for dinner parties, coffee dates, or anytime you want to impress.

    • Hand or stand mixer
    • Mixing bowls
    • Piping bag (optional)
    • Baking sheet
    • Kitchen torch (for brûlée topping)
    • Whisk
    • Saucepan
    • Cookie scoop
    • Parchment paper
    • Refrigerated:
    • 1 egg
    • 6 egg yolks
    • Condiments:
    • 2 ½ tbsp vanilla bean spread
    • Baking & Spices:
    • 2 ½ cups all-purpose flour
    • ½ tsp baking powder
    • 3 ½ tbsp cornstarch
    • ⅝ tsp salt
    • 3 ⅜ cups white granulated sugar (yes, it’s a lot — you’ll use some for caramelizing)
    • Dairy:
    • 19 tbsp unsalted butter (softened)
    • 2 ¼ cups whole milk
    1. Make the Custard Base:
    2. In a saucepan over medium heat, combine the egg yolks, vanilla bean spread, 1 ½ cups sugar, and whole milk. Stir constantly until the mixture thickens into a custard consistency. Do not boil. Once thickened, strain and chill completely.
    3. Prepare the Cookie Dough:
    4. Cream the butter and 1 ½ cups sugar until light and fluffy. Add the whole egg and mix until combined. Stir in the cooled custard. Then gradually add flour, cornstarch, baking powder, and salt. Mix until just combined. Chill the dough for 30 minutes.
    5. Shape and Bake:
    6. Preheat oven to 350°F (175°C). Scoop chilled dough onto a parchment-lined baking sheet. Slightly flatten the tops. Bake for 12–14 minutes, or until edges are golden but centers are soft. Let them cool on the tray.
    7. Brûlée the Tops:
    8. Sprinkle each cookie generously with the remaining sugar. Use a kitchen torch to caramelize the tops until golden and crispy, like classic crème brûlée.
    9. 🔁 Variations
    10. Filled version: Pipe a vanilla custard filling into the center for extra gooeyness.
    11. Chocolate swirl: Add melted white chocolate ribbons into the dough for a twist.
    12. Espresso brûlée: Mix 1 tsp of espresso powder into the custard base for a latte-style flavor.

    ❓ Frequently Asked Questions
    Can I make them ahead of time?
    Absolutely! You can prepare the dough and custard a day in advance and assemble before baking.

    Do I have to use a kitchen torch?
    It’s ideal for that perfect caramel crust, but you can broil the sugar tops briefly in the oven — just watch closely!

    Why so many egg yolks?
    That’s what gives it that signature crème brûlée richness and golden color.

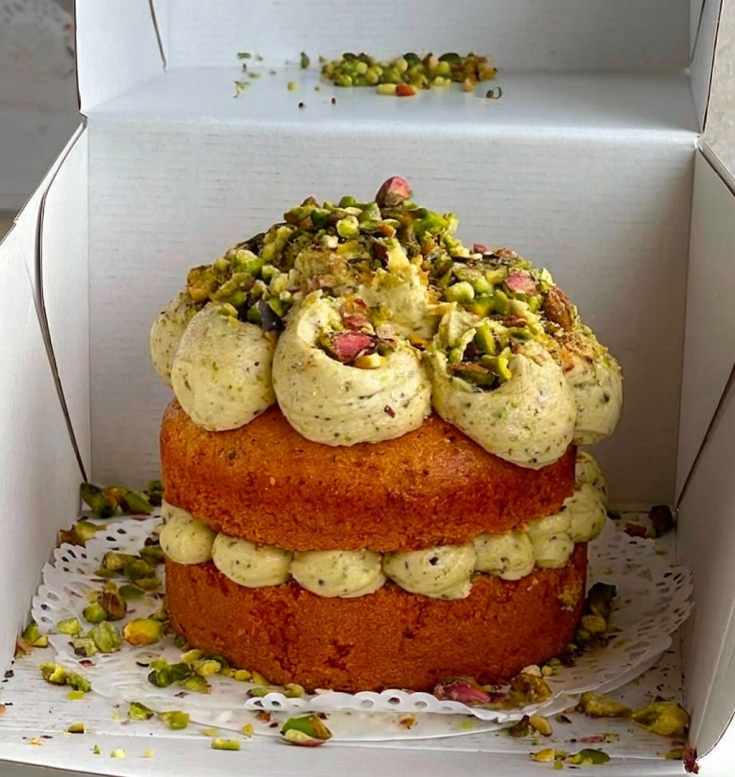
  • Pistachio Olive Oil Cake with Plum Berry Jam, Pistachio Chantilly & Buttercream – A Lush Layered Showstopper

    Introduction

    If you’re looking for an elegant and unforgettable dessert, this Pistachio Olive Oil Cake with Plum Berry Jam, Pistachio Chantilly, and Pistachio Buttercream is pure luxury in layer form. It’s not only beautiful, it’s a masterclass in flavor pairing — rich, nutty pistachio, fruity tart jam, silky chantilly cream, and velvety buttercream, all built on the lush base of a moist olive oil cake.

    Perfect for a celebration or high-end dinner party, this cake’s deep flavor and stunning appearance make it a true bakery-quality showpiece you can recreate at home.


    🍴 Equipment

    To create this cake, you’ll need:

    • Two 6-inch or 8-inch cake pans
    • Parchment paper
    • Electric mixer or stand mixer
    • Medium saucepan
    • Mixing bowls
    • Rubber spatula
    • Offset spatula or piping bag
    • Cake turntable (optional but helpful)

    🧂 Ingredients

    For the Pistachio Olive Oil Cake:

    • 1 ½ cups all-purpose flour
    • ½ cup finely ground pistachios (unsalted)
    • 1 cup granulated sugar
    • 1 tsp baking powder
    • ½ tsp baking soda
    • ½ tsp salt
    • ¾ cup extra virgin olive oil
    • ¾ cup whole milk or buttermilk
    • 3 large eggs
    • 1 tsp vanilla extract
    • Zest of 1 lemon

    For the Plum Berry Jam (or use store-bought):

    • 1 cup plums, pitted and chopped
    • ½ cup mixed berries (blueberries, raspberries, etc.)
    • ½ cup granulated sugar
    • 1 tbsp lemon juice

    For the Pistachio Chantilly Cream:

    • 1 cup heavy whipping cream
    • ¼ cup powdered sugar
    • 1 tsp vanilla
    • 2 tbsp pistachio paste (or blend pistachios with a splash of cream)

    For the Pistachio Buttercream:

    • ½ cup unsalted butter, softened
    • 1 ½ cups powdered sugar
    • 2 tbsp pistachio paste
    • 1–2 tbsp heavy cream or milk
    • Pinch of salt

    👨‍🍳 Instructions

    1. Make the Pistachio Olive Oil Cake:

    1. Preheat oven to 350°F (175°C). Grease and line two cake pans with parchment.
    2. In a large bowl, whisk together flour, ground pistachios, sugar, baking powder, baking soda, salt, and lemon zest.
    3. In another bowl, whisk olive oil, milk, eggs, and vanilla.
    4. Pour wet into dry and mix until smooth.
    5. Divide between pans and bake for 25–30 minutes or until a toothpick comes out clean.
    6. Cool completely before assembling.

    2. Make the Plum Berry Jam:

    1. In a saucepan, combine plums, berries, sugar, and lemon juice.
    2. Simmer over medium heat for 15–20 minutes until thick and jammy.
    3. Cool and refrigerate until ready to use.

    3. Make Pistachio Chantilly:

    1. Beat cream, sugar, and vanilla until soft peaks form.
    2. Add pistachio paste and continue beating until stiff peaks form.
    3. Chill until ready to use.

    4. Make Pistachio Buttercream:

    1. Beat softened butter until creamy.
    2. Add powdered sugar and beat until fluffy.
    3. Mix in pistachio paste and cream. Beat until smooth and silky.

    🎂 Assembly

    1. Level cooled cakes if needed.
    2. Pipe or spread a border of pistachio buttercream around the edge of the bottom layer.
    3. Fill the center with a spoonful of plum berry jam and a layer of pistachio chantilly.
    4. Top with second cake layer.
    5. Pipe large decorative dollops of buttercream on top and sprinkle with chopped pistachios.
    6. Optional: Garnish with edible flowers or a drizzle of extra jam.

    ⏱ Servings & Timing

    • Servings: 8–10
    • Prep Time: 45 minutes
    • Bake Time: 30 minutes
    • Assembly Time: 20 minutes
    • Total Time: ~1.5 hours

    🧁 Variations

    • Use raspberry or cherry jam if plum isn’t available.
    • Add rosewater to the chantilly for a Middle Eastern twist.
    • Use almond or hazelnut flour for part of the pistachio to mix up the flavor.

    🧊 Storage & Reheating

    • Refrigerator: Store covered for up to 4 days.
    • Freezer: Freeze layers separately, wrapped tightly, for up to 1 month.
    • Serve chilled or room temp for best flavor.

    ❓ FAQs

    1. Can I use store-bought jam?
    Yes! Use any quality berry or stone fruit jam.

    2. What if I can’t find pistachio paste?
    Make your own by blending roasted pistachios with a splash of cream or oil until smooth.

    3. Can this cake be made ahead?
    Yes — bake cakes and prep fillings a day ahead. Assemble the day of serving.

    4. Can I make it nut-free?
    You can substitute sunflower seed butter, but flavor will differ.

    5. Does olive oil taste strong?
    Not at all — it adds richness and keeps the cake moist.

    Pistachio Olive Oil Cake with Plum Berry Jam, Pistachio Chantilly & Buttercream – A Lush Layered Showstopper

    If you’re looking for an elegant and unforgettable dessert, this Pistachio Olive Oil Cake with Plum Berry Jam, Pistachio Chantilly, and Pistachio Buttercream is pure luxury in layer form. It’s not only beautiful, it’s a masterclass in flavor pairing — rich, nutty pistachio, fruity tart jam, silky chantilly cream, and velvety buttercream, all built on the lush base of a moist olive oil cake. Perfect for a celebration or high-end dinner party, this cake’s deep flavor and stunning appearance make it a true bakery-quality showpiece you can recreate at home.

    • Two 6-inch or 8-inch cake pans
    • Parchment paper
    • Electric mixer or stand mixer
    • Medium saucepan
    • Mixing bowls
    • Rubber spatula
    • Offset spatula or piping bag
    • Cake turntable (optional but helpful)

    For the Pistachio Olive Oil Cake:

    • 1 ½ cups all-purpose flour
    • ½ cup finely ground pistachios (unsalted)
    • 1 cup granulated sugar
    • 1 tsp baking powder
    • ½ tsp baking soda
    • ½ tsp salt
    • ¾ cup extra virgin olive oil
    • ¾ cup whole milk or buttermilk
    • 3 large eggs
    • 1 tsp vanilla extract
    • Zest of 1 lemon
    • For the Plum Berry Jam (or use store-bought:)
    • 1 cup plums (pitted and chopped)
    • ½ cup mixed berries (blueberries, raspberries, etc.)
    • ½ cup granulated sugar
    • 1 tbsp lemon juice
    • For the Pistachio Chantilly Cream:
    • 1 cup heavy whipping cream
    • ¼ cup powdered sugar
    • 1 tsp vanilla
    • 2 tbsp pistachio paste (or blend pistachios with a splash of cream)

    For the Pistachio Buttercream:

    • ½ cup unsalted butter (softened)
    • 1 ½ cups powdered sugar
    • 2 tbsp pistachio paste
    • 1 –2 tbsp heavy cream or milk
    • Pinch of salt

    Make the Pistachio Olive Oil Cake:

    1. Preheat oven to 350°F (175°C). Grease and line two cake pans with parchment.
    2. In a large bowl, whisk together flour, ground pistachios, sugar, baking powder, baking soda, salt, and lemon zest.
    3. In another bowl, whisk olive oil, milk, eggs, and vanilla.
    4. Pour wet into dry and mix until smooth.
    5. Divide between pans and bake for 25–30 minutes or until a toothpick comes out clean.
    6. Cool completely before assembling.

    Make the Plum Berry Jam:

    1. In a saucepan, combine plums, berries, sugar, and lemon juice.
    2. Simmer over medium heat for 15–20 minutes until thick and jammy.
    3. Cool and refrigerate until ready to use.

    Make Pistachio Chantilly:

    1. Beat cream, sugar, and vanilla until soft peaks form.
    2. Add pistachio paste and continue beating until stiff peaks form.
    3. Chill until ready to use.

    Make Pistachio Buttercream:

    1. Beat softened butter until creamy.
    2. Add powdered sugar and beat until fluffy.
    3. Mix in pistachio paste and cream. Beat until smooth and silky.

    🎂 Assembly

    1. Level cooled cakes if needed.
    2. Pipe or spread a border of pistachio buttercream around the edge of the bottom layer.
    3. Fill the center with a spoonful of plum berry jam and a layer of pistachio chantilly.
    4. Top with second cake layer.
    5. Pipe large decorative dollops of buttercream on top and sprinkle with chopped pistachios.

    Optional: Garnish with edible flowers or a drizzle of extra jam.

    🧁 Variations
    Use raspberry or cherry jam if plum isn’t available.

    Add rosewater to the chantilly for a Middle Eastern twist.

    Use almond or hazelnut flour for part of the pistachio to mix up the flavor.

    🧊 Storage & Reheating
    Refrigerator: Store covered for up to 4 days.

    Freezer: Freeze layers separately, wrapped tightly, for up to 1 month.

    Serve chilled or room temp for best flavor.

    ❓ FAQs
    1. Can I use store-bought jam?
    Yes! Use any quality berry or stone fruit jam.

    2. What if I can’t find pistachio paste?
    Make your own by blending roasted pistachios with a splash of cream or oil until smooth.

    3. Can this cake be made ahead?
    Yes — bake cakes and prep fillings a day ahead. Assemble the day of serving.

    4. Can I make it nut-free?
    You can substitute sunflower seed butter, but flavor will differ.

    5. Does olive oil taste strong?
    Not at all — it adds richness and keeps the cake moist.

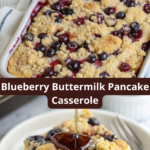
  • Blueberry Buttermilk Pancake Casserole – Fluffy, Fruity, and Perfect for Brunch!

    Blueberry Buttermilk Pancake Casserole – Fluffy, Fruity, and Perfect for Brunch

    If you’re searching for a breakfast dish that combines the comfort of pancakes with the ease of a casserole, look no further than the Blueberry Buttermilk Pancake Casserole. This delightful recipe brings together the fluffy texture of buttermilk pancakes, the sweetness of blueberries, and a crunchy brown sugar crumble topping.​ Pinterest Created by Allison Mattina of Celebrating Sweets, this casserole has become a favorite for many, boasting a 4.97-star rating from over 130 reviews. It’s an ideal choice for feeding a crowd without the hassle of flipping individual pancakes. Whether you’re hosting a holiday brunch or preparing a special weekend breakfast, this dish is sure to impress

    • 9×13-inch baking dish
    • Mixing bowls (one large, one medium)
    • Whisk
    • Rubber spatula
    • Measuring cups and spoons
    • Zester or fine grater (for lemon zest)
    • Oven

    For the Crumb Topping:

    • ½ cup all-purpose flour
    • 3 tablespoons light brown sugar
    • 2 tablespoons granulated sugar
    • ½ teaspoon ground cinnamon
    • ¼ teaspoon salt
    • 4 tablespoons unsalted butter (melted​)

    For the Pancake Batter:

    • 2½ cups all-purpose flour
    • 2 tablespoons granulated sugar
    • ½ teaspoon salt
    • 1 teaspoon baking powder
    • 1 teaspoon baking soda
    • 2 large eggs
    • 2 cups buttermilk
    • ½ cup milk (e.g., skim milk)
    • 4 tablespoons unsalted butter (melted)
    • 1 –2 teaspoons finely grated lemon zest
    • 1½ teaspoons pure vanilla extract
    • 1⅔ cups blueberries (fresh or frozen)

    Prepare the Crumb Topping:

    1. In a medium bowl, combine the flour, brown sugar, granulated sugar, cinnamon, and salt.
    2. Add the melted butter and stir until the mixture is fully combined and crumbly.
    3. Cover and refrigerate the topping while you prepare the pancake batter.​

    Preheat the Oven:

    1. Preheat your oven to 350°F (175°C).
    2. Thoroughly grease a 9×13-inch baking dish and set aside.​
    3. Prepare the Pancake Batter:
    4. In a large bowl, whisk together the flour, granulated sugar, salt, baking powder, and baking soda.
    5. In a separate bowl, whisk together the eggs, buttermilk, milk, melted butter, lemon zest, and vanilla extract.
    6. Pour the wet ingredients into the dry ingredients and stir with a rubber spatula until just combined. The batter will be lumpy; do not overmix.​
    7. Celebrating Sweets

    Assemble the Casserole:

    1. Pour the pancake batter into the prepared baking dish and spread it evenly.
    2. Sprinkle the blueberries evenly over the top of the batter.
    3. Remove the crumb topping from the refrigerator and crumble it over the blueberries and batter.​

    Bake:

    1. Bake the casserole in the preheated oven for 35–45 minutes, or until it is puffed and light golden brown.
    2. Check the center for doneness by inserting a toothpick; it should come out clean or with a few moist crumbs.​

    Serve:

    1. Allow the casserole to cool slightly before serving.
    2. Serve warm, drizzled with maple syrup.​
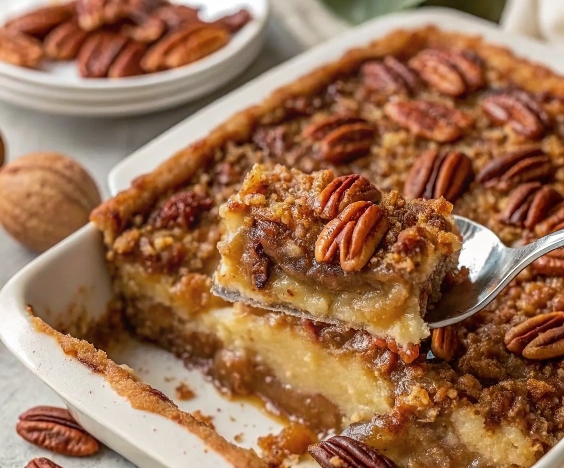
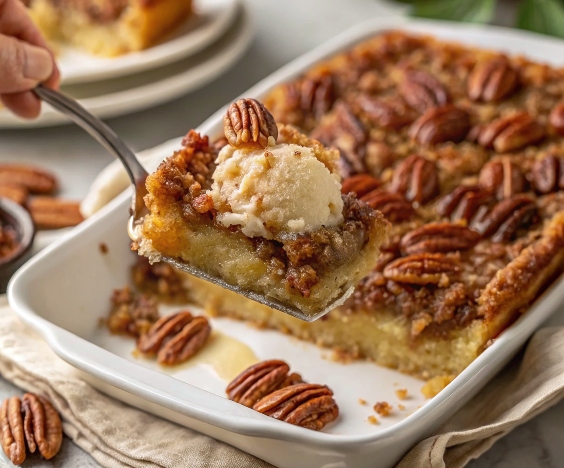
  • Pecan Pie Dump Cake – A Gooey, Buttery, Irresistible Twist on a Classic

    Introduction

    Pecan pie lovers, rejoice — this is the dessert of your dreams… simplified! Meet the Pecan Pie Dump Cake — an incredibly easy, ultra-decadent dessert that captures all the flavors of traditional pecan pie with half the effort.

    This recipe combines buttery yellow cake mix, sticky-sweet pecan filling, and crunchy pecans, all baked into a gooey, golden dessert that’s as cozy as a hug from grandma. No pie crust, no mixing bowls full of mess — just layer, bake, and swoon.

    It’s the perfect crowd-pleaser for Thanksgiving, Friendsgiving, Christmas, or any time you need a quick, cozy dessert that feels like it took hours. Top it off with whipped cream or vanilla ice cream, and you’ve got a treat that’s pure comfort in every bite.

    If you enjoy traditional pecan pie or dump cakes like apple or pumpkin, this one’s going to be your new favorite.


    🥣 Equipment

    You’ll need just a few basic kitchen tools:

    • 9×13-inch baking dish
    • Nonstick cooking spray or butter
    • Measuring cups & spoons
    • Can opener
    • Spatula or spoon
    • Oven mitts
    • Optional: whisk (if mixing eggs into filling)

    🧂 Ingredients

    This recipe uses convenient pantry staples and takes just minutes to prepare.

    Wet Filling:

    • 1 can (15 oz) pecan pie filling (or 1½ cups homemade pecan filling)
    • 3 large eggs
    • 1 tsp vanilla extract

    Cake & Topping:

    • 1 box yellow cake mix
    • 1½ cups pecans, roughly chopped
    • 1 cup (2 sticks) butter, sliced into thin pats
    • ½ tsp cinnamon (optional, for warmth)
    • Pinch of salt

    🥄 The eggs help give this dump cake a slightly more “pie-like” texture in the center — gooey, rich, and sliceable!


    👨‍🍳 Instructions

    Step 1: Prep the Oven and Pan

    • Preheat oven to 350°F (175°C).
    • Lightly grease a 9×13-inch baking dish with butter or nonstick spray.

    Step 2: Pour the Filling

    1. In a bowl, whisk together:
      • Pecan pie filling
      • 3 eggs
      • 1 tsp vanilla extract
    2. Pour into the bottom of your prepared baking dish.

    🥧 This step mimics the base of a classic pecan pie — sticky, sweet, and irresistible.


    Step 3: Add the Cake Mix

    • Evenly sprinkle the dry yellow cake mix over the filling layer. Do not stir.
    • Gently smooth with the back of a spoon to form a flat top.

    Step 4: Add Pecans and Butter

    • Sprinkle chopped pecans evenly over the cake mix layer.
    • Lay thin slices of butter across the entire surface, covering as much area as possible.

    🧈 As it bakes, the butter melts down, saturating the cake mix and forming a golden, crispy top layer.


    Step 5: Bake

    • Bake at 350°F for 45–50 minutes, or until the top is golden brown and the edges are bubbling.
    • Let cool for 15–20 minutes before serving.

    🔥 The center should be gooey but not raw — it will set more as it cools.


    ⏱ Servings & Timing

    • Servings: 12
    • Prep Time: 10 minutes
    • Bake Time: 50 minutes
    • Total Time: ~1 hour

    Perfect for holiday gatherings, church potlucks, cozy weekends, or last-minute dessert needs.


    🔁 Variations

    1. Chocolate Chip Pecan Dump Cake

    • Sprinkle ½ cup mini chocolate chips over the cake mix before baking.

    2. Salted Caramel Pecan Cake

    • Drizzle ¼ cup salted caramel sauce into the filling layer before adding cake mix.

    3. Maple Pecan Version

    • Replace ½ of the butter with maple syrup butter for a deeper, fall-forward flavor.

    4. Gluten-Free Option

    • Use a gluten-free yellow cake mix — all other ingredients are naturally GF.

    5. Apple Pecan Twist

    • Add a layer of thinly sliced apples beneath the pecan pie filling for added texture.

    🧊 Storage & Reheating

    Fridge:

    • Store leftovers in an airtight container for up to 5 days.

    Freezer:

    • Freeze cooled squares in a single layer for up to 2 months. Thaw in the fridge overnight before reheating.

    Reheat:

    • Microwave individual servings for 20–30 seconds, or reheat in oven at 300°F for 10 minutes.

    🍦 Best served warm with a scoop of vanilla ice cream or whipped cream!


    ❓ 10 Frequently Asked Questions (FAQs)

    1. Can I use homemade pecan pie filling?

    Absolutely! Use about 1½ cups of your favorite homemade filling.

    2. What if I don’t have pecan pie filling?

    Mix together:

    • 1 cup corn syrup,
    • 1 cup brown sugar,
    • 3 eggs,
    • 1 tsp vanilla,
    • 1½ cups chopped pecans

    3. Why do I need eggs?

    They help set the filling and give the dump cake a gooier, custard-like texture.

    4. Is this cake more like pie or cake?

    It’s a perfect hybrid — gooey on the bottom, crispy-cakey on top.

    5. Can I use butter substitutes?

    Stick with real butter for best results. Margarine or oil may not yield the same texture.

    6. Should I stir the cake mix?

    Nope! Layer it dry — that’s the signature dump cake method.

    7. Can I make it in advance?

    Yes — bake, cool, and store in the fridge. Reheat before serving.

    8. Can I make it in a slow cooker?

    Yes! Cook on LOW for 3–4 hours. You won’t get the same crisp topping, but it’ll be gooey and delish.

    9. Is this good for Thanksgiving?

    It’s PERFECT for Thanksgiving — all the pecan pie vibes, without the stress of pie dough.

    10. What should I serve it with?

    • Vanilla ice cream
    • Whipped cream
    • Chopped toasted pecans
    • Cinnamon dusting

    ✅ Conclusion

    This Pecan Pie Dump Cake is the ultimate easy dessert that delivers maximum flavor with minimal effort. It’s rich, buttery, nutty, and sweet — everything you love about pecan pie, without the fuss of making a crust or carefully layering ingredients.

    Just dump, bake, and dive into the gooey-crunchy comfort of this irresistible treat. It’s perfect for holidays, cozy nights in, or anytime you want something sweet and satisfying.

    Looking for more cozy bakes?

    Pecan Pie Dump Cake – A Gooey, Buttery, Irresistible Twist on a Classic

    Pecan pie lovers, rejoice — this is the dessert of your dreams… simplified! Meet the Pecan Pie Dump Cake — an incredibly easy, ultra-decadent dessert that captures all the flavors of traditional pecan pie with half the effort. This recipe combines buttery yellow cake mix, sticky-sweet pecan filling, and crunchy pecans, all baked into a gooey, golden dessert that’s as cozy as a hug from grandma. No pie crust, no mixing bowls full of mess — just layer, bake, and swoon. It’s the perfect crowd-pleaser for Thanksgiving, Friendsgiving, Christmas, or any time you need a quick, cozy dessert that feels like it took hours. Top it off with whipped cream or vanilla ice cream, and you’ve got a treat that’s pure comfort in every bite. If you enjoy traditional pecan pie or dump cakes like apple or pumpkin, this one’s going to be your new favorite.

    • 9×13-inch baking dish
    • Nonstick cooking spray or butter
    • Measuring cups & spoons
    • Can opener
    • Spatula or spoon
    • Oven mitts
    • Optional: whisk (if mixing eggs into filling)

    Wet Filling:

    • 1 can (15 oz pecan pie filling (or 1½ cups homemade pecan filling))
    • 3 large eggs
    • 1 tsp vanilla extract

    Cake & Topping:

    • 1 box yellow cake mix
    • 1½ cups pecans (roughly chopped)
    • 1 cup 2 sticks butter, sliced into thin pats
    • ½ tsp cinnamon (optional, for warmth)
    • Pinch of salt

    🥄 The eggs help give this dump cake a slightly more “pie-like” texture in the center — gooey, rich, and sliceable!

    Step 1: Prep the Oven and Pan

    1. Preheat oven to 350°F (175°C).
    2. Lightly grease a 9×13-inch baking dish with butter or nonstick spray.

    Step 2: Pour the Filling

    1. In a bowl, whisk together:
    2. Pecan pie filling
    3. 3 eggs
    4. 1 tsp vanilla extract
    5. Pour into the bottom of your prepared baking dish.

    🥧 This step mimics the base of a classic pecan pie — sticky, sweet, and irresistible.

    Step 3: Add the Cake Mix

    1. Evenly sprinkle the dry yellow cake mix over the filling layer. Do not stir.
    2. Gently smooth with the back of a spoon to form a flat top.

    Step 4: Add Pecans and Butter

    1. Sprinkle chopped pecans evenly over the cake mix layer.
    2. Lay thin slices of butter across the entire surface, covering as much area as possible.

    🧈 As it bakes, the butter melts down, saturating the cake mix and forming a golden, crispy top layer.

    Step 5: Bake

    1. Bake at 350°F for 45–50 minutes, or until the top is golden brown and the edges are bubbling.
    2. Let cool for 15–20 minutes before serving.

    🔥 The center should be gooey but not raw — it will set more as it cools.

    🔁 Variations
    1. Chocolate Chip Pecan Dump Cake
    Sprinkle ½ cup mini chocolate chips over the cake mix before baking.

    2. Salted Caramel Pecan Cake
    Drizzle ¼ cup salted caramel sauce into the filling layer before adding cake mix.

    3. Maple Pecan Version
    Replace ½ of the butter with maple syrup butter for a deeper, fall-forward flavor.

    4. Gluten-Free Option
    Use a gluten-free yellow cake mix — all other ingredients are naturally GF.

    5. Apple Pecan Twist
    Add a layer of thinly sliced apples beneath the pecan pie filling for added texture.

    🧊 Storage & Reheating
    Fridge:
    Store leftovers in an airtight container for up to 5 days.

    Freezer:
    Freeze cooled squares in a single layer for up to 2 months. Thaw in the fridge overnight before reheating.

    Reheat:
    Microwave individual servings for 20–30 seconds, or reheat in oven at 300°F for 10 minutes.

    🍦 Best served warm with a scoop of vanilla ice cream or whipped cream!

    ❓ 10 Frequently Asked Questions (FAQs)
    1. Can I use homemade pecan pie filling?
    Absolutely! Use about 1½ cups of your favorite homemade filling.

    2. What if I don’t have pecan pie filling?
    Mix together:

    1 cup corn syrup,

    1 cup brown sugar,

    3 eggs,

    1 tsp vanilla,

    1½ cups chopped pecans

    3. Why do I need eggs?
    They help set the filling and give the dump cake a gooier, custard-like texture.

    4. Is this cake more like pie or cake?
    It’s a perfect hybrid — gooey on the bottom, crispy-cakey on top.

    5. Can I use butter substitutes?
    Stick with real butter for best results. Margarine or oil may not yield the same texture.

    6. Should I stir the cake mix?
    Nope! Layer it dry — that’s the signature dump cake method.

    7. Can I make it in advance?
    Yes — bake, cool, and store in the fridge. Reheat before serving.

    8. Can I make it in a slow cooker?
    Yes! Cook on LOW for 3–4 hours. You won’t get the same crisp topping, but it’ll be gooey and delish.

    9. Is this good for Thanksgiving?
    It’s PERFECT for Thanksgiving — all the pecan pie vibes, without the stress of pie dough.

    10. What should I serve it with?
    Vanilla ice cream

    Whipped cream

    Chopped toasted pecans

    Cinnamon dusting

    ✅ Conclusion
    This Pecan Pie Dump Cake is the ultimate easy dessert that delivers maximum flavor with minimal effort. It’s rich, buttery, nutty, and sweet — everything you love about pecan pie, without the fuss of making a crust or carefully layering ingredients.

    Just dump, bake, and dive into the gooey-crunchy comfort of this irresistible treat. It’s perfect for holidays, cozy nights in, or anytime you want something sweet and satisfying.

    Looking for more cozy bakes?

    Pumpkin Dump Cake

    Apple Cinnamon Cobbler

    Southern Chess Bars

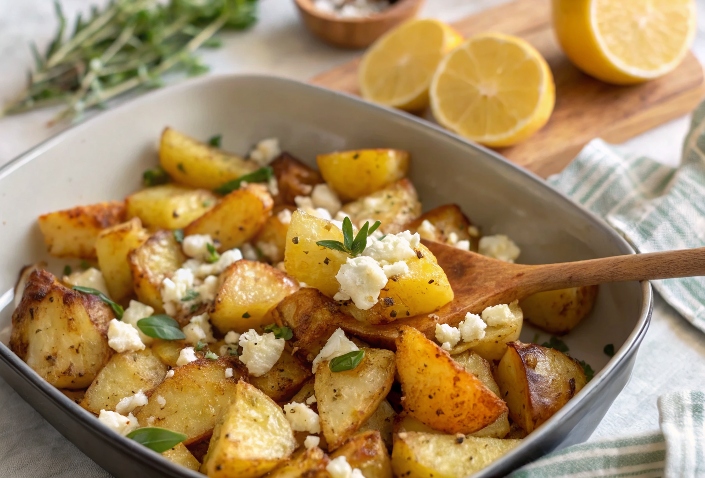
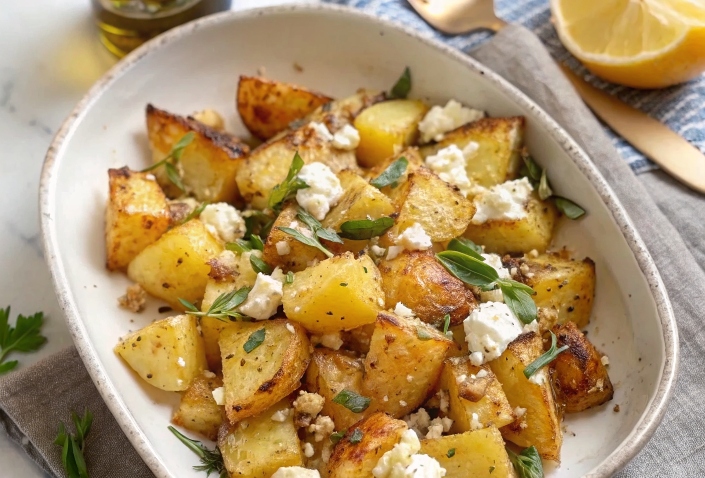
  • Baked Feta Potatoes – Crispy, Creamy, Herby Perfection

    Introduction

    If you’re looking for the ultimate side dish (or cozy vegetarian main) that’s effortless yet packed with bold, savory flavor, this Baked Feta Potatoes recipe is calling your name. It’s the kind of dish you’ll make once and immediately add to your regular rotation.

    Roasted golden yellow potatoes, creamy feta cheese, rich roasted garlic, and a splash of fresh lemon juice, all tied together with a medley of Greek-inspired herbs — this dish is the definition of simple ingredients, big flavor. Think of it like a warm potato salad meets whipped feta dip meets Greek street food — all roasted in one pan.

    Whether you’re vegetarian or just craving a hearty meatless dish, this bake makes the perfect addition to any dinner table. Serve it as a side for grilled proteins, or let it shine on its own with a big green salad and some crusty bread.

    Love easy Greek-inspired recipes? You might also enjoy Greek Lemon Potatoes or Baked Feta Pasta.


    🍽 Equipment

    To make this dish successfully, you’ll need:

    • Large baking dish or roasting pan
    • Cutting board & sharp knife
    • Mixing bowl
    • Zester or grater
    • Fork or potato masher
    • Measuring spoons
    • Tongs or spatula

    🧂 Ingredients

    Here’s everything you’ll need to make this dish sing:

    Produce:

    • 2 lbs yellow potatoes, washed and quartered
    • 1 whole head of garlic, top sliced off
    • 1 lemon, zest and juice

    Cheese:

    • 7–8 oz block of feta cheese, crumbled or whole

    Oil:

    • 3–4 tbsp olive oil

    Herbs & Seasonings:

    • 1 tsp dried oregano
    • ½ tsp dried thyme
    • Salt and black pepper, to taste
    • Optional: red chili flakes or paprika for a spicy kick

    🥔 No need to peel the potatoes unless preferred — the skins crisp beautifully in the oven!

    🧀 Make sure your feta is vegetarian if needed, as not all feta is rennet-free.


    👨‍🍳 Instructions

    Step 1: Prep the Oven and Potatoes

    • Preheat your oven to 400°F (200°C).
    • In a large bowl, toss quartered potatoes with:
    • 2–3 tbsp olive oil
    • Salt and pepper
    • Oregano and thyme
    • Transfer to a roasting dish or baking pan, spreading evenly.

    Step 2: Add Garlic and Feta

    • Nestle the whole head of garlic (with the top cut off) into the center of the dish.
    • Place the block of feta or crumbled feta on top or to the side of the potatoes.
    • Drizzle everything with another tablespoon of olive oil.

    🧄 The garlic will roast and become sweet, soft, and mashable — perfect for mixing into the sauce later.


    Step 3: Roast

    • Roast in the oven for 35–40 minutes, or until:
    • Potatoes are golden and crispy on the edges
    • Feta is softened and browned
    • Garlic is tender when poked with a fork

    🔄 Toss the potatoes halfway through cooking for even browning.


    Step 4: Mash and Mix

    • Carefully remove the dish from the oven.
    • Use tongs to squeeze the roasted garlic cloves out of their skins into the pan.
    • Use a fork or masher to mash the garlic with the melted feta and a little bit of the lemon juice, mixing it around the potatoes.

    Step 5: Finish with Lemon

    • Zest the lemon over the top of the dish.
    • Squeeze in fresh lemon juice to brighten everything up.
    • Garnish with a pinch of chili flakes, fresh herbs, or a drizzle of olive oil, if desired.

    ⏱ Servings & Timing

    • Servings: 4 (as a side) or 2 (as a main)
    • Prep Time: 10 minutes
    • Cook Time: 40 minutes
    • Total Time: 50 minutes

    🔁 Variations

    1. Spicy Feta Potatoes

    • Add ½ tsp chili flakes or smoked paprika before roasting for a subtle kick.

    2. Herb Explosion

    • Add fresh rosemary, thyme, or dill before roasting for extra aromatics.

    3. Tomato Feta Fusion

    • Add cherry tomatoes to the baking dish for a burst of sweetness.

    4. Feta Yogurt Sauce Finish

    • Mix roasted garlic and feta with Greek yogurt after baking for a creamy sauce drizzle.

    5. Vegan Version

    • Use a vegan feta alternative and roasted garlic tahini dressing for a similar creamy, tangy flavor.

    🧊 Storage & Reheating

    Fridge:

    • Store leftovers in an airtight container for up to 4 days.

    Reheat:

    • Reheat in the oven at 350°F for 10–15 minutes to restore crispiness.
    • Microwave works too (though less crisp).

    Freezing:

    • Not recommended — feta changes texture and the potatoes can get mushy.

    ❓ 10 Frequently Asked Questions (FAQs)

    1. What type of potatoes work best?

    Yellow or gold potatoes (like Yukon Gold) offer the best balance of creaminess and crispiness.

    2. Do I have to use a whole garlic head?

    Not at all! You can use a few cloves or skip if you’re not a big garlic fan.

    3. Can I use crumbled feta instead of a block?

    Yes — just scatter it over the top of the potatoes and mix as directed.

    4. Can I add protein to this dish?

    Absolutely! Add chickpeas before roasting, or serve alongside grilled chicken, lamb, or tofu.

    5. Is this dish gluten-free?

    Yes — all ingredients are naturally gluten-free.

    6. Can I prep this ahead of time?

    You can cut the potatoes and pre-mix the seasoning, but it’s best roasted fresh.

    7. How do I get the potatoes really crispy?

    Spread them out in a single layer and don’t overcrowd the pan — and roast at high heat.

    8. What can I serve this with?

    • Grilled meats
    • Greek salad
    • Roasted vegetables
    • Hummus and pita

    9. Can I use other cheeses?

    Yes — goat cheese or ricotta would also be delicious, though feta offers the best salt and tang.

    10. Is it vegetarian-friendly?

    It can be! Just make sure your feta is made with vegetarian rennet.


    ✅ Conclusion

    These Baked Feta Potatoes are a weeknight win and a dinner party hero. Crispy, herby, creamy, and packed with Mediterranean flavor, they’re versatile, low-effort, and totally addictive. Whether you serve them as a side dish, main, or even warm salad — this recipe is all about flavor meets simplicity.

    Pair them with a crisp white wine or sparkling lemonade and let the feta magic do the talking.

    Want more Mediterranean-style recipes?

    Baked Feta Potatoes – Crispy, Creamy, Herby Perfection

    If you’re looking for the ultimate side dish (or cozy vegetarian main) that’s effortless yet packed with bold, savory flavor, this Baked Feta Potatoes recipe is calling your name. It’s the kind of dish you’ll make once and immediately add to your regular rotation. Roasted golden yellow potatoes, creamy feta cheese, rich roasted garlic, and a splash of fresh lemon juice, all tied together with a medley of Greek-inspired herbs — this dish is the definition of simple ingredients, big flavor. Think of it like a warm potato salad meets whipped feta dip meets Greek street food — all roasted in one pan. Whether you’re vegetarian or just craving a hearty meatless dish, this bake makes the perfect addition to any dinner table. Serve it as a side for grilled proteins, or let it shine on its own with a big green salad and some crusty bread. Love easy Greek-inspired recipes? You might also enjoy Greek Lemon Potatoes or Baked Feta Pasta.

    • Large baking dish or roasting pan
    • Cutting board & sharp knife
    • Mixing bowl
    • Zester or grater
    • Fork or potato masher
    • Measuring spoons
    • Tongs or spatula

    Produce:

    • 2 lbs yellow potatoes (washed and quartered)
    • 1 whole head of garlic (top sliced off)
    • 1 lemon (zest and juice)

    Cheese:

    • 7 –8 oz block of feta cheese (crumbled or whole)

    Oil:

    • 3 –4 tbsp olive oil
    • Herbs & Seasonings:
    • 1 tsp dried oregano
    • ½ tsp dried thyme
    • Salt and black pepper (to taste)
    • Optional: red chili flakes or paprika for a spicy kick

    🥔 No need to peel the potatoes unless preferred — the skins crisp beautifully in the oven!

    🧀 Make sure your feta is vegetarian if needed, as not all feta is rennet-free.

    Step 1: Prep the Oven and Potatoes

    1. Preheat your oven to 400°F (200°C).
    2. In a large bowl, toss quartered potatoes with:
    3. 2–3 tbsp olive oil
    4. Salt and pepper
    5. Oregano and thyme
    6. Transfer to a roasting dish or baking pan, spreading evenly.

    Step 2: Add Garlic and Feta

    1. Nestle the whole head of garlic (with the top cut off) into the center of the dish.
    2. Place the block of feta or crumbled feta on top or to the side of the potatoes.
    3. Drizzle everything with another tablespoon of olive oil.

    🧄 The garlic will roast and become sweet, soft, and mashable — perfect for mixing into the sauce later.

    Step 3: Roast

    1. Roast in the oven for 35–40 minutes, or until:
    2. Potatoes are golden and crispy on the edges
    3. Feta is softened and browned
    4. Garlic is tender when poked with a fork

    🔄 Toss the potatoes halfway through cooking for even browning.

    Step 4: Mash and Mix

    1. Carefully remove the dish from the oven.
    2. Use tongs to squeeze the roasted garlic cloves out of their skins into the pan.
    3. Use a fork or masher to mash the garlic with the melted feta and a little bit of the lemon juice, mixing it around the potatoes.

    Step 5: Finish with Lemon

    1. Zest the lemon over the top of the dish.
    2. Squeeze in fresh lemon juice to brighten everything up.
    3. Garnish with a pinch of chili flakes, fresh herbs, or a drizzle of olive oil, if desired.

    🔁 Variations
    1. Spicy Feta Potatoes
    Add ½ tsp chili flakes or smoked paprika before roasting for a subtle kick.

    2. Herb Explosion
    Add fresh rosemary, thyme, or dill before roasting for extra aromatics.

    3. Tomato Feta Fusion
    Add cherry tomatoes to the baking dish for a burst of sweetness.

    4. Feta Yogurt Sauce Finish
    Mix roasted garlic and feta with Greek yogurt after baking for a creamy sauce drizzle.

    5. Vegan Version
    Use a vegan feta alternative and roasted garlic tahini dressing for a similar creamy, tangy flavor.

    🧊 Storage & Reheating
    Fridge:
    Store leftovers in an airtight container for up to 4 days.

    Reheat:
    Reheat in the oven at 350°F for 10–15 minutes to restore crispiness.

    Microwave works too (though less crisp).

    Freezing:
    Not recommended — feta changes texture and the potatoes can get mushy.

    ❓ 10 Frequently Asked Questions (FAQs)
    1. What type of potatoes work best?
    Yellow or gold potatoes (like Yukon Gold) offer the best balance of creaminess and crispiness.

    2. Do I have to use a whole garlic head?
    Not at all! You can use a few cloves or skip if you’re not a big garlic fan.

    3. Can I use crumbled feta instead of a block?
    Yes — just scatter it over the top of the potatoes and mix as directed.

    4. Can I add protein to this dish?
    Absolutely! Add chickpeas before roasting, or serve alongside grilled chicken, lamb, or tofu.

    5. Is this dish gluten-free?
    Yes — all ingredients are naturally gluten-free.

    6. Can I prep this ahead of time?
    You can cut the potatoes and pre-mix the seasoning, but it’s best roasted fresh.

    7. How do I get the potatoes really crispy?
    Spread them out in a single layer and don’t overcrowd the pan — and roast at high heat.

    8. What can I serve this with?
    Grilled meats

    Greek salad

    Roasted vegetables

    Hummus and pita

    9. Can I use other cheeses?
    Yes — goat cheese or ricotta would also be delicious, though feta offers the best salt and tang.

    10. Is it vegetarian-friendly?
    It can be! Just make sure your feta is made with vegetarian rennet.

    ✅ Conclusion
    These Baked Feta Potatoes are a weeknight win and a dinner party hero. Crispy, herby, creamy, and packed with Mediterranean flavor, they’re versatile, low-effort, and totally addictive. Whether you serve them as a side dish, main, or even warm salad — this recipe is all about flavor meets simplicity.

    Pair them with a crisp white wine or sparkling lemonade and let the feta magic do the talking.

    Want more Mediterranean-style recipes?

    Greek Lemon Roasted Potatoes

    Baked Feta Pasta

    Mediterranean Chickpea Salad

  • Tropical Party Bucket Punch – Fruity, Fizzy, and Ready for a Crowd

    Introduction

    If you’re planning a backyard bash, beach day, BBQ, or birthday party, there’s one thing every gathering needs: an easy, colorful, and refreshing party punch. This Tropical Party Bucket Punch is exactly that — a fizzy, fruit-filled drink served right from a large bucket that screams summer fun. 🌞🧊

    Loaded with fresh fruit, pineapple and orange juice, a splash of grenadine, and topped with lemon-lime soda, this drink is bursting with tropical flavor, natural sweetness, and a vibrant color that’ll steal the spotlight on any drinks table.

    The best part? It takes less than 10 minutes to throw together, and it’s easy to customize (add alcohol for the adults or keep it kid-friendly). It’s perfect for big crowds, and the presentation in a bucket — complete with a ladle or big spoon — is always a conversation starter.

    If you enjoy drinks like Rainbow Sherbet Punch or Tropical Rum Punch, you’ll absolutely love this easy punch bucket recipe!


    🍽 Equipment

    To make and serve this punch, you’ll need:

    • Large clean bucket (food-safe, 1–2 gallons)
    • Mixing spoon or ladle
    • Measuring cups
    • Cutting board & knife (for chopping fresh fruit)
    • Optional: ice scoop or tongs
    • Plastic or reusable cups for serving
    • Optional: punch dispenser or cooler tap bucket

    🧂 Ingredients

    This punch is incredibly simple and uses just 5 ingredients, all easily found at any grocery store.

    Fresh Produce:

    • 2 cups fresh fruit (sliced strawberries, oranges, pineapple chunks, grapes, or kiwi)

    Juices & Mixers:

    • 1 liter orange juice
    • 1 liter pineapple juice
    • 1 liter lemon-lime soda (like Sprite or 7-Up)
    • 1 cup grenadine syrup

    🍓 Use fresh fruit for color and texture — it floats beautifully in the bucket and adds natural sweetness!


    👨‍🍳 Instructions

    Step 1: Prepare the Fruit

    • Wash and slice your fresh fruit into small, bite-sized pieces.
    • For the best presentation, use:
      • Sliced strawberries
      • Pineapple chunks
      • Orange slices
      • Green grapes
      • Kiwi slices

    🍍 You can freeze some of the fruit ahead of time to help chill the punch without watering it down!


    Step 2: Combine the Juices

    • In a large food-safe bucket, pour in:
      • 1 liter pineapple juice
      • 1 liter orange juice
      • 1 cup grenadine
    • Stir to combine. You’ll already see a gorgeous sunset-like color forming.

    Step 3: Add the Soda

    • Just before serving, gently pour in:
      • 1 liter lemon-lime soda
    • Stir once or twice to keep the fizz without losing the bubbles.

    🥤 The soda adds sparkle and lightness to balance the sweet fruit juices and grenadine.


    Step 4: Add the Fruit and Ice

    • Add your fresh (and/or frozen) fruit chunks directly into the bucket.
    • Optional: Add ice cubes or a large ice ring to keep the punch chilled.

    Step 5: Serve

    • Place the bucket in the center of your drink station.
    • Add a ladle or large serving spoon, and let guests scoop punch and fruit into their cups.
    • Garnish with mint leaves, paper umbrellas, or citrus wheels for extra flair.

    ❄️ If serving outside, place the bucket in a larger cooler or tray with ice to keep it cold for hours.


    ⏱ Servings & Timing

    • Servings: ~12–16 cups
    • Prep Time: 10 minutes
    • Chill Time: Optional (15–30 minutes before serving)
    • Total Time: ~10–15 minutes

    Great for birthday parties, brunches, showers, beach days, and BBQs.


    🔁 Variations

    1. Adult-Only Boozy Bucket

    • Add 1–1½ cups of rum, vodka, or tequila
    • Coconut rum or peach schnapps are delicious tropical options

    2. Frozen Punch Bucket

    • Use frozen juice concentrates and frozen fruit to create a slush-style punch

    3. Berry Citrus Twist

    • Swap orange juice for cranberry or white grape juice
    • Add fresh raspberries and blueberries

    4. Mango Madness

    • Replace grenadine with mango nectar and add frozen mango cubes

    5. Sparkling Version

    • Use sparkling water or ginger ale in place of soda for lighter fizz

    🧊 Storage & Reheating (Not that you’ll need it 😉)

    Storage:

    • Leftover punch can be stored in a covered pitcher in the fridge for up to 2 days.
    • The fruit may soften slightly but will still taste great!

    Reheating:

    • Not applicable — this drink is served chilled only.

    ❓ 10 Frequently Asked Questions (FAQs)

    1. Can I make this ahead of time?

    Yes! Combine juices and fruit up to 8 hours ahead, and add soda just before serving for max fizz.

    2. Can I use canned fruit?

    Yes — just drain the juice and use the fruit only to avoid over-sweetening the punch.

    3. Is this kid-friendly?

    Absolutely! It’s non-alcoholic and full of fun colors and fruit.

    4. What’s the best way to keep it cold?

    Use frozen fruit instead of ice, or add an ice ring made from frozen juice.

    5. What type of bucket should I use?

    Use a food-grade plastic bucket (like from restaurant supply stores or drink coolers with a spigot).

    6. Can I double the recipe?

    Definitely — double or triple as needed. Just use a larger container or multiple buckets.

    7. How sweet is this drink?

    It’s sweet but balanced. If you prefer less sweetness, reduce the grenadine or use club soda.

    8. What’s a good garnish idea?

    • Lime wheels
    • Mint sprigs
    • Skewers with fruit chunks

    9. Can I add alcohol later?

    Yes — serve liquor on the side so guests can spike their own cups.

    10. Can I serve this in a dispenser instead?

    Absolutely! Just strain the pulp or fruit if using a narrow-spout dispenser.


    ✅ Conclusion

    This Tropical Party Bucket Punch is the life of the party — easy to make, beautiful to serve, and guaranteed to be a hit with kids and adults alike. It’s packed with fruit, bursting with citrus flavor, and just fizzy enough to feel festive.

    Whether you’re hosting a summer bash, birthday party, or brunch with friends, this recipe is a low-effort, high-impact way to bring a little tropical flair to the table.

    Looking for more party drinks?

    Tropical Party Bucket Punch – Fruity, Fizzy, and Ready for a Crowd

    If you’re planning a backyard bash, beach day, BBQ, or birthday party, there’s one thing every gathering needs: an easy, colorful, and refreshing party punch. This Tropical Party Bucket Punch is exactly that — a fizzy, fruit-filled drink served right from a large bucket that screams summer fun. 🌞🧊 Loaded with fresh fruit, pineapple and orange juice, a splash of grenadine, and topped with lemon-lime soda, this drink is bursting with tropical flavor, natural sweetness, and a vibrant color that’ll steal the spotlight on any drinks table. The best part? It takes less than 10 minutes to throw together, and it’s easy to customize (add alcohol for the adults or keep it kid-friendly). It’s perfect for big crowds, and the presentation in a bucket — complete with a ladle or big spoon — is always a conversation starter. If you enjoy drinks like Rainbow Sherbet Punch or Tropical Rum Punch, you’ll absolutely love this easy punch bucket recipe!

    • Large clean bucket (food-safe, 1–2 gallons)
    • Mixing spoon or ladle
    • Measuring cups
    • Cutting board & knife (for chopping fresh fruit)
    • Optional: ice scoop or tongs
    • Plastic or reusable cups for serving
    • Optional: punch dispenser or cooler tap bucket

    Fresh Produce:

    • 2 cups fresh fruit (sliced strawberries, oranges, pineapple chunks, grapes, or kiwi)

    Juices & Mixers:

    • 1 liter orange juice
    • 1 liter pineapple juice
    • 1 liter lemon-lime soda (like Sprite or 7-Up)
    • 1 cup grenadine syrup

    🍓 Use fresh fruit for color and texture — it floats beautifully in the bucket and adds natural sweetness!

    Step 1: Prepare the Fruit

    1. Wash and slice your fresh fruit into small, bite-sized pieces.
    2. For the best presentation, use:
    3. Sliced strawberries
    4. Pineapple chunks
    5. Orange slices
    6. Green grapes
    7. Kiwi slices

    🍍 You can freeze some of the fruit ahead of time to help chill the punch without watering it down!

    Step 2: Combine the Juices

    1. In a large food-safe bucket, pour in:
    2. 1 liter pineapple juice
    3. 1 liter orange juice
    4. 1 cup grenadine
    5. Stir to combine. You’ll already see a gorgeous sunset-like color forming.

    Step 3: Add the Soda

    1. Just before serving, gently pour in:
    2. 1 liter lemon-lime soda
    3. Stir once or twice to keep the fizz without losing the bubbles.

    🥤 The soda adds sparkle and lightness to balance the sweet fruit juices and grenadine.

    Step 4: Add the Fruit and Ice

    1. Add your fresh (and/or frozen) fruit chunks directly into the bucket.
    2. Optional: Add ice cubes or a large ice ring to keep the punch chilled.

    Step 5: Serve

    1. Place the bucket in the center of your drink station.
    2. Add a ladle or large serving spoon, and let guests scoop punch and fruit into their cups.
    3. Garnish with mint leaves, paper umbrellas, or citrus wheels for extra flair.
    4. ❄️ If serving outside, place the bucket in a larger cooler or tray with ice to keep it cold for hours.

    🔁 Variations
    1. Adult-Only Boozy Bucket
    Add 1–1½ cups of rum, vodka, or tequila

    Coconut rum or peach schnapps are delicious tropical options

    2. Frozen Punch Bucket
    Use frozen juice concentrates and frozen fruit to create a slush-style punch

    3. Berry Citrus Twist
    Swap orange juice for cranberry or white grape juice

    Add fresh raspberries and blueberries

    4. Mango Madness
    Replace grenadine with mango nectar and add frozen mango cubes

    5. Sparkling Version
    Use sparkling water or ginger ale in place of soda for lighter fizz

    🧊 Storage & Reheating (Not that you’ll need it 😉)
    Storage:
    Leftover punch can be stored in a covered pitcher in the fridge for up to 2 days.

    The fruit may soften slightly but will still taste great!

    Reheating:
    Not applicable — this drink is served chilled only.

    ❓ 10 Frequently Asked Questions (FAQs)
    1. Can I make this ahead of time?
    Yes! Combine juices and fruit up to 8 hours ahead, and add soda just before serving for max fizz.

    2. Can I use canned fruit?
    Yes — just drain the juice and use the fruit only to avoid over-sweetening the punch.

    3. Is this kid-friendly?
    Absolutely! It’s non-alcoholic and full of fun colors and fruit.

    4. What’s the best way to keep it cold?
    Use frozen fruit instead of ice, or add an ice ring made from frozen juice.

    5. What type of bucket should I use?
    Use a food-grade plastic bucket (like from restaurant supply stores or drink coolers with a spigot).

    6. Can I double the recipe?
    Definitely — double or triple as needed. Just use a larger container or multiple buckets.

    7. How sweet is this drink?
    It’s sweet but balanced. If you prefer less sweetness, reduce the grenadine or use club soda.

    8. What’s a good garnish idea?
    Lime wheels

    Mint sprigs

    Skewers with fruit chunks

    9. Can I add alcohol later?
    Yes — serve liquor on the side so guests can spike their own cups.

    10. Can I serve this in a dispenser instead?
    Absolutely! Just strain the pulp or fruit if using a narrow-spout dispenser.

    ✅ Conclusion
    This Tropical Party Bucket Punch is the life of the party — easy to make, beautiful to serve, and guaranteed to be a hit with kids and adults alike. It’s packed with fruit, bursting with citrus flavor, and just fizzy enough to feel festive.

    Whether you’re hosting a summer bash, birthday party, or brunch with friends, this recipe is a low-effort, high-impact way to bring a little tropical flair to the table.

    Looking for more party drinks?

    Sparkling Strawberry Lemonade

    Sherbet Punch

    Watermelon Mint Cooler