Category: Breakfast

  • Authentic German Potato Pancakes (Kartoffelpuffer) – Crispy, Golden & Totally Delicious

    Authentic German Potato Pancakes (Kartoffelpuffer) – Crispy, Golden & Totally Delicious

    Few dishes capture the cozy, rustic charm of German cuisine quite like German Potato Pancakes, or as they’re known in Germany — Kartoffelpuffer. These savory, crispy-edged pancakes made from freshly grated potatoes and onion are a beloved staple served everywhere from street fairs to holiday tables. 🥔✨ Golden brown on the outside and tender inside, they can be enjoyed in so many ways — served with applesauce for a sweet contrast, or paired with sour cream or herbed yogurt for a savory side dish. They’re perfect as an appetizer, snack, or even breakfast! If you love traditional comfort food made from humble ingredients, don’t miss our Homemade Spaetzle Noodles or Crispy Rösti.

    • Box grater or food processor – for shredding potatoes and onion
    • Large mixing bowl – to mix everything together
    • Clean kitchen towel or cheesecloth – to wring out potato moisture
    • Frying pan or skillet – non-stick or cast iron works great
    • Spatula – for flipping
    • Measuring spoons and cups – for flour and seasoning
    • Plate with paper towels – for draining after frying

    Makes 6–8 potato pancakes

    Produce:

    • 1 lb russet potatoes (peeled)
    • 1 small yellow onion (peeled)

    Refrigerated:

    • 1 large egg

    Baking & Spices:

    • 3 tablespoons all-purpose flour
    • 1 pinch salt
    • 1 pinch black pepper

    Oils:

    • Vegetable oil (for frying)
    • Optional serving ideas:
    • Applesauce
    • Sour cream or Greek yogurt
    • Chopped chives or green onion
    • Smoked salmon or cured meats (for savory versions)

    Step 1: Grate Potatoes and Onion

    1. Peel the potatoes and onion.
    2. Grate them using the large holes of a box grater or a food processor with shredding blade.
    3. Transfer the mixture to a clean kitchen towel or cheesecloth and wring out as much liquid as possible.
    4. Removing moisture is key to getting crispy pancakes!

    Step 2: Mix the Batter

    1. In a large bowl, combine:
    2. Grated potato and onion mixture
    3. 1 beaten egg
    4. 3 tablespoons flour
    5. A pinch of salt and black pepper
    6. Stir well until the mixture holds together slightly.

    Step 3: Fry the Pancakes

    1. Heat vegetable oil in a skillet over medium-high heat.
    2. Spoon about ¼ cup of mixture per pancake into the pan, flattening gently with a spatula.
    3. Cook for 3–4 minutes per side, or until golden brown and crispy.
    4. ✅ Tip: Don’t overcrowd the pan — cook in batches and add more oil as needed.

    Step 4: Drain and Serve

    1. Remove pancakes and place them on a paper towel-lined plate to drain excess oil.
    2. Serve hot with applesauce, sour cream, or your favorite toppings.

    🔁 Variations
    1. Cheesy Kartoffelpuffer
    Add ½ cup grated Parmesan or Gruyère to the mix for a rich, cheesy version.

    2. Herbed Pancakes
    Mix in fresh parsley, dill, or chives for added flavor.

    3. Spiced Version
    Add a dash of smoked paprika or garlic powder for a modern twist.

    4. Sweet Potato Pancakes
    Replace half of the russets with sweet potatoes for color and sweetness.

    5. Gluten-Free Option
    Use rice flour or chickpea flour instead of wheat flour.

    🧊 Storage & Reheating
    Storing:
    Store cooled pancakes in an airtight container in the fridge for up to 3 days.

    Reheating:
    Reheat in a skillet over medium heat to restore crispiness.

    Or warm in the oven at 375°F (190°C) for 8–10 minutes.

    Freezing:
    Let pancakes cool completely.

    Freeze between parchment layers for up to 1 month.

    Reheat from frozen in the oven or air fryer for best texture.

    ❓ 10 Frequently Asked Questions (FAQs)
    1. Do I need to peel the potatoes?
    For traditional German texture and look, yes — but you can leave skins on for a rustic version.

    2. Why do my pancakes fall apart?
    Too much moisture or not enough flour can cause this. Be sure to squeeze out liquid and measure flour accurately.

    3. What’s the best oil for frying?
    Use vegetable, canola, or sunflower oil — anything with a high smoke point.

    4. Can I bake them instead of frying?
    You can, but they won’t be as crispy. Bake at 425°F for 20–25 minutes, flipping halfway.

    5. Are these the same as latkes?
    They’re very similar! Kartoffelpuffer are often simpler, without baking powder or matzo meal.

    6. What are they traditionally served with in Germany?
    Often served with applesauce or herbed quark (a soft German cheese).

    7. Can I prep the mixture ahead of time?
    Best to fry immediately. The potatoes oxidize and can turn gray if left too long.

    8. Can I use pre-shredded potatoes?
    Fresh is best, but you can use thawed hash browns in a pinch (drain well).

    9. Can kids help with this recipe?
    Yes! Kids can help mix and even form the pancakes (just keep them away from the hot oil).

    10. Are German potato pancakes gluten-free?
    Not by default, but you can use gluten-free flour for an easy swap.

    ✅ Conclusion
    German Potato Pancakes are a crispy, golden, savory treat that showcases how a few simple ingredients can come together in the most delicious way. Whether served sweet with applesauce or savory with sour cream and herbs, these Kartoffelpuffer are perfect for breakfast, brunch, or even a light dinner.

    They’re comforting, traditional, and a great recipe to make with family — and once you try them fresh out of the pan, they’re sure to become a staple in your kitchen.

  • Sausage French Toast Roll-Ups – A Sweet & Savory Breakfast Favorite

    Sausage French Toast Roll-Ups – A Sweet & Savory Breakfast Favorite

    Looking to level up your breakfast game with something that’s crispy on the outside, gooey on the inside, and bursting with sweet and savory flavor? These Sausage French Toast Roll-Ups are the perfect grab-and-go breakfast that feels indulgent but is surprisingly easy to make. 🍳🍞🌭 Imagine juicy sausage links wrapped inside soft bread, rolled up like cinnamon toast, dipped in a vanilla-cinnamon egg mixture, and pan-fried to golden perfection. Finished with a dusting of powdered sugar and a drizzle of warm maple syrup — this is breakfast magic. Whether you’re hosting brunch, meal-prepping for busy mornings, or just treating yourself on a Sunday, these French Toast Roll-Ups hit the spot every time. Love breakfast with a twist? Try our Breakfast Quesadillas or Mini Pancake Cereal.

    • Non-stick skillet or griddle
    • Mixing bowls – one for egg wash
    • Whisk – for eggs and milk
    • Rolling pin – to flatten bread
    • Tongs or spatula – to flip roll-ups
    • Measuring cups and spoons
    • Plate with paper towels – to drain excess oil
    • Sifter (optional) – for powdered sugar

    Meat:

    • 8 breakfast sausage links (fully cooked)

    ✅use turkey, beef, chicken, or plant-based breakfast sausage.

    Refrigerated:

    • 4 large eggs

    Dairy:

    • ½ cup milk
    • 1 tbsp butter (for frying)

    Baking & Spices:

    • 1 tsp ground cinnamon
    • 1 tsp vanilla extract
    • Powdered sugar (for dusting)
    • Condiments:
    • Maple syrup (for serving)

    Bread & Grains:

    • 8 slices white or whole wheat sandwich bread

    Step 1: Prep the Bread

    1. Trim crusts off the slices of bread.
    2. Use a rolling pin to flatten each slice to make it easy to roll.

    Step 2: Place & Roll

    1. Place a fully cooked sausage link on one edge of each bread slice.
    2. Roll tightly around the sausage like a cigar, pressing to seal the edge.

    Step 3: Mix the Egg Wash

    1. In a bowl, whisk together:
    2. 4 eggs
    3. ½ cup milk
    4. 1 tsp cinnamon
    5. 1 tsp vanilla extract

    Step 4: Cook the Roll-Ups

    1. Melt 1 tbsp butter in a skillet over medium heat.
    2. Dip each roll-up in the egg mixture, then place seam-side down in the skillet.
    3. Cook for 2–3 minutes per side, turning until all sides are golden brown.

    Step 5: Finish & Serve

    1. Remove from pan and place on a paper towel-lined plate.
    2. Dust with powdered sugar and serve with warm maple syrup for dipping.

    🔁 Variations
    1. Stuffed with Cheese
    Add a slice of cheddar or mozzarella with the sausage for a melty center.

    2. Fruit-Filled Roll-Ups
    Swap sausage for banana slices or strawberries for a sweet version.

    3. Spicy Savory Version
    Use spicy sausage and add a pinch of chili powder to the egg wash.

    4. Plant-Based Option
    Use vegan sausage and plant-based milk and butter.

    5. Baked Version
    After rolling and dipping, bake at 375°F for 15–18 minutes for a lighter option.

    🧊 Storage & Reheating
    Store:
    Keep cooled roll-ups in an airtight container in the fridge for up to 3 days.

    Reheat:
    Reheat in a toaster oven or skillet to retain crispness.

    Microwave for 20–30 seconds if in a hurry (less crisp).

    Freeze:
    Freeze uncooked, egg-washed roll-ups wrapped in plastic and foil for up to 1 month.

    Thaw overnight and cook as directed.

    ❓ 10 Frequently Asked Questions (FAQs)
    1. Do I need to cook the sausage first?
    Yes, use fully cooked sausage links to avoid undercooked centers.

    2. Can I use frozen sausage?
    Yes, but thaw and heat them before wrapping to ensure even cooking.

    3. Is it okay to use whole wheat bread?
    Absolutely — it adds fiber and holds up well for rolling.

    4. What’s the best sausage for this?
    Use breakfast-style links (pork, turkey, beef, or plant-based).

    5. Can I make them ahead of time?
    Yes — prep and refrigerate overnight, then cook fresh in the morning.

    6. Are these freezer-friendly?
    Yes! Freeze prepped roll-ups before cooking for a fast future breakfast.

    7. What’s the best way to keep them warm for serving?
    Place cooked roll-ups in a warm oven (200°F) until ready to serve.

    8. Can I air-fry them instead of pan-frying?
    Yes — air fry at 375°F for 8–10 minutes, flipping halfway.

    9. Do these work for school lunches?
    Yes — great warm or cold, just pack the syrup separately.

    10. Can I use croissant dough or tortillas instead of bread?
    Sure! Just adjust cooking time — tortillas crisp up faster, and croissant dough may take longer.

    ✅ Conclusion
    These Sausage French Toast Roll-Ups are the perfect fusion of sweet and savory — ideal for busy mornings, brunch with friends, or meal-prepping something delicious ahead of time.

    With the comforting flavor of cinnamon-spiced French toast and the heartiness of sausage, it’s no wonder this recipe is a family favorite. Customize them your way, and watch them disappear in seconds!

  • Red Velvet Crinkle Cookies – Festive, Fudgy & Dusted in Holiday Magic

    Red Velvet Crinkle Cookies – Festive, Fudgy & Dusted in Holiday Magic

    There’s something magical about a cookie that’s both beautiful to look at and decadently delicious to bite into. These Red Velvet Crinkle Cookies check all the boxes: they’re soft, fudgy, filled with rich cocoa flavor, and rolled in snowy powdered sugar that cracks and crinkles as they bake. ❄️🍪 With their signature red hue and gorgeous crackled tops, they’re perfect for Christmas cookie platters, Valentine’s Day treats, bake sales, or sweet gifts. Made with simple ingredients and no chill time needed, they’re as easy to make as they are impressive to serve. If you love red velvet, you’ll also want to try our Red Velvet Sandwich Cookies or Red Velvet Cheesecake Brownies.

    • Mixing bowls – at least two (one for dry, one for wet)
    • Electric hand or stand mixer – to cream the butter and sugar
    • Whisk – for dry ingredients
    • Spatula – for folding and scraping
    • Measuring cups and spoons – baking is science!
    • Cookie scoop – for uniform cookies
    • Baking sheets – lined with parchment or silicone baking mats
    • Cooling rack – to cool cookies evenly

    Refrigerated:

    • 2 large eggs

    Baking & Spices:

    • 1½ cups all-purpose flour
    • ½ cup unsweetened cocoa powder
    • 1 tsp baking powder
    • ¼ tsp salt
    • 1 cup granulated sugar
    • ½ cup powdered sugar (for rolling)
    • 1 tbsp red food coloring (gel or liquid)
    • 1 tsp vanilla extract

    Dairy:

    • ½ cup unsalted butter (softened)

    Step 1: Preheat & Prep

    1. Preheat your oven to 350°F (175°C).
    2. Line two baking sheets with parchment paper or silicone mats.

    Step 2: Mix the Dry Ingredients

    1. In a medium bowl, whisk together:
    2. Flour
    3. Cocoa powder
    4. Baking powder
    5. Salt
    6. Set aside.

    Step 3: Cream the Butter & Sugar

    1. In a large mixing bowl, beat butter and granulated sugar together until light and fluffy (about 2–3 minutes).
    2. Add the eggs, vanilla extract, and red food coloring, beating until smooth and well combined.

    Step 4: Combine Wet & Dry

    1. Gradually mix the dry ingredients into the wet ingredients using a spatula or mixer on low speed.
    2. The dough will be thick and sticky — that’s perfect!

    Step 5: Roll in Powdered Sugar

    1. Scoop dough into 1-inch balls using a cookie scoop or spoon.
    2. Roll each ball generously in powdered sugar, coating well.

    Step 6: Bake

    1. Place cookies about 2 inches apart on prepared baking sheets.
    2. Bake for 10–12 minutes, or until tops are crinkled and centers are set but soft.
    3. Let cool on the baking sheet for 5 minutes before transferring to a wire rack.

    🔁 Variations
    Want to shake things up? Try these delicious twists:

    1. Stuffed Red Velvet Crinkles
    Add a white chocolate chunk or a mini marshmallow inside each dough ball.

    2. Cream Cheese Glaze Drizzle
    After baking, drizzle cooled cookies with a thin cream cheese glaze for added decadence.

    3. Red Velvet Crinkle Sandwiches
    Spread cream cheese frosting between two cookies to create dreamy red velvet sandwiches.

    4. Mint Crinkle Cookies
    Add ¼ tsp peppermint extract to the dough and sprinkle crushed candy canes on top post-baking.

    5. Gluten-Free Red Velvet Crinkles
    Substitute all-purpose flour with a 1:1 gluten-free baking flour and reduce baking time slightly.

    🧊 Storage & Freezing
    Storing:
    Store in an airtight container at room temperature for up to 5 days.

    Keep them soft by placing a slice of white bread in the container.

    Freezing:
    Freeze baked cookies for up to 2 months in a freezer-safe bag.

    Freeze unbaked dough balls (without powdered sugar) on a tray, then store and roll in powdered sugar before baking.

    ❓ 10 Frequently Asked Questions (FAQs)
    1. Why are they called crinkle cookies?
    The powdered sugar coating cracks as the dough rises and spreads, creating that signature crinkle pattern.

    2. Do I need to chill the dough?
    Nope! This recipe doesn’t require chilling — but you can chill for 30 minutes if you want thicker cookies.

    3. What type of food coloring works best?
    Gel food coloring gives the most vibrant red with less liquid, but liquid food coloring works too.

    4. Can I use Dutch-processed cocoa?
    Yes, but it may give a slightly richer flavor. Natural cocoa is classic for red velvet.

    5. How do I keep the powdered sugar from melting?
    Make sure cookies are fully coated and don’t skip the generous rolling step.

    6. Can I double the recipe?
    Absolutely — these are perfect for holiday batches. Just mix and bake in batches.

    7. What does red velvet taste like?
    It’s a blend of mild cocoa, vanilla, and a slight tang, with a soft, buttery texture.

    8. Can I add chocolate chips?
    Yes! Fold in ½ cup white or dark chocolate chips for extra indulgence.

    9. How do I make them festive for the holidays?
    Add edible glitter, red sprinkles, or roll in green powdered sugar for a Christmas twist.

    10. Can I use margarine instead of butter?
    It works, but unsalted butter gives the best rich flavor and texture.

    ✅ Conclusion
    These Red Velvet Crinkle Cookies are everything you want in a festive treat — fudgy, flavorful, beautiful, and super easy to bake. With that bright red color and snowy powdered sugar finish, they’re bound to steal the show on any dessert table.

    Whether you’re baking for the holidays, a romantic Valentine’s Day surprise, or just a cozy weekend at home, these cookies are a guaranteed win.

    Try them once, and they’ll become a permanent part of your holiday baking traditions.

    More red velvet love:

    Red Velvet Cake Mix Cookies

    Red Velvet Cupcakes with Cream Cheese Frosting

    Red Velvet Oreo Cheesecake

    Bake a batch, dust with magic, and share the love.

  • Butterfinger Balls – No-Bake, Chocolate-Dipped Peanut Butter Bliss!

    Butterfinger Balls – No-Bake, Chocolate-Dipped Peanut Butter Bliss!

    Calling all peanut butter and chocolate lovers! These Butterfinger Balls are about to become your go-to no-bake dessert. Imagine creamy peanut butter blended with sweet graham cracker crumbs, crushed Butterfinger bars, and a touch of vanilla — all rolled into bite-sized balls and dipped in melted chocolate. 🤎🥜 They’re crunchy, creamy, and crave-worthy, with just the right balance of texture and sweetness. Think Buckeyes with a Butterfinger crunch — and no oven needed! Perfect for holiday cookie trays, party platters, or make-ahead snacks, these easy confections are made with just a handful of ingredients and come together in under 30 minutes. If you love Butterfinger desserts, don’t miss our Butterfinger Pie or No-Bake Peanut Butter Bars next!

    • Mixing bowls – one for the peanut butter filling, one for melting chocolate
    • Microwave-safe bowl or double boiler – for melting chocolate
    • Spatula or wooden spoon – for mixing
    • Cookie scoop or spoon – to portion the mixture evenly
    • Baking sheet – lined with parchment paper
    • Wax or parchment paper – to prevent sticking
    • Fork or dipping tool – for chocolate coating
    • Refrigerator/freezer space – to chill balls before dipping

    Peanut Butter Filling:

    • 1 cup peanut butter (creamy or crunchy — your call)
    • 4 tbsp butter (softened)
    • 1 cup powdered sugar
    • ¾ cup graham cracker crumbs
    • ½ cup crushed Butterfinger bars (about 2 fun-size bars)
    • 1 tsp vanilla extract

    Chocolate Coating:

    • 8 oz chocolate bark or chocolate chips (milk, semi-sweet, or dark — your choice)

    Step 1: Prepare the Peanut Butter Mixture

    1. In a large mixing bowl, combine:
    2. Peanut butter
    3. Softened butter
    4. Vanilla extract
    5. Stir or beat until smooth and creamy.
    6. Add in:
    7. Powdered sugar
    8. Graham cracker crumbs
    9. Crushed Butterfinger pieces
    10. Mix until fully incorporated and the dough is thick but scoopable.

    Step 2: Shape the Balls

    1. Use a small cookie scoop or tablespoon to portion out the dough.
    2. Roll into smooth balls using your hands.
    3. Place on a parchment-lined baking sheet.
    4. Chill in the freezer for 20 minutes, or in the fridge for 40 minutes, until firm.

    Step 3: Melt the Chocolate

    1. In a microwave-safe bowl, melt chocolate bark or chips in 30-second intervals, stirring in between, until smooth.
    2. Alternatively, use a double boiler for more control.

    Step 4: Dip and Set

    1. Use a fork or dipping tool to dip each chilled ball into the melted chocolate.
    2. Tap off excess and place back on the lined baking sheet.
    3. While chocolate is still wet, sprinkle with extra Butterfinger crumbs for garnish.
    4. Let set at room temperature or chill in the fridge until firm.

    🔁 Variations
    Switch things up with these easy customizations:

    1. Butterfinger Buckeyes
    Leave a bit of the peanut butter ball exposed at the top for a “Buckeye” style.

    2. White Chocolate Dip
    Use melted white chocolate chips or vanilla almond bark for a sweet contrast.

    3. Extra Crunch
    Stir in crushed pretzels, rice Krispies, or chopped peanuts for added texture.

    4. Chocolate + Peanut Butter Swirl
    Dip half in milk chocolate, the other in peanut butter chips melted with coconut oil.

    5. No Chocolate Dip
    Roll in crushed Butterfinger bars instead of chocolate for a quick and less messy treat.

    🧊 Storage & Make-Ahead Tips
    Room Temp:
    Store in an airtight container in a cool, dry place for up to 5 days.

    Fridge:
    Keep refrigerated for up to 10 days. Best for warmer climates.

    Freezer:
    Freeze for up to 2 months in a sealed container with parchment between layers.

    Thaw at room temperature for 10–15 minutes before serving.

    Make-Ahead Tip:
    Make the filling up to 2 days in advance and chill until ready to roll and dip.

    ❓ 10 Frequently Asked Questions (FAQs)
    1. Can I use crunchy peanut butter?
    Yes! It adds great texture and a little more bite.

    2. Do I need to chill the balls before dipping?
    Absolutely — chilling prevents them from falling apart in warm melted chocolate.

    3. Can I skip the graham cracker crumbs?
    You can, but they help hold the mixture together. Substitute with crushed pretzels or digestive biscuits if needed.

    4. What’s the best chocolate to use?
    Use melting chocolate or almond bark for smooth results. Chocolate chips work too — just add a little coconut oil to thin if needed.

    5. Can I make these nut-free?
    Swap peanut butter for sunflower seed butter and ensure Butterfinger bars are safe for your allergy needs.

    6. How do I crush Butterfingers?
    Use a food processor, or place them in a zip-top bag and crush with a rolling pin.

    7. Can kids help make these?
    Definitely! Let them roll the balls or drizzle melted chocolate on top.

    8. Why is my filling too sticky to roll?
    Add more graham crumbs or powdered sugar one tablespoon at a time.

    9. How do I make them prettier?
    Drizzle with a contrasting chocolate and add festive sprinkles for flair!

    10. Do they travel well?
    Yes! Great for gifting. Keep cool in transit and store in a sturdy container.

    ✅ Conclusion
    These Butterfinger Balls are a no-bake wonder — combining the sweet crunch of your favorite candy bar with creamy peanut butter and smooth chocolate coating. 🍫🥜

    With their quick prep, rich flavor, and bite-sized charm, they’re perfect for holidays, parties, or anytime you want a quick sweet fix with major wow factor. Plus, they’re freezer-friendly and endlessly customizable!

    Looking for more no-bake treats?

    Peanut Butter Balls (Buckeyes)

    No-Bake Oreo Truffles

    No-Bake Cookie Dough Bites

    Make a batch — and try not to eat them all before the chocolate sets.

  • The Best Fudgy Chewy Brookies (Brownie Cookies) – Rich, Gooey, and Totally Irresistible

    The Best Fudgy Chewy Brookies (Brownie Cookies) – Rich, Gooey, and Totally Irresistible

    Can’t decide between a brownie and a cookie? Don’t worry — with these Fudgy Chewy Brookies (a.k.a. brownie cookies), you get the best of both worlds. 🍪🍫 These brookies are soft, chewy, and have that deep cocoa flavor we all love in brownies, with the crinkled top and handheld charm of cookies. The inside is fudgy, rich, and almost gooey, while the outside has those classic crackly tops and chewy edges. It’s a perfect fusion dessert for chocolate lovers. Made with dark chocolate, cocoa powder, and both caster and demerara sugars, these cookies have depth, sweetness, and an addictive texture that makes them disappear fast. Love this kind of chocolate-on-chocolate madness? Check out these Chocolate Crinkle Cookies or our Ultimate Triple Chocolate Brownies too!

    • Mixing bowls – one for dry, one for wet
    • Electric hand mixer or stand mixer – for creaming and beating
    • Double boiler or microwave-safe bowl – to melt chocolate
    • Spatula – for folding in chocolate and chips
    • Baking sheet – lined with parchment or silicone mat
    • Cookie scoop – optional, but helps portion dough evenly
    • Cooling rack – to finish setting cookies
    • Digital kitchen scale – optional, but ensures accuracy for metric ingredients

    Refrigerated:

    • 2 large eggs

    Baking & Spices:

    • 95 g ¾ cup all-purpose flour
    • 1 tsp baking powder
    • 100 g caster sugar
    • 90 g demerara sugar (adds crunch and caramel notes)
    • 2 tbsp unsweetened cocoa powder
    • ¼ tsp salt
    • 1 tsp vanilla extract

    Chocolate:

    • 225 g dark chocolate (70% cocoa, chopped or chips)
    • 85 g dark or milk chocolate chips (for mixing in)

    Dairy:

    • 56 g butter (salted or unsalted – your choice!)

    Step 1: Melt Chocolate & Butter

    1. In a heatproof bowl over a pan of simmering water (or in the microwave in short bursts), melt 225g dark chocolate and 56g butter until smooth.
    2. Let it cool slightly for 5 minutes.

    Step 2: Mix Wet Ingredients

    1. In a large bowl, beat together eggs, caster sugar, demerara sugar, and vanilla extract until thick, pale, and slightly foamy (2–3 minutes).
    2. Slowly pour in the melted chocolate mixture while beating on low.

    Step 3: Add Dry Ingredients

    1. Sift in flour, cocoa powder, baking powder, and salt.
    2. Fold gently with a spatula until just combined.
    3. Stir in chocolate chips.

    Step 4: Chill the Dough

    1. Cover the bowl and chill the dough for 20–30 minutes. This helps prevent spreading and intensifies the fudgy texture.

    Step 5: Scoop and Bake

    1. Preheat oven to 175°C / 350°F. Line a baking tray with parchment paper.
    2. Scoop dough into balls (about 1½ tablespoons each) and space 2 inches apart.
    3. Bake for 10–12 minutes, until tops are crackly and edges are set but centers still look soft.

    Step 6: Cool and Serve

    1. Let brookies cool on the tray for 5 minutes, then transfer to a cooling rack.
    2. Enjoy warm or cooled — they stay fudgy for days!

    🔁 Variations
    Customize your brookies with fun mix-ins and flavor twists:

    1. Sea Salt Brookies
    Sprinkle flaky sea salt over the tops before baking for salty-sweet magic.

    2. Nutty Brookies
    Add ½ cup chopped walnuts, pecans, or hazelnuts to the dough.

    3. Espresso Chocolate Brookies
    Add 1 tsp instant espresso powder to the dry ingredients for a deeper cocoa flavor.

    4. Peanut Butter Brookies
    Swirl in peanut butter chips or dollop peanut butter in the center before baking.

    5. Gluten-Free Brookies
    Use a 1:1 gluten-free flour blend — brookies are very forgiving!

    🧊 Storage & Freezing
    Storing:
    Keep brookies in an airtight container at room temperature for 4–5 days.

    Freezing Dough:
    Freeze scooped dough balls on a tray, then store in freezer bags for up to 3 months.

    Bake from frozen — add 1–2 minutes to the bake time.

    Freezing Baked Brookies:
    Wrap tightly in plastic wrap and foil, then freeze for up to 2 months.

    ❓ 10 Frequently Asked Questions (FAQs)
    1. Why are my brookies too cakey?
    Too much flour or overbaking. Be sure to measure carefully and remove when centers are slightly soft.

    2. Can I use only one type of sugar?
    You can, but demerara sugar adds a caramel crunch — we recommend keeping both.

    3. Do I need to chill the dough?
    Yes! It helps the cookies hold their shape and develop that iconic fudgy texture.

    4. Can I skip the cocoa powder?
    We don’t recommend it — cocoa boosts the brownie flavor.

    5. Can I make these dairy-free?
    Yes — use plant-based butter and dairy-free chocolate.

    6. Can I bake these as a brownie bar instead?
    You can try — use an 8×8 pan and bake for 20–25 minutes.

    7. Can I make these smaller or larger?
    Yes — adjust bake time accordingly. Smaller = 8 mins, larger = 13–15 mins.

    8. What’s the best chocolate to use?
    Use 70% dark chocolate for depth or a mix of milk/dark for balance.

    9. Why didn’t my brookies get crackly tops?
    Make sure to beat the eggs and sugar well and don’t overmix once the dry ingredients are added.

    10. Do they taste more like brownies or cookies?
    Both — they’re chewy like brownies, shaped like cookies, and totally delicious!

    ✅ Conclusion
    These Fudgy Chewy Brookies are the kind of ultimate hybrid dessert that makes everyone fall in love at first bite. With their shiny, crackly tops and gooey centers, they check every box for what a chocolate lover wants in a treat. 🍫

    Whether you’re baking for yourself, your family, or a special event, these cookies deliver maximum impact with minimal fuss. They’re rich, indulgent, and totally bakery-worthy — without the price tag.

    Looking for more chocolate-rich recipes?

    One Bowl Fudge Brownies

    Chocolate Lava Cookies

    Salted Chocolate Chunk Cookies

    Bake them once — crave them forever.

  • The Best Red Velvet Oreo Cheesecake Recipe – Rich, Creamy, and Show-Stopping!

    The Best Red Velvet Oreo Cheesecake Recipe – Rich, Creamy, and Show-Stopping!

    If you’re a fan of red velvet cake, love cheesecake, and have a soft spot for Oreos, you’re in for a dangerously delicious treat! This Red Velvet Oreo Cheesecake is everything you could ever crave in one dessert: rich, velvety cake layers, a smooth and creamy cheesecake center, and a crunchy Oreo crust. ❤️🍰🍫 It’s indulgent. It’s striking. And it’s perfect for special occasions — whether it’s Valentine’s Day, birthdays, holidays, or any day that deserves something sweet and over the top. Made with real cream cheese, buttermilk, and cocoa powder, this cake combines the classic flavor of red velvet with the irresistible texture of cookies and cream. Each slice is a beautiful blend of tangy, chocolatey, and creamy delight. Love bold desserts? Don’t miss our Cookies & Cream Cheesecake Bars or Red Velvet Cheesecake Brownies.

    • 9-inch springform pan – for the cheesecake
    • Electric mixer or stand mixer – to blend cream cheese to perfection
    • Mixing bowls – at least two for cake and cheesecake
    • Spatula – for folding and scraping
    • Measuring cups and spoons – accuracy is key in baking
    • Whisk – for smooth batter
    • Cooling rack – essential for chill time
    • Parchment paper – to line and lift
    • Knife or food processor – to crush Oreos
    • For the Red Velvet Cake Layer:
    • 1¼ cups all-purpose flour
    • ¼ cup unsweetened cocoa powder
    • ½ tsp baking powder
    • ¼ tsp baking soda
    • ¼ tsp salt
    • ¾ cup unsalted butter (softened)
    • 1 cup granulated sugar
    • 2 large eggs
    • ½ cup buttermilk
    • 1 tbsp red food coloring
    • 1 tsp white vinegar
    • 1 tsp vanilla extract

    For the Oreo Cheesecake Layer:

    • 16 oz cream cheese (softened)
    • ½ cup granulated sugar
    • ¼ cup sour cream
    • 2 large eggs
    • 1 tsp vanilla extract
    • 2 cups Oreo crumbs

    For Garnish:

    • ¼ cup red velvet cake crumbs
    • 4 whole Oreos (halved or crushed for topping)
    • ¼ cup red velvet glaze
    • Whipped cream (for piping or dolloping)

    Step 1: Prepare the Red Velvet Cake Layer

    1. Preheat oven to 350°F (175°C). Grease and line a 9-inch springform pan with parchment paper.
    2. In a bowl, sift together flour, cocoa powder, baking powder, baking soda, and salt.
    3. In a separate bowl, beat butter and sugar until fluffy (about 2–3 minutes).
    4. Add eggs, one at a time. Then mix in buttermilk, food coloring, vinegar, and vanilla.
    5. Gradually add the dry ingredients and mix until just combined.
    6. Pour the batter into the pan and bake for 18–20 minutes or until a toothpick comes out clean.
    7. Let cool completely in the pan.

    Step 2: Make the Oreo Cheesecake

    1. Lower oven temp to 325°F (160°C).
    2. In a large bowl, beat cream cheese until smooth.
    3. Add sugar, then mix in sour cream, eggs, and vanilla.
    4. Fold in Oreo crumbs.
    5. Pour cheesecake filling on top of the cooled cake layer.
    6. Bake for 45–50 minutes, or until edges are set but center is slightly jiggly.
    7. Turn off oven, crack door, and let sit inside for 1 hour.
    8. Remove and cool on a wire rack. Then refrigerate for at least 4 hours, preferably overnight.

    Step 3: Garnish & Serve

    1. Pipe or dollop whipped cream around the edges.
    2. Drizzle with red velvet glaze.
    3. Top with cake crumbs and halved Oreos.

    🔁 Variations
    Try these flavor spins to make the recipe your own:

    1. Mini Red Velvet Cheesecakes
    Bake in cupcake liners for individual servings.

    2. Chocolate Oreo Version
    Swap the red velvet cake layer with a thin chocolate cake.

    3. No-Bake Oreo Cheesecake Topping
    Skip the oven cheesecake and make a no-bake filling with whipped cream and cream cheese.

    4. Nutella Swirl Cheesecake
    Add 2 tbsp Nutella into the cheesecake batter and swirl.

    5. Gluten-Free Option
    Use a gluten-free flour blend and certified GF Oreos.

    🧊 Storage & Reheating
    Fridge:
    Store in an airtight container or covered in the fridge for up to 5 days.

    Freezer:
    Freeze whole cheesecake (or slices) tightly wrapped for up to 2 months.

    Thaw overnight in the refrigerator before serving.

    Reheating:
    Not recommended — best enjoyed chilled or room temp.

    ❓ 10 Frequently Asked Questions (FAQs)
    1. Can I use store-bought red velvet cake mix?
    Yes, but the texture and flavor will differ slightly.

    2. What’s the best cream cheese for cheesecake?
    Use full-fat, brick-style cream cheese for best texture.

    3. Can I make this ahead of time?
    Yes — it tastes even better the next day!

    4. Can I reduce the sugar?
    Slightly, yes — but don’t reduce too much or it may affect texture.

    5. How do I get a smooth cheesecake top?
    Use room temperature ingredients and avoid over-mixing the batter.

    6. Can I make this without a springform pan?
    You can, but removing the cake may be harder — line your pan very well.

    7. Do I need a water bath?
    Not for this recipe — but you can use one for an ultra-smooth texture.

    8. Can I use Greek yogurt instead of sour cream?
    Yes — plain, full-fat Greek yogurt works well.

    9. How do I prevent the cheesecake from cracking?
    Let it cool gradually and don’t overbake.

    10. Can I skip the glaze or topping?
    Of course! But it adds that extra wow factor.

    ✅ Conclusion
    This Red Velvet Oreo Cheesecake is the ultimate show-stopping dessert — combining the tangy charm of red velvet, the crunch of Oreos, and the luscious creaminess of cheesecake. 🍰

    Whether you’re baking it for a loved one, a celebration, or just to spoil yourself (yes, you deserve it!), this dessert is guaranteed to impress.

    More bold and beautiful dessert ideas:

    Oreo Cheesecake Bars

    Red Velvet Trifle

    Triple Chocolate Cheesecake

    Get ready for compliments, cravings, and requests for seconds!

  • Best Ever Cocoa Brownies – Fudgy, Chewy & Ultra-Chocolatey!

    Best Ever Cocoa Brownies – Fudgy, Chewy & Ultra-Chocolatey!

    Looking for that perfect brownie recipe that’s rich, chewy, and packed with bold cocoa flavor — without any fancy chocolate bars or melting mess? These Best Ever Cocoa Brownies are your answer. 🍫🔥 Made entirely with unsweetened cocoa powder, these brownies are intensely chocolatey, with crisp, crackly tops, chewy centers, and a fudgy bite that rivals your favorite bakery. Whether you’re baking for a crowd, a cozy night in, or just a chocolate craving emergency, this one-bowl wonder is fail-proof, quick, and insanely good. And unlike some recipes that call for melted chocolate or multiple mixing steps, this one’s beautifully simple. Just pantry staples, a whisk, and a craving for something amazing. If you love rich desserts, don’t miss our Flourless Chocolate Cake or these Chewy Chocolate Crinkle Cookies.

    • Mixing bowl – one large bowl for everything
    • Whisk or electric mixer – for combining ingredients
    • Measuring cups & spoons – accuracy matters in baking
    • 8×8-inch baking pan – or 9×9 for thinner brownies
    • Parchment paper – for easy lift-out
    • Spatula – to spread the batter evenly
    • Cooling rack – to let brownies set perfectly
    • ½ cup 1 stick unsalted butter
    • 1¼ cups granulated sugar
    • 2 large eggs
    • 1 teaspoon vanilla extract
    • ½ cup unsweetened cocoa powder (Dutch-processed or natural)
    • ½ cup all-purpose flour
    • ¼ teaspoon salt
    • ½ teaspoon baking powder
    • Optional: ½ cup chocolate chips or chopped walnuts for extra texture

    Step 1: Preheat & Prep

    1. Preheat oven to 325°F (165°C).
    2. Line an 8×8-inch pan with parchment paper, leaving an overhang for easy lifting.

    Step 2: Melt the Butter

    1. In a microwave-safe bowl or saucepan, melt ½ cup butter until just melted — don’t boil it.

    Step 3: Whisk in Sugar & Eggs

    1. Add sugar, eggs, and vanilla to the melted butter.
    2. Whisk for 1–2 minutes until light and glossy. This helps get those shiny, crackly tops!

    Step 4: Add Dry Ingredients

    1. Stir in cocoa powder, flour, salt, and baking powder.
    2. Mix until just combined — don’t overmix!
    3. Fold in chocolate chips or walnuts if using.

    Step 5: Bake

    1. Pour batter into prepared pan and smooth the top with a spatula.
    2. Bake for 25–30 minutes, or until a toothpick inserted in the center comes out with a few moist crumbs.

    Step 6: Cool & Slice

    1. Let brownies cool completely in the pan on a rack.
    2. Lift out using the parchment overhang, then cut into squares.

    🔁 Variations
    Here’s how to make these brownies your own:

    1. Espresso Cocoa Brownies
    Add 1 teaspoon instant espresso powder to the batter to deepen the chocolate flavor.

    2. Salted Caramel Swirl
    Swirl in 2–3 tablespoons caramel sauce before baking. Sprinkle with flaky sea salt after baking.

    3. Peanut Butter Brownies
    Drop spoonfuls of peanut butter over the batter and swirl before baking.

    4. Double Chocolate
    Stir in ½ cup chocolate chunks or chips for gooey chocolate pockets.

    5. Gluten-Free Version
    Use a 1:1 gluten-free flour blend to keep the texture close to the original.

    🧊 Storage & Freezing
    Storing:
    Keep in an airtight container at room temperature for up to 4 days.

    Store in the fridge if you like a denser, fudgier bite.

    Freezing:
    Wrap individual brownies in plastic wrap and foil.

    Freeze for up to 3 months.

    Thaw at room temperature or microwave for 15–20 seconds to revive the texture.

    ❓ 10 Frequently Asked Questions (FAQs)
    1. Can I double the recipe?
    Yes! Use a 9×13-inch pan and increase bake time to 35–40 minutes.

    2. Can I use olive oil or coconut oil instead of butter?
    Yes, but it may slightly alter the flavor and texture.

    3. Why do my brownies turn out cakey?
    Too much flour or overbaking can cause a cake-like texture. Use a light hand when mixing and bake just until set.

    4. What type of cocoa is best?
    Both Dutch-processed and natural cocoa powder work — Dutch gives a deeper flavor and darker color.

    5. Can I use brown sugar instead of granulated?
    You can swap half for brown sugar for a slightly chewier texture and caramel notes.

    6. How do I get clean brownie cuts?
    Use a hot knife and clean it between each cut.

    7. Are these brownies freezer-friendly?
    Absolutely — freeze well-wrapped squares for up to 3 months.

    8. What if I don’t have baking powder?
    You can omit it for an even fudgier texture — the result will be more dense, less cakey.

    9. Can I add frosting or ganache?
    Yes — top cooled brownies with chocolate ganache, peanut butter frosting, or cream cheese glaze for a rich finish.

    10. Can I make them dairy-free?
    Use vegan butter or coconut oil and check that your cocoa is dairy-free.

    ✅ Conclusion
    These Best Ever Cocoa Brownies are proof that you don’t need fancy chocolate to make a bakery-worthy treat. 🍫

    With their glossy tops, chewy edges, and rich, fudgy middle, they’re the ultimate chocolate indulgence — and they come together with pantry staples in under an hour.

    Whether you eat them warm with ice cream, pack them in lunchboxes, or sneak one with your coffee, these brownies are the kind of simple pleasure that never disappoints.

    For more chocolatey goodness, check out:

    Double Chocolate Zucchini Bread

    Fudgy Chocolate Cookies

    Chocolate Lava Cakes

    Once you try them, you’ll never need another brownie recipe again.

  • Apple Fritter Bites – Crispy, Soft & Full of Warm Fall Flavors

    Apple Fritter Bites – Crispy, Soft & Full of Warm Fall Flavors

    There’s nothing quite like the sweet aroma of apples, cinnamon, and nutmeg sizzling into golden perfection — and these Apple Fritter Bites deliver all the nostalgia and coziness of a fairground favorite in bite-sized form. 🍎✨ Crispy on the outside, soft and fluffy on the inside, these fritter bites are packed with tender apple chunks, warm spices, and finished with a light vanilla glaze. Whether you serve them for breakfast, brunch, or dessert, they’re bound to disappear fast. Even better? They’re made with pantry staples and come together in under 30 minutes — no yeast or special equipment needed! Love these? You might also enjoy our Cinnamon Sugar Donut Muffins or Mini Pumpkin Fritters.

    • Mixing bowls – for wet and dry ingredients
    • Whisk – for mixing batter and glaze
    • Spatula – for folding in apples
    • Measuring cups & spoons – for accuracy
    • Heavy-bottomed pot or deep fryer – for frying
    • Slotted spoon or spider strainer – to remove fritters from oil
    • Cooling rack + paper towels – for draining excess oil
    • Small bowl – for glaze
    • Knife and cutting board – for dicing apples
    • Candy thermometer (optional) – to monitor oil temperature

    For the Fritters:

    • 1 cup peeled and diced apple (Granny Smith or Honeycrisp work great)
    • 1 cup all-purpose flour
    • 1 teaspoon baking powder
    • ½ teaspoon ground cinnamon
    • ¼ teaspoon ground nutmeg
    • ¼ teaspoon salt
    • 2 tablespoons granulated sugar
    • 1 large egg
    • ½ cup milk
    • ½ teaspoon vanilla extract
    • Vegetable oil (for frying (enough to fill pan 2 inches deep))

    For the Glaze:

    • 1 cup powdered sugar
    • 1 teaspoon vanilla extract
    • 1 –2 tablespoons milk (to thin as needed)

    Step 1: Prep the Apples

    1. Peel and dice apples into small, ¼-inch cubes.
    2. Set aside while you prep the batter.

    Step 2: Make the Batter

    1. In a mixing bowl, whisk together:
    2. Flour, baking powder, cinnamon, nutmeg, salt, and sugar.
    3. In a separate bowl, beat together:
    4. Egg, milk, and vanilla.
    5. Pour the wet ingredients into the dry and stir until just combined.
    6. Gently fold in the diced apples.

    Step 3: Heat the Oil

    1. Pour about 2 inches of vegetable oil into a deep skillet or pot.
    2. Heat to 350°F (175°C) over medium heat.
    3. Line a plate with paper towels and place a cooling rack on top.

    Step 4: Fry the Bites

    1. Drop spoonfuls of batter (about 1 tbsp each) into hot oil.
    2. Don’t overcrowd the pan — fry in batches.
    3. Fry for 2–3 minutes per side, or until golden brown and puffed.
    4. Use a slotted spoon to transfer to the cooling rack.

    Step 5: Make the Glaze

    1. Whisk together powdered sugar, vanilla, and milk until smooth.
    2. Dip warm fritters in the glaze or drizzle over the top.

    🔁 Variations
    Switch it up with these easy, fun ideas:

    1. Baked Apple Fritter Bites
    Spoon into a mini muffin pan and bake at 375°F for 15–18 minutes.

    2. Cinnamon Sugar Coating
    Toss freshly fried fritters in cinnamon sugar instead of glaze.

    3. Caramel Apple Fritters
    Drizzle with caramel sauce and chopped pecans.

    4. Apple-Pear Combo
    Use half diced pear and half apple for a fruity twist.

    5. Pumpkin Spice Fritters
    Add ¼ cup pumpkin puree and reduce milk to ⅓ cup.

    🧊 Storage & Reheating
    Storing:
    Keep fritters in an airtight container at room temperature for up to 2 days.

    Refrigerate for up to 4 days, but note they may soften.

    Freezing:
    Freeze unglazed fritters for up to 1 month.

    Thaw at room temperature and warm before glazing.

    Reheating:
    Reheat in the air fryer at 350°F for 2–3 minutes or microwave for 10–15 seconds.

    Glaze after reheating for best texture.

    ❓ 10 Frequently Asked Questions (FAQs)
    1. Can I use any apple variety?
    Yes — but Granny Smith offers a tart balance to the sweet glaze.

    2. Do I need to peel the apples?
    Peeling is recommended for softer texture, but not essential.

    3. Can I make these ahead of time?
    Yes — just store and glaze just before serving for best results.

    4. Why are my fritters greasy?
    Your oil may be too cold. Keep it at 350°F for crispy, non-greasy results.

    5. Can I double the recipe?
    Absolutely — just fry in multiple batches.

    6. Can I make these gluten-free?
    Yes — use a 1:1 gluten-free flour blend for a GF-friendly version.

    7. Is there a way to make them egg-free?
    Try using a flax egg or egg replacer.

    8. Can I air fry them?
    Yes! Drop spoonfuls into a preheated air fryer at 375°F and cook for 8–10 minutes, flipping halfway.

    9. What’s the best oil for frying?
    Use a neutral oil like vegetable, canola, or sunflower.

    10. Do they need to be glazed?
    No — you can dust them with powdered sugar or dip in cinnamon sugar instead.

    ✅ Conclusion
    These Apple Fritter Bites are the perfect blend of crisp, fluffy, and fall-inspired comfort. 🍎🍩

    With their tender apple chunks, warm cinnamon spice, and sweet vanilla glaze, they taste just like your favorite bakery treat — but are so easy to whip up at home. Whether you’re craving something cozy on a chilly morning or need a quick dessert for guests, these little fritters are sure to please.

    Looking for more cozy bites? Try:

    Mini Pumpkin Donuts

    Cinnamon Apple Muffins

    Easy Apple Crisp Cups

    Warm, golden, and dipped in glaze — what’s not to love?

  • No-Bake Mini Banana Cream Pies – Easy, Creamy & Delicious for Any Occasion!

    No-Bake Mini Banana Cream Pies – Easy, Creamy & Delicious for Any Occasion!

    If you’re looking for a quick, crowd-pleasing dessert that doesn’t require turning on the oven, these No-Bake Mini Banana Cream Pies are exactly what you need! 🍌🥧✨ With buttery graham cracker crusts, silky banana cream pudding, layers of fresh banana slices, and a cloud of homemade whipped cream, these individual treats are perfect for parties, potlucks, or a lazy weekend indulgence. The best part? They come together in about 20 minutes — no oven, no fuss, just creamy banana bliss. If you’re a fan of banana desserts, don’t miss our No-Bake Banana Cheesecake Cups or this Mini Banana Pudding Trifle. Let’s dig into this easy no-bake dessert that tastes like summer in a cup!

    • 12-count muffin pan or mini tart pans
    • Mixing bowls – at least two (for crust and filling)
    • Electric mixer or whisk – for making whipped cream
    • Measuring cups and spoons
    • Spoon or spatula – for pressing crust and layering filling
    • Plastic wrap – for chilling
    • Sharp knife – for slicing bananas
    • Piping bag (optional) – for fancy whipped cream topping

    Crust:

    • 1½ cups graham cracker crumbs (about 10–12 crackers)
    • ½ cup unsalted butter (melted)
    • 1 tablespoon honey

    Filling:

    • 1 3.4 oz package banana cream instant pudding mix
    • 2 cups cold milk
    • 2 ripe bananas (sliced)

    Whipped Cream:

    • 1 cup heavy cream
    • 2 tablespoons powdered sugar
    • 1 teaspoon vanilla extract
    • Optional: store-bought whipped cream for convenience

    Garnish:

    • Extra banana slices
    • Crushed graham crackers
    • Mint leaves or caramel drizzle (optional)

    Step 1: Make the Graham Cracker Crust

    1. In a bowl, combine graham cracker crumbs, melted butter, and honey.
    2. Stir until the crumbs resemble wet sand.
    3. Press about 1–2 tablespoons into each muffin tin or mini tart pan.
    4. Use the back of a spoon or a shot glass to press firmly into a crust.
    5. Place in the fridge to chill while you prepare the filling.

    Step 2: Prepare the Banana Cream Pudding

    1. In a mixing bowl, whisk together the banana cream pudding mix and cold milk.
    2. Whisk for about 2 minutes until thickened.
    3. Let sit for 5 minutes to fully set.

    Step 3: Make the Whipped Cream

    1. In a separate chilled bowl, whip heavy cream, powdered sugar, and vanilla using a mixer on high speed until stiff peaks form (about 3–4 minutes).
    2. Set aside ⅓ of the whipped cream for topping, and fold the remaining ⅔ into the pudding for a lighter, mousse-like texture.

    Step 4: Assemble the Mini Pies

    1. Remove the crusts from the fridge.
    2. Add a few banana slices on top of each crust layer.
    3. Spoon or pipe the banana cream filling over the bananas until nearly full.
    4. Top each mini pie with a generous swirl of whipped cream.
    5. Garnish with a banana slice, graham cracker crumble, or mint leaf.

    Step 5: Chill & Serve

    1. Chill in the refrigerator for at least 1 hour to allow flavors to meld and crusts to firm up.
    2. Serve cold and enjoy the creamy, dreamy goodness!

    🔁 Variations
    Want to personalize your mini pies? Try these easy swaps and fun twists:

    1. Chocolate Banana Cream Pies
    Add a layer of melted chocolate or Nutella to the crust before adding pudding.

    2. Oreo Crust
    Swap graham crackers for Oreo crumbs for a chocolatey base.

    3. Coconut Banana Pies
    Add ¼ cup shredded coconut to the pudding or whipped cream for tropical vibes.

    4. Peanut Butter Drizzle
    Drizzle with melted peanut butter before topping with whipped cream.

    5. Vegan Version
    Use dairy-free pudding mix, plant-based milk, and coconut whipped cream.

    🧊 Storage & Make-Ahead Tips
    Refrigerator:
    Store in the fridge in an airtight container for up to 3 days.

    Add fresh banana slices just before serving to prevent browning.

    Freezer:
    Not recommended due to banana texture and whipped cream separation when frozen.

    Make-Ahead:
    Assemble crusts and filling up to 24 hours ahead.

    Add bananas and whipped cream on the day of serving for best presentation.

    ❓ 10 Frequently Asked Questions (FAQs)
    1. Can I use homemade pudding instead of instant?
    Yes — just make sure it’s cooled and thickened before assembling the pies.

    2. What’s the best banana to use?
    Use ripe but firm bananas — overly soft ones may get mushy.

    3. Can I make this into a full-size pie?
    Absolutely — just press the crust into a standard 9-inch pie dish and follow the same steps.

    4. Is it okay to use Cool Whip instead of homemade whipped cream?
    Yes, it works well and saves time!

    5. How can I keep the bananas from browning?
    Brush them with a little lemon juice before adding to the pies.

    6. Can I use different pudding flavors?
    Sure! Vanilla, coconut, or even butterscotch pudding make great substitutes.

    7. Do these travel well for potlucks?
    Yes — just store in a container with a lid and add whipped cream and garnish on site.

    8. Can I skip the crust and make parfaits?
    Definitely! Layer pudding and bananas in jars or cups for a crust-free version.

    9. Do I have to chill the crust?
    It’s not essential, but chilling helps it firm up and hold its shape better.

    10. Can I use pre-made mini pie shells?
    Yes! Store-bought graham cracker crust cups work great in a pinch.

    ✅ Conclusion
    These No-Bake Mini Banana Cream Pies are everything you want in a dessert: quick, creamy, and completely irresistible. 🍌🥧

    With no oven required and just a few simple ingredients, these little pies are perfect for busy weeknights, last-minute parties, or anytime you’re craving banana cream pie flavor — without the work. And since they’re mini-sized, they’re as cute as they are delicious!

    For more no-bake dessert inspiration:

    No-Bake Cheesecake Cups

    Banana Pudding Trifles

    Strawberry Icebox Cake

    Whip up a batch and let the compliments roll in!

  • Salted Caramel Cheesecake Cookies: Creamy, Decadent, and Irresistible

    Salted Caramel Cheesecake Cookies: Creamy, Decadent, and Irresistible

    Salted Caramel Cheesecake Cookies: Creamy, Decadent, and Irresistible

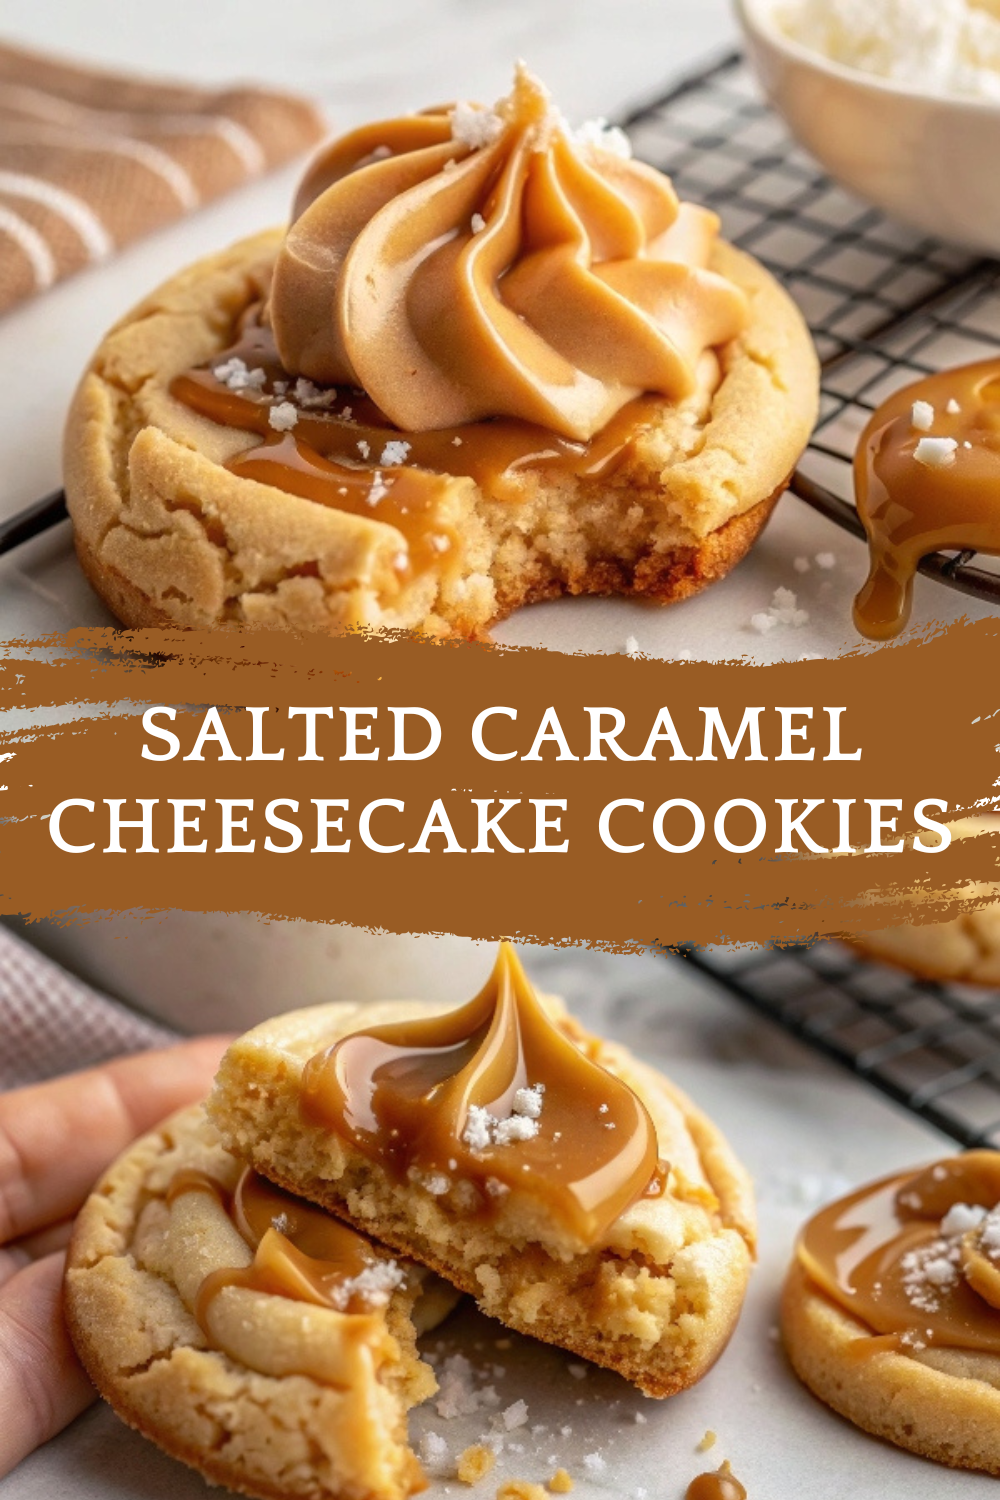
    If you’re a fan of soft, gooey cookies and rich cheesecake flavor, then these Salted Caramel Cheesecake Cookies are about to become your new favorite treat. Imagine a thick, chewy cookie base swirled with creamy cream cheese, drizzled in silky caramel sauce, and topped with a sprinkle of flaky sea salt — a flavor combo that’s both elegant and indulgent. 🍪🧂🍮 Perfect for holidays, cookie swaps, or a cozy weekend bake, these cookies deliver bakery-style decadence right from your home oven. Plus, they’re surprisingly easy to make and hold up beautifully when baked — no runny centers or cracked tops! If you love gourmet cookies, don’t miss our Brown Butter Chocolate Chip Cookies or Oreo Cheesecake Cookies.

    • Stand mixer or hand mixer – for creaming butter, sugars, and cream cheese
    • Mixing bowls – at least two (wet and dry ingredients)
    • Measuring cups and spoons – for accurate measurements
    • Spatula – for folding and scraping
    • Cookie scoop or tablespoon – for even cookie portions
    • Baking sheets – lined with parchment paper or silicone mats
    • Cooling rack – for even airflow after baking
    • Spoon or piping bag – to drizzle caramel
    • Small bowl – for flaky sea salt finishing

    Refrigerated:

    • 1 large egg
    • 4 oz cream cheese (softened)
    • ½ cup unsalted butter (softened)

    Condiments:

    • ½ cup thick caramel sauce (store-bought or homemade)

    Baking & Spices:

    • 2¼ cups all-purpose flour
    • ½ tsp baking powder
    • ½ tsp baking soda
    • ½ tsp salt
    • ½ cup light brown sugar (packed)
    • ¾ cup granulated sugar
    • 2 tsp vanilla extract
    • Flaky sea salt (for topping)

    Step 1: Cream Butter, Cream Cheese, and Sugars

    1. In a large bowl or stand mixer, beat the butter, cream cheese, granulated sugar, and brown sugar until light and fluffy — about 2–3 minutes on medium speed.

    Step 2: Add Egg and Vanilla

    1. Add the egg and vanilla extract, and mix until fully incorporated.

    Step 3: Mix Dry Ingredients

    1. In a separate bowl, whisk together the flour, baking powder, baking soda, and salt.

    Step 4: Combine Wet and Dry

    1. Gradually add the dry ingredients to the wet, mixing on low until a soft dough forms. Be careful not to overmix.

    Step 5: Chill the Dough

    1. Cover and refrigerate the dough for at least 1 hour, or up to 24 hours. Chilling helps prevent the cookies from spreading too much.

    Step 6: Preheat and Scoop

    1. Preheat oven to 350°F (175°C). Line baking sheets with parchment. Use a cookie scoop or spoon to scoop dough into 1.5 to 2-inch balls.

    Step 7: Bake

    1. Bake for 10–12 minutes, or until edges are set and tops look slightly underbaked — they’ll finish cooking on the tray. Let sit for 5 minutes, then transfer to a cooling rack.

    Step 8: Add Caramel and Salt

    1. Once slightly cooled, drizzle cookies with thick caramel sauce using a spoon or piping bag. Immediately sprinkle with flaky sea salt.

    🔁 Variations
    Try these fun and delicious twists:

    1. Stuffed Caramel Center
    Insert a caramel candy (like a soft Werther’s or Kraft) into the center of each dough ball before baking.

    2. Espresso Caramel Cookies
    Add ½ tsp instant espresso powder to the dough for a coffeehouse vibe.

    3. Brown Butter Upgrade
    Swap regular butter for brown butter to deepen the nutty flavor.

    4. Chocolate Caramel
    Mix in 1 cup mini chocolate chips and skip the sea salt for a sweeter twist.

    5. Graham Cracker Crust
    Roll dough balls in crushed graham crackers before baking for a cheesecake crust feel.

    🧊 Storage & Reheating
    Storage:
    Store cookies in an airtight container at room temperature for 3–4 days.

    Keep caramel-topped cookies between layers of parchment to avoid sticking.

    Freezing:
    Freeze baked cookies for up to 2 months.

    Freeze dough balls on a sheet, then transfer to a bag for easy future baking.

    Reheating:
    Warm in the microwave for 8–10 seconds to re-melt caramel before serving.

    ❓ 10 Frequently Asked Questions (FAQs)
    1. Can I make these ahead of time?
    Yes — the dough can be made up to 2 days in advance. You can also freeze dough balls for later.

    2. What kind of caramel sauce works best?
    Use a thick, slow-pour caramel — store-bought or homemade. Avoid thin syrup.

    3. Can I skip the cream cheese?
    Cream cheese is key for the cheesecake flavor, but you can sub 2 more tbsp of butter if needed.

    4. Why chill the dough?
    Chilling solidifies the fat, which prevents excess spreading and gives you thick, chewy cookies.

    5. How do I make homemade caramel sauce?
    Combine sugar, butter, and heavy cream in a saucepan. Simmer until golden and thickened.

    6. Can I make them gluten-free?
    Yes — substitute a 1:1 gluten-free flour blend like Bob’s Red Mill.

    7. Do they taste like cheesecake?
    Yes! The cream cheese adds a rich tang that mimics cheesecake, especially with the caramel.

    8. Can I add nuts?
    Absolutely — chopped pecans or walnuts pair wonderfully with caramel.

    9. Can I double the recipe?
    Yes — perfect for holidays or parties. Just chill the full batch before baking.

    10. Why are my cookies too flat?
    Likely due to warm dough or over-mixing. Chill thoroughly and mix just until combined.

    ✅ Conclusion
    These Salted Caramel Cheesecake Cookies are the perfect hybrid of your favorite desserts: part cookie, part cheesecake, and totally decadent. With their creamy tang, buttery texture, and irresistible caramel drizzle, they’re guaranteed to impress any crowd — or just your own sweet tooth. 😍🍪

    Make them once, and they’ll become a permanent fixture in your cookie rotation.

    Want more bakery-style treats? Try:

    Cheesecake Stuffed Snickerdoodles

    Caramel Stuffed Chocolate Chip Cookies

    Brown Butter Pecan Cookies

    Now go make magic happen — and don’t forget the sea salt sprinkle!