Category: Breakfast

  • 5-Day Oatmeal Diet Plan – Lose Weight, Cleanse, and Feel Amazing!

    5-Day Oatmeal Diet Plan – Lose Weight, Cleanse, and Feel Amazing!

    5-Day Oatmeal Diet Plan – Lose Weight, Cleanse, and Feel Amazing!

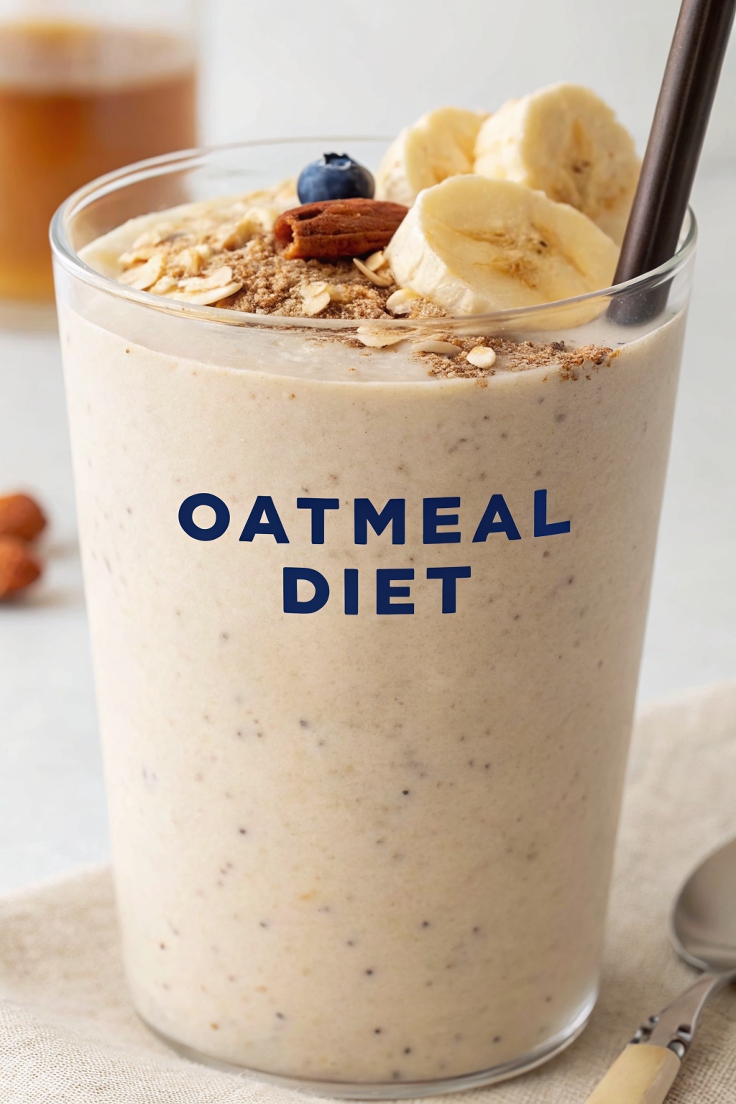
    Looking for a simple, affordable, and effective way to jumpstart your weight loss goals or give your body a clean, nutritious reboot? The 5-Day Oatmeal Diet Plan is a gentle and filling approach to detoxing and losing weight — without going hungry. 🥣✨ Oatmeal is rich in soluble fiber, low in fat, and keeps you feeling full longer, making it the perfect base for a low-calorie, high-nutrient meal plan. When paired with fruit, veggies, lean proteins, and healthy fats, oats can help you shed excess water weight, balance blood sugar, and feel more energized in just a few days. Why oatmeal? It’s packed with beta-glucan fiber to support heart health It supports digestive regularity and reduces bloating It’s incredibly versatile and easy to prep It naturally supports weight loss and appetite control Ready to reset your plate and feel better from the inside out? Let’s dig in!

    • To follow this oatmeal meal plan successfully, here’s what you’ll need:
    • Saucepan or microwave-safe bowl – for cooking oats quickly
    • Measuring cups and spoons – portion control is key
    • Knife and cutting board – to prep fruits and veggies
    • Mixing bowls – for prepping oatmeal-based meals
    • Storage containers – to portion out meals ahead of time
    • Blender (optional) – for oat smoothies or overnight oats

    🗓️ The 5-Day Oatmeal Diet Plan

    1. Each day includes 3 meals and healthy snack ideas. Oatmeal is the base for breakfast and lunch, while dinner includes a balanced, light meal to round out the day.

    🍽️ Day 1 – Clean Start

    Breakfast:

    1. ½ cup rolled oats cooked in water
    2. Topped with ½ banana, cinnamon, and 1 tsp chia seeds

    Lunch:

    1. ½ cup oatmeal mixed with ½ cup plain Greek yogurt, ¼ cup blueberries, and a drizzle of honey

    Dinner:

    1. Grilled chicken breast (4 oz)
    2. Steamed broccoli + ½ sweet potato
    3. Lemon olive oil drizzle

    Snack:

    1. 1 apple
    2. 10 raw almonds

    🍽️ Day 2 – Protein Boost

    Breakfast:

    1. ½ cup oats + 1 scoop vanilla protein powder
    2. Mixed with almond milk and 1 tbsp flaxseed

    Lunch:

    1. Savory oats: Cooked oats with sautéed spinach, garlic, cherry tomatoes, and a soft-boiled egg

    Dinner:

    1. Baked salmon (4 oz)
    2. Roasted zucchini and bell peppers
    3. Small side salad with balsamic vinegar

    Snack:

    1. Baby carrots + hummus
    2. Green tea with lemon

    🍽️ Day 3 – Sweet & Savory

    Breakfast:

    1. Overnight oats with ½ cup oats, almond milk, 1 tbsp peanut butter, and 1 tsp cocoa powder
    2. Topped with ½ banana
    3. Lunch:
    4. Oats cooked with veggie broth, mushrooms, onions, and kale
    5. Topped with nutritional yeast

    Dinner:

    1. Turkey meatballs with cauliflower rice
    2. Side of cucumber tomato salad

    Snack:

    1. 1 hard-boiled egg
    2. Handful of grapes
    3. 🍽️ Day 4 – Antioxidant Day

    Breakfast:

    1. ½ cup oats + 1 cup almond milk
    2. Mixed berries, cinnamon, and 1 tbsp hemp seeds

    Lunch:

    1. Oats blended into a smoothie with spinach, frozen banana, vanilla extract, and flaxseed

    Dinner:

    1. Stir-fried tofu and veggies (bell peppers, broccoli, edamame)
    2. Drizzle of coconut aminos or light soy sauce

    Snack:

    1. Greek yogurt + sliced strawberries

    🍽️ Day 5 – Final Flush

    Breakfast:

    1. Apple pie oats: ½ cup oats + diced apple + cinnamon + nutmeg + a few walnuts

    Lunch:

    1. Oat-based veggie patties made with grated carrots, zucchini, and spices
    2. Served with a leafy green salad

    Dinner:

    1. Lentil and vegetable soup
    2. 1 slice of sprouted grain toast
    3. Snack:
    4. Cucumber slices + 2 tbsp guacamole
    5. Herbal detox tea

    🔁 Variations & Customizations
    This plan is flexible! Here are some swaps and upgrades:

    Make it vegan: Use almond or oat milk, plant-based yogurt, and tofu for protein.

    Boost your protein: Add protein powder, Greek yogurt, hemp seeds, or eggs.

    Add flavor without calories: Use cinnamon, ginger, turmeric, or vanilla extract.

    Switch fruits: Use any fresh or frozen fruit like mango, cherries, or peaches.

    Savory ideas: Add avocado, chili flakes, or roasted veggies to plain oats.

    🧊 Storage and Meal Prep Tips
    Prep Ahead:
    Make overnight oats in jars for 3–4 days in advance

    Cook a big batch of oats and store in the fridge for easy reheating

    Chop fruits & veggies and store them in meal-prep containers

    Portion out snacks to avoid overeating

    Storage:
    Cooked oats: store up to 5 days in the fridge

    Overnight oats: keep chilled for up to 4 days

    Smoothies: best made fresh but can be frozen in mason jars

    ❓ 10 Frequently Asked Questions (FAQs)
    1. Can I do the oatmeal diet longer than 5 days?
    Yes, but it’s best used short-term to reset. After 5 days, transition to a more balanced meal plan.

    2. Will I lose weight on this plan?
    Most people lose 2–5 pounds in 5 days depending on calorie intake and activity level.

    3. Can I snack on other foods?
    Yes — stick with healthy snacks like fruit, nuts, veggies, or hard-boiled eggs.

    4. Can I use steel-cut oats?
    Yes! Just adjust cooking time. They’re slightly higher in fiber and have a chewier texture.

    5. Is this plan good for diabetics?
    Yes, but choose unsweetened oats, avoid added sugars, and consult a doctor before starting.

    6. Is oatmeal gluten-free?
    Naturally, yes — but choose certified gluten-free oats if sensitive.

    7. Can I drink coffee or tea?
    Absolutely — just skip the sugar and flavored creamers.

    8. How do I prevent boredom?
    Change up flavors daily: berries, bananas, savory oats, or add cocoa powder and spices.

    9. Can I exercise during the plan?
    Yes! In fact, pairing it with light to moderate activity can help accelerate fat burning.

    10. What’s a good post-diet plan?
    Ease back into regular meals with lean proteins, whole grains, healthy fats, and lots of vegetables.

    ✅ Conclusion
    The 5-Day Oatmeal Diet Plan is a gentle, structured, and nourishing way to support your wellness journey. Whether you’re looking to shed a few pounds, reduce bloating, or reset your habits, this plan offers flexibility, satiety, and a strong nutritional foundation.

    Oats are affordable, versatile, and easy to love — and when combined with fresh produce and lean proteins, they can transform your health one meal at a time.

    Want more healthy eating ideas? Try:

    High Protein Overnight Oats

    Oat Flour Pancakes

    Savory Oatmeal Bowls

    Happy eating — and healthy living! 🥄
  • Peanut Butter Energy Balls – The Perfect No-Bake Snack for Energy, Protein & Flavor

    Peanut Butter Energy Balls – The Perfect No-Bake Snack for Energy, Protein & Flavor

    Peanut Butter Energy Balls – The Perfect No-Bake Snack for Energy, Protein & Flavor

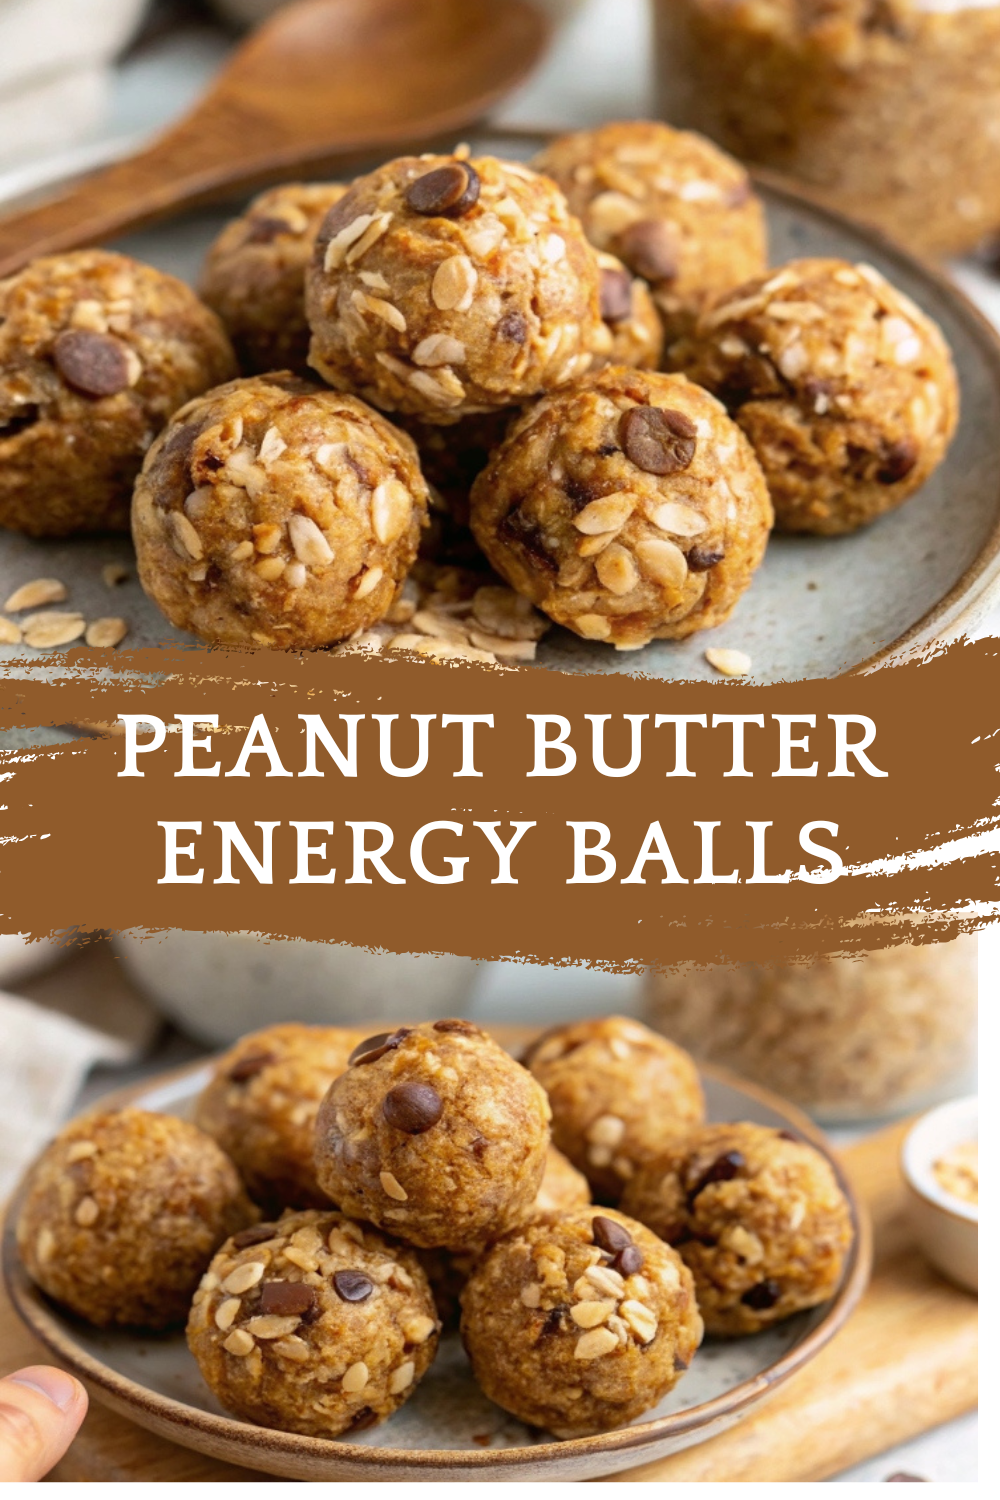
    Say hello to the ultimate healthy snack: Peanut Butter Energy Balls! These no-bake bites are soft, chewy, naturally sweet, and loaded with protein, fiber, and healthy fats — all in one poppable little ball. 🥜🍯 Whether you’re: Rushing out the door in the morning Need a mid-day pick-me-up Looking for a pre/post-workout bite Or craving something sweet without the guilt… These peanut butter energy balls are always a win. Made with rolled oats, nut butter, natural sweeteners, and your favorite mix-ins like chocolate chips, flaxseed, or chia, they’re endlessly customizable. Even better? They take less than 10 minutes to make — no oven required! For more energy snack ideas, check out this No-Bake Chocolate Oat Bars or this popular Date Energy Balls. Let’s roll up a batch of your new favorite snack!

    • All you need are basic tools — no food processor or fancy gadgets required:
    • Mixing bowl – large enough for stirring your ingredients
    • Wooden spoon or rubber spatula – for easy mixing
    • Measuring cups and spoons – accuracy = consistency
    • Cookie scoop (optional) – for perfectly portioned balls
    • Baking sheet or tray – for chilling the balls
    • Parchment paper – keeps everything mess-free

    Base Ingredients:

    • 1 1/2 cups rolled oats
    • 1/2 cup natural peanut butter (smooth or chunky)
    • 1/3 cup honey (or maple syrup for vegan version)
    • 1/2 teaspoon vanilla extract
    • 1/4 teaspoon salt

    Optional Boosters & Mix-ins (choose your favorite!):

    • 1/4 cup mini chocolate chips
    • 2 tablespoons ground flaxseed
    • 1 tablespoon chia seeds
    • 2 tablespoons shredded coconut
    • 1 tablespoon cocoa powder
    • 2 tablespoons chopped nuts
    • Dash of cinnamon

    Step 1: Mix the Base

    1. In a large bowl, combine:
    2. Oats
    3. Peanut butter
    4. Honey
    5. Vanilla
    6. Salt
    7. Stir until fully combined. The mixture should be thick and sticky.

    Step 2: Add Mix-ins

    1. Fold in any optional add-ins like chocolate chips, chia, flax, or coconut.
    2. Stir until evenly distributed.

    Step 3: Chill

    1. Place the bowl in the fridge for 20–30 minutes to firm up the dough. This makes it easier to roll.

    Step 4: Roll into Balls

    1. Use a cookie scoop or your hands to form 1-inch balls.
    2. Place on a parchment-lined tray or plate.

    Step 5: Store

    1. Enjoy immediately or transfer to an airtight container.
    2. Store in the fridge for 1 week or freeze for up to 3 months.

    🌀 Variations
    Looking to mix it up? Try these fun flavor combinations:

    1. Peanut Butter Chocolate Chip (Classic)
    Add 1/4 cup mini chocolate chips

    Dash of cinnamon

    2. Salted Peanut Butter Caramel
    Add 2 tablespoons chopped dates

    Sprinkle with sea salt before chilling

    3. Peanut Butter Cup
    Add 1 tablespoon cocoa powder and mini dark chocolate chips

    4. Trail Mix Energy Balls
    Add chopped dried cranberries, pumpkin seeds, and sunflower seeds

    5. Crunchy Peanut Butter Pretzel
    Use crunchy peanut butter and add 2 tablespoons crushed pretzels

    6. Banana Peanut Butter Balls
    Add 2 tablespoons mashed banana (store in fridge and eat within 2–3 days)

    🧊 Storage & Freezing
    Refrigerator:
    Store in an airtight container for up to 1 week.

    Freezer:
    Place energy balls in a single layer on a tray to freeze.

    Transfer to a freezer bag and store for up to 3 months.

    Let thaw at room temp for 10–15 minutes before enjoying.

    ❓ 10 Frequently Asked Questions (FAQs)
    1. Can I use quick oats instead of rolled oats?
    Yes, but the texture will be slightly softer. Rolled oats give more chew.

    2. Are these energy balls gluten-free?
    Yes, if you use certified gluten-free oats.

    3. Can I make them vegan?
    Absolutely — just swap honey for maple syrup or agave.

    4. Can I use another nut butter?
    Definitely! Try almond, cashew, or sunflower seed butter.

    5. How do I make them nut-free?
    Use sunflower seed butter and avoid nut-based mix-ins.

    6. Do I need to cook or bake them?
    Nope! These are 100% no-bake.

    7. Why is my dough too sticky or dry?
    Too sticky? Add more oats. Too dry? Add more nut butter or a touch of honey.

    8. Can I blend the oats?
    Yes — you can pulse them in a food processor for a finer texture.

    9. Are energy balls healthy?
    Yes! They’re loaded with fiber, healthy fats, and protein, making them a clean snack.

    10. Can kids eat these?
    Absolutely — they’re a hit in lunchboxes and after school snacks!

    ✅ Conclusion
    Whether you’re powering through a long day, tackling your next workout, or just want a sweet, healthy treat, these Peanut Butter Energy Balls are the perfect grab-and-go snack. 🥜⚡

    They’re:

    No-bake

    Naturally sweetened

    Loaded with protein & fiber

    Totally customizable

    Ready in minutes

    Make a batch (or two!) and keep them in the fridge or freezer for a ready-to-roll snack all week long.

    Looking for more healthy snack ideas?

    Oatmeal Chocolate Chip Energy Bites

    Peanut Butter Banana Smoothie

    Healthy Homemade Granola Bars

    Snack smart — and deliciously!

  • Simple Cottage Cheese Egg Salad – A High-Protein, Low-Carb Classic with a Creamy Twist

    Simple Cottage Cheese Egg Salad – A High-Protein, Low-Carb Classic with a Creamy Twist

    Simple Cottage Cheese Egg Salad – A High-Protein, Low-Carb Classic with a Creamy Twist

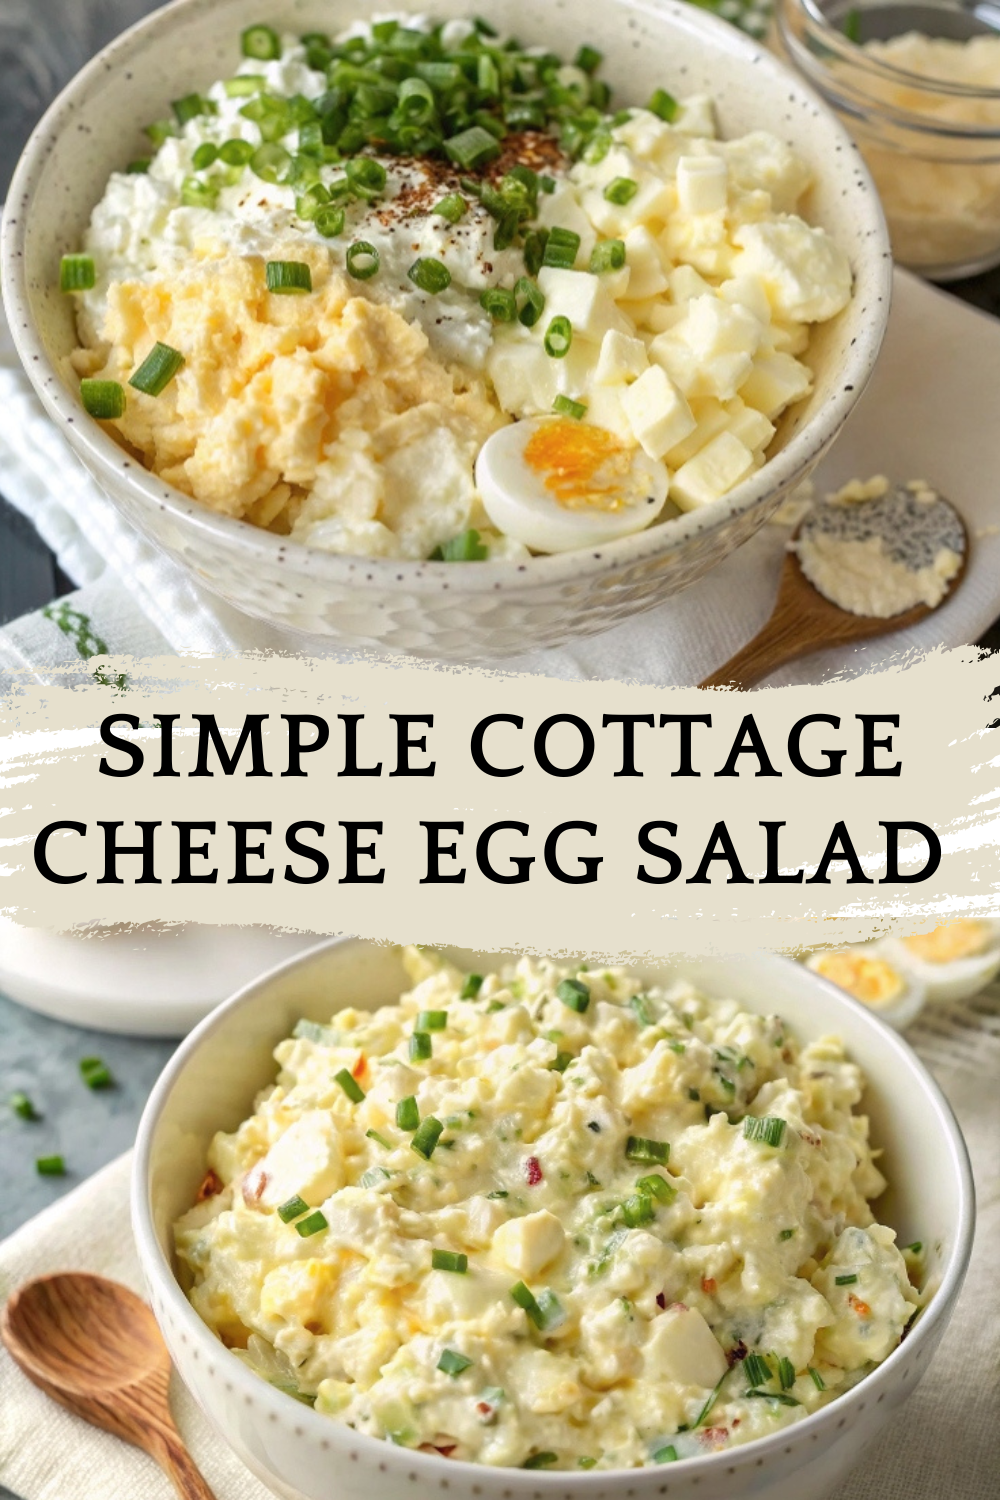
    If you love the rich, satisfying flavor of traditional egg salad but want something lighter, creamier, and packed with protein, this Simple Cottage Cheese Egg Salad is your new go-to. 🥚🧀 Combining classic hard-boiled eggs with creamy, tangy cottage cheese instead of heavy mayo creates a healthier, lighter, and protein-rich version of a classic favorite. It’s perfect for meal prep, quick lunches, and even post-workout refueling. Whether you enjoy it on toast, in a lettuce wrap, or scooped with crackers, this recipe is satisfying, wholesome, and so easy to make. Want more high-protein, cottage cheese-based meals? Don’t miss this High-Protein Cottage Cheese Dip or our viral favorite Cottage Cheese Pasta Sauce. Let’s make the easiest egg salad you’ll ever crave.

    • You’ll need just a few staple ingredients for this creamy egg salad:
    • Main Ingredients:
    • 6 large eggs (hard-boiled and peeled)
    • 1/2 cup cottage cheese (use small curd for a smoother texture)
    • 1 tablespoon Dijon mustard (or yellow mustard)
    • 1 tablespoon fresh chives or green onions (chopped)
    • Salt and pepper (to taste)
    • Optional Add-Ins:
    • 1 teaspoon lemon juice (adds a fresh tang)
    • 1 tablespoon dill relish or chopped pickles
    • 1/4 teaspoon garlic powder
    • Pinch of paprika or cayenne
    • 1 tablespoon Greek yogurt (for extra creaminess)

    Step 1: Hard-Boil the Eggs

    1. Place the eggs in a pot and cover with water.
    2. Bring to a boil, then cover, remove from heat, and let sit for 12 minutes.
    3. Drain and transfer to an ice bath for 5–10 minutes, then peel.
    4. Pro Tip: Older eggs peel more easily than fresh ones.

    Step 2: Chop the Eggs

    1. Chop the peeled eggs into small pieces using a knife or egg slicer.
    2. Transfer to a mixing bowl.

    Step 3: Add the Creamy Base

    1. Add cottage cheese, mustard, and chopped chives to the bowl.
    2. Mix until well combined.

    Step 4: Season and Customize

    1. Season with salt and pepper, and add any optional mix-ins you like.

    Step 5: Serve and Enjoy!

    1. Enjoy immediately or chill for 30 minutes for best flavor.
    2. Serve on toast, in a lettuce wrap, or with crackers for dipping.

    Perfect for meal prep, light lunches, or quick protein-packed snacks!

    Variations
    Want to shake up your egg salad game? Try these creative flavor twists:

    1. Avocado Cottage Egg Salad
    Replace some or all of the cottage cheese with mashed avocado.

    2. Spicy Sriracha Version
    Add 1 teaspoon Sriracha or hot sauce and a pinch of paprika.

    3. Pickle Lovers’ Egg Salad
    Add 1 tablespoon chopped pickles or dill relish and a sprinkle of dill.

    4. Greek-Inspired
    Mix in chopped cucumber, feta, and a squeeze of lemon juice.

    5. Keto-Friendly Wraps
    Scoop into lettuce cups or low-carb wraps for a light, keto option.

    Storage and Reheating
    Fridge:
    Store in an airtight container for up to 3 days.

    Stir well before serving again — cottage cheese can release some liquid.

    Freezer:
    Not recommended. The texture of eggs and cottage cheese changes when frozen.

    Reheating:
    This salad is best served cold or at room temperature.

    10 Frequently Asked Questions (FAQs)
    1. Is cottage cheese a healthy replacement for mayo?
    Yes! Cottage cheese is lower in fat and calories and higher in protein than mayonnaise.

    2. What type of cottage cheese works best?
    Small curd works best for a creamy texture, but you can blend regular cottage cheese if you prefer it smoother.

    3. Can I make this recipe ahead of time?
    Absolutely! It tastes even better after chilling for a few hours.

    4. How do I serve cottage cheese egg salad?
    Try it on toast, in a sandwich, over greens, or in lettuce cups.

    5. Is this recipe keto-friendly?
    Yes — it’s low in carbs, high in protein, and great for a keto diet.

    6. Can I add vegetables?
    Yes! Add celery, onions, or even grated carrots for extra crunch and fiber.

    7. Can I use egg whites only?
    Sure — use 10–12 egg whites in place of whole eggs for a lower-fat version.

    8. Can I blend the cottage cheese first?
    Yes — for a smoother texture, blend the cottage cheese before mixing it in.

    9. How long can this sit out?
    No more than 2 hours at room temperature. Keep it chilled when possible.

    10. Can I use flavored cottage cheese?
    Stick to plain for this recipe. Flavored versions may contain sugar or seasonings that clash with eggs.

    Conclusion
    This Simple Cottage Cheese Egg Salad is the perfect blend of nutrition, simplicity, and flavor. 🥚💛

    Swapping mayonnaise for cottage cheese boosts the protein content, cuts down on fat, and gives you a light, tangy twist that feels totally fresh. Whether you’re eating it straight from the bowl, on toast, or as a quick lunchbox addition — this recipe is bound to become a staple.

    For more light & healthy meals, check out:

    Avocado Tuna Salad

    Healthy Chicken Salad

    Protein-Packed Greek Yogurt Egg Salad

    Simple, satisfying, and so easy to love — enjoy every bite!

  • Energy Balls – Healthy No-Bake Snack, With 10 Irresistible Flavors!

    Energy Balls – Healthy No-Bake Snack, With 10 Irresistible Flavors!

    Energy Balls – Healthy No-Bake Snack, With 10 Irresistible Flavors!

    Looking for a snack that’s healthy, portable, easy to make, and tastes like dessert? Let us introduce you to your new best friend: Energy Balls (also known as bliss balls or protein bites). ✨ These no-bake treats are loaded with wholesome ingredients like oats, nut butters, seeds, and dried fruit — no refined sugar, no baking required, and totally customizable. Whether you need a pre-workout boost, a midday pick-me-up, or a guilt-free treat, energy balls have your back. They’re: Gluten-free (if using certified GF oats) Kid-approved Meal-prep friendly Easily adaptable for any diet (vegan, keto, paleo) If you’re a fan of healthy snacking, don’t miss our Peanut Butter Protein Bars or this No-Bake Chocolate Oatmeal Cookies. Now let’s roll into the base recipe — and then I’ll show you 10 incredible flavor variations!

    • 1 1/2 cups rolled oats
    • 1/2 cup natural nut butter (peanut, almond, cashew, sunflower)
    • 1/3 cup honey (or maple syrup for vegan)
    • 1/2 teaspoon vanilla extract
    • 1/4 teaspoon salt
    • 2 –3 tablespoons mix-ins (chocolate chips, flaxseed, chia, etc.)

    Step 1: Mix

    1. In a large bowl, combine oats, nut butter, honey/maple syrup, vanilla, and salt.
    2. Stir until fully combined.
    3. Fold in any additional mix-ins of your choice.

    Step 2: Chill

    1. Refrigerate the mixture for 20–30 minutes to make it easier to roll.

    Step 3: Roll

    1. Use your hands or a small cookie scoop to form the mixture into 1-inch balls.

    Step 4: Store

    1. Store in an airtight container in the fridge for 1 week, or freezer for 2–3 months.

    10 Delicious Flavor Variations
    You can start with the base and mix it up 100 different ways. Here are 10 flavor-packed favorites you must try:

    1. Peanut Butter Chocolate Chip 🍫🥜
    Add:

    1/4 cup mini chocolate chips

    1 tablespoon ground flaxseed

    Optional: roll in crushed peanuts for extra crunch

    2. Coconut Cashew Lime 🥥🍋
    Swap nut butter: cashew

    Add:

    1/4 cup shredded coconut

    1 teaspoon lime zest

    1 tablespoon chia seeds

    3. Almond Joy 🍫🌰
    Add:

    2 tablespoons chopped almonds

    2 tablespoons shredded coconut

    2 tablespoons dark chocolate chips

    4. Cinnamon Roll 🍥
    Add:

    1/2 teaspoon cinnamon

    1/8 teaspoon nutmeg

    1 tablespoon raisins or chopped dates

    Optional: drizzle with coconut butter

    5. Matcha Pistachio 🍵💚
    Add:

    1 teaspoon matcha powder

    2 tablespoons chopped pistachios

    Swap: honey for maple syrup

    6. Chocolate Cherry Almond 🍒🍫
    Add:

    1/4 cup dried cherries

    2 tablespoons mini chocolate chips

    2 tablespoons chopped almonds

    7. Pumpkin Spice 🎃
    Add:

    2 tablespoons pumpkin purée

    1/2 teaspoon pumpkin spice

    1 tablespoon flaxseed

    8. Lemon Poppy Seed 🍋
    Add:

    1 tablespoon lemon zest

    2 tablespoons lemon juice

    1 teaspoon poppy seeds

    Use almond or cashew butter

    9. Mocha Espresso ☕🍫
    Add:

    1 tablespoon cocoa powder

    1 teaspoon instant espresso

    2 tablespoons mini chocolate chips

    10. Birthday Cake 🎉
    Add:

    1/4 teaspoon almond extract

    1 tablespoon maple syrup

    1 tablespoon sprinkles (natural if preferred)

    Optional: white chocolate chips

    Storage and Freezing
    Fridge:
    Store in an airtight container for up to 1 week.

    Freezer:
    Freeze in a ziplock or container for up to 3 months.

    Let thaw at room temp or microwave for 10 seconds for a quick snack.

    Pro Tip: Make a double batch and freeze half for later!

    10 Frequently Asked Questions (FAQs)
    1. Can I make energy balls without oats?
    Yes! Use ground flaxseed, almond flour, or protein powder as the base.

    2. Are energy balls healthy?
    Absolutely. They’re packed with fiber, healthy fats, protein, and no refined sugar.

    3. Are they gluten-free?
    Use certified gluten-free oats to make them 100% GF.

    4. Can I make them vegan?
    Yes! Just use maple syrup instead of honey.

    5. Can I add protein powder?
    Yes! Replace 1/4 cup oats with your favorite protein powder.

    6. Can kids eat energy balls?
    Totally! They’re great lunchbox snacks — just skip large nuts for toddlers.

    7. What nut butters work best?
    Any! Try peanut, almond, cashew, or sunflower seed butter.

    8. How do I make them nut-free?
    Use sunflower seed butter and coconut instead of nuts.

    9. Why won’t my mixture stick together?
    Add a bit more nut butter or a drizzle of water/honey to bind.

    10. Can I use steel-cut oats?
    Nope — rolled or quick oats work best for this recipe.

    Conclusion
    Energy Balls are the ultimate snack hero: quick, healthy, portable, and so delicious you’ll forget they’re good for you. 🥣💪

    With 10 amazing flavor variations (and endless more to create), you can meal prep a big batch and enjoy a fresh flavor every day of the week. Plus, they’re endlessly customizable — so have fun with it!

    Craving more no-bake snack inspo? Try these:

    Homemade Granola Bars

    Peanut Butter Protein Balls

    No-Bake Oatmeal Cookies

    Now get rolling and snack happy! 🎉

  • Raspberry Cinnamon Rolls – Sweet, Tangy, and Irresistibly Soft!

    Raspberry Cinnamon Rolls – Sweet, Tangy, and Irresistibly Soft!

    Raspberry Cinnamon Rolls – Sweet, Tangy, and Irresistibly Soft!

    What’s better than the warm aroma of freshly baked cinnamon rolls wafting through your kitchen? Raspberry Cinnamon Rolls — that’s what! 🍓✨ These soft, fluffy rolls take the classic cinnamon roll and give it a fruity, tangy twist with bursts of fresh raspberries and a hint of bright lemon zest. The sweet-tart raspberries balance perfectly with the warm cinnamon filling and the pillowy, buttery dough. Finish it all off with a drizzle of vanilla-lemon glaze, and you’ve got a bakery-worthy treat that’s perfect for breakfast, brunch, or a sweet snack any time of day. If you love homemade rolls, you’ll also enjoy this Classic Cinnamon Roll Recipe or for another fruity twist, try these Strawberry Sweet Rolls. Ready to make your kitchen smell amazing? Let’s get baking!

    • Dough:
    • 4 cups all-purpose flour
    • 2 teaspoons instant yeast
    • 1/2 teaspoon salt
    • 3/4 cup granulated sugar
    • 2 large eggs
    • 1 1/4 cups milk (warm)
    • 5/16 cup unsalted butter (melted (about 5 tablespoons))
    • 1 tablespoon vegetable oil
    • Filling:
    • 1 cup fresh raspberries
    • 2 teaspoons ground cinnamon
    • Zest of 1 lemon
    • 1 tablespoon lemon juice (fresh)
    • 1/4 cup granulated sugar
    • Glaze:
    • 1 cup powdered sugar
    • 1/2 teaspoon vanilla extract
    • 1 –2 tablespoons lemon juice (to desired consistency)
    • Optional Garnish:
    • Extra lemon zest
    • Fresh raspberries
    • Dusting of powdered sugar

    Step 1: Prepare the Dough

    1. In a large mixing bowl, combine:
    2. Warm milk (about 110°F / 43°C)
    3. Instant yeast
    4. Sugar
    5. Melted butter
    6. Eggs
    7. Vegetable oil
    8. Whisk until smooth.
    9. Gradually add flour and salt, mixing until a sticky dough forms.
    10. Knead the dough by hand or using a stand mixer with the dough hook attachment for 6–8 minutes, until smooth and elastic.

    Step 2: Let the Dough Rise

    1. Place the dough in a lightly oiled bowl, cover with a damp cloth, and let rise in a warm place for 1 to 1.5 hours, or until doubled in size.
    2. Tip: If your kitchen is cool, place the bowl in a slightly warm (but turned off) oven.

    Step 3: Prepare the Raspberry Filling

    1. In a small bowl, gently toss the raspberries with:
    2. Lemon zest
    3. Lemon juice
    4. Sugar
    5. Ground cinnamon
    6. Set aside and let the mixture macerate while the dough finishes rising.

    Step 4: Roll Out the Dough

    1. Once the dough has doubled, punch it down and turn it onto a floured surface.
    2. Roll it into a rectangle about 12×18 inches.

    Step 5: Add the Filling

    1. Spread the raspberry mixture evenly over the dough.
    2. Gently press the filling into the dough to help it stick.

    Step 6: Roll and Slice

    1. Starting from the long edge, tightly roll the dough into a log.
    2. Slice into 12 equal rolls using a sharp knife or unflavored dental floss for cleaner cuts.

    Step 7: Second Rise

    1. Arrange the rolls in a greased 9×13-inch baking dish.
    2. Cover with a clean towel and let rise again for 30–45 minutes, until puffy.

    Step 8: Bake

    1. Preheat your oven to 350°F (175°C).
    2. Bake the rolls for 25–30 minutes, until golden brown and the filling is bubbly.

    Step 9: Make the Glaze

    1. In a bowl, whisk together:
    2. Powdered sugar
    3. Vanilla extract
    4. Lemon juice (adjust until desired consistency is reached)

    Step 10: Glaze and Serve!

    1. Drizzle the glaze over the warm rolls.
    2. Garnish with extra raspberries and lemon zest if desired.
    3. Serve and enjoy every sweet, tangy bite!

    Variations
    Want to put your own twist on these Raspberry Cinnamon Rolls? Try these ideas:

    1. Add Cream Cheese Glaze
    Swap the lemon glaze for a luscious cream cheese frosting.

    2. Mixed Berry Rolls
    Use a mix of blueberries, strawberries, and raspberries for a berry explosion.

    3. Nutty Raspberry Rolls
    Add 1/2 cup chopped pecans or almonds to the filling for crunch.

    4. Chocolate Raspberry Rolls
    Sprinkle mini chocolate chips over the raspberry filling before rolling up.

    5. Spiced Up
    Increase the cinnamon and add a pinch of cardamom for extra warmth.

    6. Overnight Method
    Prep the rolls the night before, cover tightly, and refrigerate. In the morning, let them come to room temperature and bake as directed.

    Storage and Reheating
    Storage:
    Store cooled rolls in an airtight container at room temperature for 2 days.

    For longer storage, refrigerate for up to 5 days.

    Freezing:
    Freeze unglazed rolls for up to 2 months.

    Thaw overnight in the fridge, then warm and glaze before serving.

    Reheating:
    Microwave individual rolls for 15–20 seconds.

    Reheat in the oven at 300°F (150°C) for 8–10 minutes.

    Pro Tip: Add a splash of milk or water before reheating to keep them soft!

    10 Frequently Asked Questions (FAQs)
    1. Can I use frozen raspberries?
    Yes! Use frozen berries directly from the freezer — no need to thaw.

    2. Can I make these rolls ahead of time?
    Absolutely! Prepare and shape the rolls, cover, and refrigerate overnight. Bake fresh in the morning.

    3. What if I don’t have instant yeast?
    You can use active dry yeast. Just dissolve it in the warm milk with a pinch of sugar first, and let it sit for 5–10 minutes until frothy.

    4. Can I use a stand mixer?
    Yes! Use the dough hook attachment to knead the dough for about 6–8 minutes.

    5. How do I get cleaner slices?
    Use unflavored dental floss to slice the dough cleanly without squishing it.

    6. What flour works best?
    All-purpose flour is perfect, but you can use bread flour for an even chewier texture.

    7. Can I add a crumble topping?
    Yes! Mix butter, sugar, and flour for a quick streusel to sprinkle over the rolls before baking.

    8. How do I prevent soggy bottoms?
    Avoid overfilling and bake on the middle rack. Also, let the rolls cool slightly before serving.

    9. Can I double the recipe?
    Of course! Just use two baking dishes and rotate them halfway through baking.

    10. What’s the best way to serve them?
    Warm, with a hot cup of coffee or tea — and extra glaze for dipping!

    Conclusion
    There’s something magical about homemade rolls — especially when they’re filled with juicy raspberries and warm cinnamon spice. 🍓✨

    These Raspberry Cinnamon Rolls are soft, fluffy, and bursting with bright, fruity flavor. The sweet-tart balance of the raspberries, the cozy warmth of cinnamon, and the finishing touch of tangy lemon glaze make every bite unforgettable.

    They’re perfect for lazy weekend breakfasts, festive brunches, or anytime you want to treat yourself and your loved ones to a bakery-quality experience at home.

    For more cozy bakes, try these Blueberry Sweet Rolls or this Lemon Poppy Seed Bread.

    Happy baking!

  • Best Fluffy Pancakes – Light, Airy, and Absolutely Irresistible!

    Best Fluffy Pancakes – Light, Airy, and Absolutely Irresistible!

    Best Fluffy Pancakes – Light, Airy, and Absolutely Irresistible!

    There’s just something magical about a stack of golden, fluffy pancakes on a lazy morning. 🥞✨ These Best Fluffy Pancakes are exactly what your breakfast dreams are made of — light as air, soft on the inside, and slightly crisp on the edges. With just the right balance of sweetness, a hint of vanilla, and optional bursts of juicy blueberries, they’re perfect for weekends, brunch parties, or anytime you crave a comforting start to your day. What makes these pancakes stand out? It’s all about the ingredients and the technique. The combination of baking powder for lift, warm cinnamon for depth, and melted butter for richness gives you that diner-style pancake at home. Want to take it to the next level? Try them with a drizzle of maple syrup, a dollop of whipped cream, or a dusting of powdered sugar. For even more pancake inspiration, check out this Buttermilk Pancake Recipe or these fluffy Japanese Soufflé Pancakes. Let’s flip some pancakes!

    • Produce:
    • 1/2 cup blueberries (optional, fresh or frozen — for a fruity burst!)
    • Refrigerated:
    • 1 large egg
    • Dairy:
    • 3 tablespoons unsalted butter (melted)
    • 1 1/4 cups milk (whole milk for richness)
    • Baking & Spices:
    • 1 1/2 cups all-purpose flour
    • 3 1/2 teaspoons baking powder
    • 1/2 teaspoon cinnamon
    • 1/2 teaspoon salt
    • 1 tablespoon sugar
    • 1 teaspoon vanilla extract
    • Optional Toppings:
    • Maple syrup
    • Butter
    • Whipped cream
    • Extra blueberries
    • Powdered sugar

    Step 1: Melt the Butter

    1. In a small saucepan or microwave, melt the butter and set aside to cool slightly.

    Step 2: Combine Dry Ingredients

    1. In a large mixing bowl, whisk together:
    2. Flour
    3. Baking powder
    4. Cinnamon
    5. Salt
    6. Sugar
    7. Tip: Sifting the flour and baking powder can make your pancakes even lighter!

    Step 3: Mix Wet Ingredients

    1. In a separate bowl, whisk together:
    2. Milk
    3. Egg
    4. Vanilla extract
    5. Melted butter (cooled)

    Step 4: Make the Batter

    1. Pour the wet ingredients into the dry ingredients.
    2. Gently fold until just combined — do not overmix!
    3. The batter should be slightly lumpy. Overmixing leads to flat pancakes.

    Step 5: Add Blueberries (Optional)

    1. If using blueberries, gently fold them into the batter.

    Step 6: Heat the Pan

    1. Heat a non-stick skillet or griddle over medium heat.
    2. Lightly grease with a bit of butter or cooking spray.

    Step 7: Cook the Pancakes

    1. Scoop about 1/4 cup of batter onto the skillet for each pancake.
    2. Cook until bubbles form on the surface and the edges look set, about 2–3 minutes.
    3. Flip and cook for another 1–2 minutes, until golden brown.

    Step 8: Serve and Enjoy!

    1. Stack pancakes high, top with butter, syrup, and extra blueberries.
    2. Serve warm and enjoy the fluffiest pancakes ever!

    Variations
    Want to make these fluffy pancakes your own? Try these fun variations:

    1. Chocolate Chip Pancakes
    Fold 1/2 cup mini chocolate chips into the batter.

    2. Lemon Blueberry Pancakes
    Add 1 tablespoon lemon zest for a zesty twist.

    3. Banana Pancakes
    Mash 1 ripe banana and mix into the wet ingredients.

    4. Nutty Delight
    Add 1/4 cup chopped pecans or walnuts for a bit of crunch.

    5. Gluten-Free
    Substitute with a 1:1 gluten-free flour blend for a gluten-free version.

    6. Vegan Pancakes
    Use plant-based milk, flax egg (1 tbsp flaxseed + 3 tbsp water), and vegan butter.

    Storage and Reheating
    Storage:
    Store leftover pancakes in an airtight container in the fridge for up to 3 days.

    Freezing:
    Freeze pancakes between sheets of parchment paper in a freezer bag for up to 2 months.

    Reheating:
    Reheat in the toaster or oven at 300°F (150°C) for about 5 minutes.

    You can microwave for 20–30 seconds, but toasters give a crispier edge!

    Pro Tip: Make a double batch and freeze extras for busy mornings!

    10 Frequently Asked Questions (FAQs)
    1. Can I use buttermilk instead of regular milk?
    Yes! Buttermilk adds a tangy flavor and extra tenderness.

    2. Why are my pancakes flat?
    Overmixing or expired baking powder can result in flat pancakes. Mix gently!

    3. Can I make the batter ahead of time?
    It’s best to cook the batter fresh, but you can mix dry and wet ingredients separately and combine just before cooking.

    4. Can I add protein powder?
    Yes! Add 1–2 scoops of your favorite protein powder, but you may need to add a splash of extra milk.

    5. What’s the best pan to use?
    A non-stick griddle or cast-iron skillet works best for even browning.

    6. How do I know when to flip?
    Flip when bubbles form on the surface and the edges look set.

    7. Can I make these pancakes smaller?
    Yes! Use 1–2 tablespoons of batter for mini pancakes — perfect for kids.

    8. Can I make them without blueberries?
    Of course! They’re delicious plain or with other mix-ins.

    9. How do I keep pancakes warm while cooking batches?
    Place them on a baking sheet in the oven at 200°F (93°C).

    10. Can I make these pancakes sugar-free?
    Yes — simply omit the sugar or use a natural sweetener like monk fruit or stevia.

    Conclusion
    There’s nothing like a warm stack of Best Fluffy Pancakes to start your day right. 🥞✨

    These pancakes are wonderfully light, slightly sweet, and oh-so-comforting. Whether you enjoy them with classic maple syrup, fresh blueberries, or even a dollop of whipped cream, they’re sure to become a family favorite.

    They’re quick to make, freezer-friendly, and customizable to your heart’s desire. So next time you’re craving a cozy breakfast, skip the boxed mix and whip up a batch of these fluffy delights!

    For more breakfast inspiration, try these Banana Pancakes or these fun Pancake Muffins.

    Happy flipping!

  • Fluffy Cottage Cheese Cloud Bread – Light, Airy, and Naturally Protein-Packed!

    Fluffy Cottage Cheese Cloud Bread – Light, Airy, and Naturally Protein-Packed!

    Fluffy Cottage Cheese Cloud Bread – Light, Airy, and Naturally Protein-Packed!

    Have you ever wished bread could be so light, so fluffy, it feels like you’re biting into a cloud? ☁️ Well, let me introduce you to Fluffy Cottage Cheese Cloud Bread — a soft, high-protein, and slightly sweet bread alternative that’s as delightful to eat as it is to make! Using simple, wholesome ingredients like cottage cheese, eggs, and a touch of honey for subtle sweetness, this cloud bread is naturally gluten-free and low in carbs. It’s perfect for those following keto, low-carb, or high-protein diets, but honestly? It’s so tasty, it’s for everyone. Whether you enjoy it for breakfast with fruit and yogurt, as a sandwich base, or as a snack straight from the oven, this cloud bread is about to become your new favorite recipe. If you enjoy light and airy recipes, check out this popular Classic Cloud Bread Recipe or try this creative twist on Low-Carb Cheese Bread. Ready? Let’s bake some clouds!

    • Refrigerated:
    • 3 large eggs (separated)
    • Dairy:
    • 1/2 cup cottage cheese (whole milk for creaminess)
    • Condiments:
    • 1 teaspoon honey (for a hint of natural sweetness)
    • Baking & Spices:
    • 1 tablespoon cornstarch (or arrowroot powder for a grain-free option)
    • 1/4 teaspoon cream of tartar (helps stabilize egg whites)
    • 1/2 teaspoon salt
    • Optional Toppings:
    • Sesame seeds
    • Everything bagel seasoning
    • Chia seeds
    • Cinnamon sugar (for a sweet twist)

    Step 1: Preheat Your Oven

    1. Preheat your oven to 300°F (150°C).
    2. Line a baking sheet with parchment paper or a silicone baking mat for easy cleanup.

    Step 2: Separate the Eggs

    1. Carefully separate the egg whites from the yolks.
    2. Place the whites in a large, clean mixing bowl and the yolks in a separate bowl.
    3. Pro Tip: Make sure no yolk gets into the whites to achieve perfect stiff peaks!

    Step 3: Prepare the Cottage Cheese Mixture

    1. In the bowl with the egg yolks, add:
    2. Cottage cheese
    3. Honey
    4. Cornstarch or arrowroot powder
    5. Salt
    6. Blend until smooth using a hand mixer or immersion blender for a creamy base.

    Step 4: Whip the Egg Whites

    1. Add cream of tartar to the egg whites.
    2. Beat on high speed until stiff peaks form — this will take about 3–4 minutes.

    Step 5: Fold It All Together

    1. Gently fold one-third of the whipped egg whites into the cottage cheese mixture to lighten it.
    2. Carefully fold in the remaining egg whites until fully combined. Be gentle! You want to keep the batter light and airy.

    Step 6: Shape the Cloud Bread

    1. Spoon dollops of batter onto the prepared baking sheet, forming about 6 cloud-like rounds.
    2. Use the back of the spoon to smooth the tops slightly.
    3. Optional: Sprinkle with sesame seeds or everything bagel seasoning for extra flavor.

    Step 7: Bake

    1. Bake for 25–30 minutes, or until the cloud breads are golden brown and slightly firm to the touch.

    Step 8: Cool and Enjoy!

    1. Let cool for 10 minutes on the baking sheet.
    2. Serve warm or at room temperature. Enjoy with spreads, fruit, or just as they are!

    Variations
    Want to customize your Fluffy Cottage Cheese Cloud Bread? Try these fun twists:

    1. Savory Herb Cloud Bread
    Add 1/2 teaspoon garlic powder and 1/2 teaspoon dried herbs like rosemary or thyme.

    2. Cheesy Cloud Bread
    Fold in 1/4 cup grated Parmesan cheese for extra flavor.

    3. Sweet Cloud Bread
    Add 1 teaspoon vanilla extract and a sprinkle of cinnamon sugar for a sweet treat.

    4. Seeded Cloud Bread
    Sprinkle with poppy seeds, chia seeds, or flaxseeds before baking.

    5. Spicy Kick
    Add a pinch of cayenne pepper or a sprinkle of crushed red pepper flakes.

    6. Lemon Zest
    Add 1/2 teaspoon lemon zest to brighten up the flavor!

    Storage and Reheating
    Storage:
    Store cloud bread in an airtight container in the refrigerator for up to 3 days.

    Freezing:
    Freeze cloud bread between layers of parchment paper for up to 1 month.

    Thaw at room temperature or warm in the oven.

    Reheating:
    Reheat in a toaster oven at 300°F (150°C) for 3–5 minutes to restore fluffiness.

    Pro Tip: Avoid microwaving as it can make cloud bread rubbery!

    10 Frequently Asked Questions (FAQs)
    1. Can I use low-fat cottage cheese?
    Yes, but whole milk cottage cheese adds the creamiest texture!

    2. Can I skip the cream of tartar?
    It helps stabilize the egg whites, but you can substitute with 1/2 teaspoon lemon juice.

    3. Can I make this dairy-free?
    Try dairy-free cottage cheese alternatives, but note the texture may vary.

    4. Can I use almond flour instead of cornstarch?
    Almond flour won’t provide the same structure. Stick with cornstarch or arrowroot powder.

    5. Is cloud bread keto-friendly?
    Yes! Especially if you skip the honey or use a sugar-free alternative.

    6. Can I double the recipe?
    Absolutely — double everything for a larger batch.

    7. Why did my cloud bread deflate?
    Overmixing or under-whipping the egg whites can cause deflation.

    8. What spreads go well with cloud bread?
    Try avocado, cream cheese, peanut butter, or even honey butter!

    9. Is this bread good for sandwiches?
    Yes! Use two cloud breads as a sandwich bun for a light, low-carb option.

    10. Can I make this sweet and savory?
    Yes — balance with a little honey and herbs for sweet-savory flavor.

    Conclusion
    There you have it — the perfect, fluffy, and protein-packed Cottage Cheese Cloud Bread! ☁️🍞✨

    This recipe is not only fun to make, but it’s also endlessly versatile. Whether you enjoy it sweet with fruit and honey, or savory with herbs and cheese, cloud bread is a game-changing addition to your kitchen repertoire.

    It’s light, low in carbs, and packed with protein, making it a fantastic option for anyone looking for a healthier bread alternative. Plus, it’s gluten-free and customizable — win-win!

    For more high-protein and gluten-free baking ideas, be sure to check out this Chickpea Flour Flatbread or this Protein Banana Bread.

    Happy baking! Enjoy your fluffy clouds of goodness!

  • English Muffin Breakfast Pizza – The Perfect Savory Morning Treat!

    English Muffin Breakfast Pizza – The Perfect Savory Morning Treat!

    English Muffin Breakfast Pizza – The Perfect Savory Morning Treat!

    Breakfast just got a major upgrade! 🧇🍳✨ Say hello to your new morning favorite: English Muffin Breakfast Pizza. This easy, satisfying recipe brings together all the best breakfast flavors — crispy English muffins, savory breakfast sausage, fluffy scrambled eggs, and loads of melty cheddar cheese. What makes this dish a winner is its versatility. Whether you’re hosting brunch, meal-prepping for busy weekdays, or just craving a hearty, comforting breakfast, these mini breakfast pizzas check every box. They’re quick to assemble, easy to customize, and fun to eat — perfect for kids and adults alike! And if you love creative breakfast ideas, be sure to try these Homemade Breakfast Burritos or this irresistible Avocado Toast with Egg. Let’s get cooking!

    • Meat:
    • 1 lb breakfast sausage (crumbled)
    • 1/4 cup sausage drippings (reserved from cooking sausage)
    • Refrigerated:
    • 8 large eggs
    • 2 cups milk
    • Dairy:
    • 8 oz mild cheddar cheese (shredded)
    • Baking & Spices:
    • 1/4 cup all-purpose flour
    • 1/2 teaspoon salt
    • 1/4 teaspoon black pepper
    • Bread:
    • 1 package English muffins (about 6 muffins, split in half for 12 pieces)
    • Optional toppings:
    • Fresh parsley (chopped)
    • Hot sauce
    • Green onions (sliced)
    • Crushed red pepper flakes

    Step 1: Cook the Sausage

    1. In a large skillet over medium heat, cook the breakfast sausage until browned and fully cooked, breaking it up as it cooks.
    2. Drain the sausage, reserving 1/4 cup of the drippings for the sauce.
    3. Set the cooked sausage aside.

    Step 2: Make the Sausage Gravy Sauce

    1. In the same skillet, heat the reserved sausage drippings over medium heat.
    2. Whisk in the flour, and cook for 1–2 minutes until lightly golden.
    3. Gradually whisk in the milk, stirring constantly to avoid lumps.
    4. Season with salt and pepper.
    5. Cook until the sauce thickens, about 3–5 minutes.
    6. Remove from heat and set aside.

    Step 3: Scramble the Eggs

    1. In a separate pan, scramble the eggs over low heat until just set.
    2. Season lightly with salt and pepper.
    3. Tip: Keep them soft — they’ll finish cooking in the oven!

    Step 4: Prep the English Muffins

    1. Preheat your oven to 375°F (190°C).
    2. Split the English muffins and lay them cut-side up on a baking sheet.
    3. Lightly toast them in the oven for 3–4 minutes to help prevent sogginess.

    Step 5: Assemble the Breakfast Pizzas

    1. Spread a generous spoonful of sausage gravy over each muffin half.
    2. Top with scrambled eggs, a sprinkle of cooked sausage, and a handful of shredded cheddar cheese.

    Step 6: Bake

    1. Bake in the preheated oven for 8–10 minutes, or until the cheese is melted and bubbly.

    Step 7: Garnish and Serve

    1. Remove from the oven and garnish with your favorite toppings like fresh parsley, green onions, or a drizzle of hot sauce.
    2. Serve warm and enjoy your hearty, cheesy breakfast pizzas!

    Variations
    Want to give your English Muffin Breakfast Pizza a fun twist? Try these delicious variations:

    1. Veggie Delight
    Add sautéed spinach, bell peppers, or mushrooms.

    2. Spicy Southwest
    Sprinkle with jalapeños, pepper jack cheese, and a dollop of salsa.

    3. Bacon Lover’s Version
    Swap the sausage for crispy bacon crumbles.

    4. Avocado Breakfast Pizza
    Top with fresh avocado slices after baking for creaminess.

    5. Low-Carb Version
    Use portobello mushroom caps instead of English muffins.

    6. Italian Twist
    Add Italian sausage, mozzarella, and a sprinkle of oregano.

    Storage and Reheating
    Storage:
    Store leftover breakfast pizzas in an airtight container in the refrigerator for up to 3 days.

    Freezing:
    Freeze assembled but unbaked pizzas for up to 2 months.

    Bake from frozen at 375°F for 15–18 minutes.

    Reheating:
    Reheat in the oven at 350°F for 5–7 minutes until warmed through.

    Avoid microwaving, as it can make the muffins soggy.

    Pro Tip: Reheat in an air fryer for extra crispiness!

    10 Frequently Asked Questions (FAQs)
    1. Can I make these breakfast pizzas ahead of time?
    Yes! Assemble them in advance, refrigerate, and bake when ready to serve.

    2. Can I use store-bought gravy?
    You can, but homemade sausage gravy adds much more flavor!

    3. What type of cheese works best?
    Mild cheddar melts beautifully, but feel free to use sharp cheddar, mozzarella, or a blend.

    4. Can I make these vegetarian?
    Definitely! Skip the sausage and load up with your favorite veggies.

    5. Can I freeze baked breakfast pizzas?
    Yes — wrap tightly and freeze for up to 2 months. Reheat in the oven for best results.

    6. What’s the best way to prevent soggy muffins?
    Pre-toast the English muffins before assembling to keep them crisp!

    7. Can I use bagels instead of English muffins?
    Absolutely! Bagels make a thicker, chewier base.

    8. Do I need to use breakfast sausage?
    No, you can use turkey sausage, chorizo, or even vegan sausage!

    9. Can I make these gluten-free?
    Yes! Use gluten-free English muffins and ensure your sausage and flour are gluten-free.

    10. Are these kid-friendly?
    Absolutely! Kids love the fun, mini pizza style — let them help assemble!

    Conclusion
    These English Muffin Breakfast Pizzas are everything you love about breakfast — all in one, easy-to-make package! 🍳🧀✨

    With crispy English muffins, savory sausage, creamy gravy, fluffy eggs, and melty cheddar, every bite is packed with flavor and comfort. Whether you’re hosting a brunch, looking for a fun family breakfast, or prepping meals for the week, this recipe is sure to become a go-to.

    Feel free to customize with your favorite toppings, and don’t be surprised if you find yourself making a double batch!

    For more breakfast inspiration, check out this Breakfast Casserole Recipe or these Savory Breakfast Muffins.

    Happy cooking, and enjoy every bite!

  • Butter Pecan Cookies – Buttery, Nutty, and Totally Irresistible!

    Butter Pecan Cookies – Buttery, Nutty, and Totally Irresistible!

    Butter Pecan Cookies – Buttery, Nutty, and Totally Irresistible!

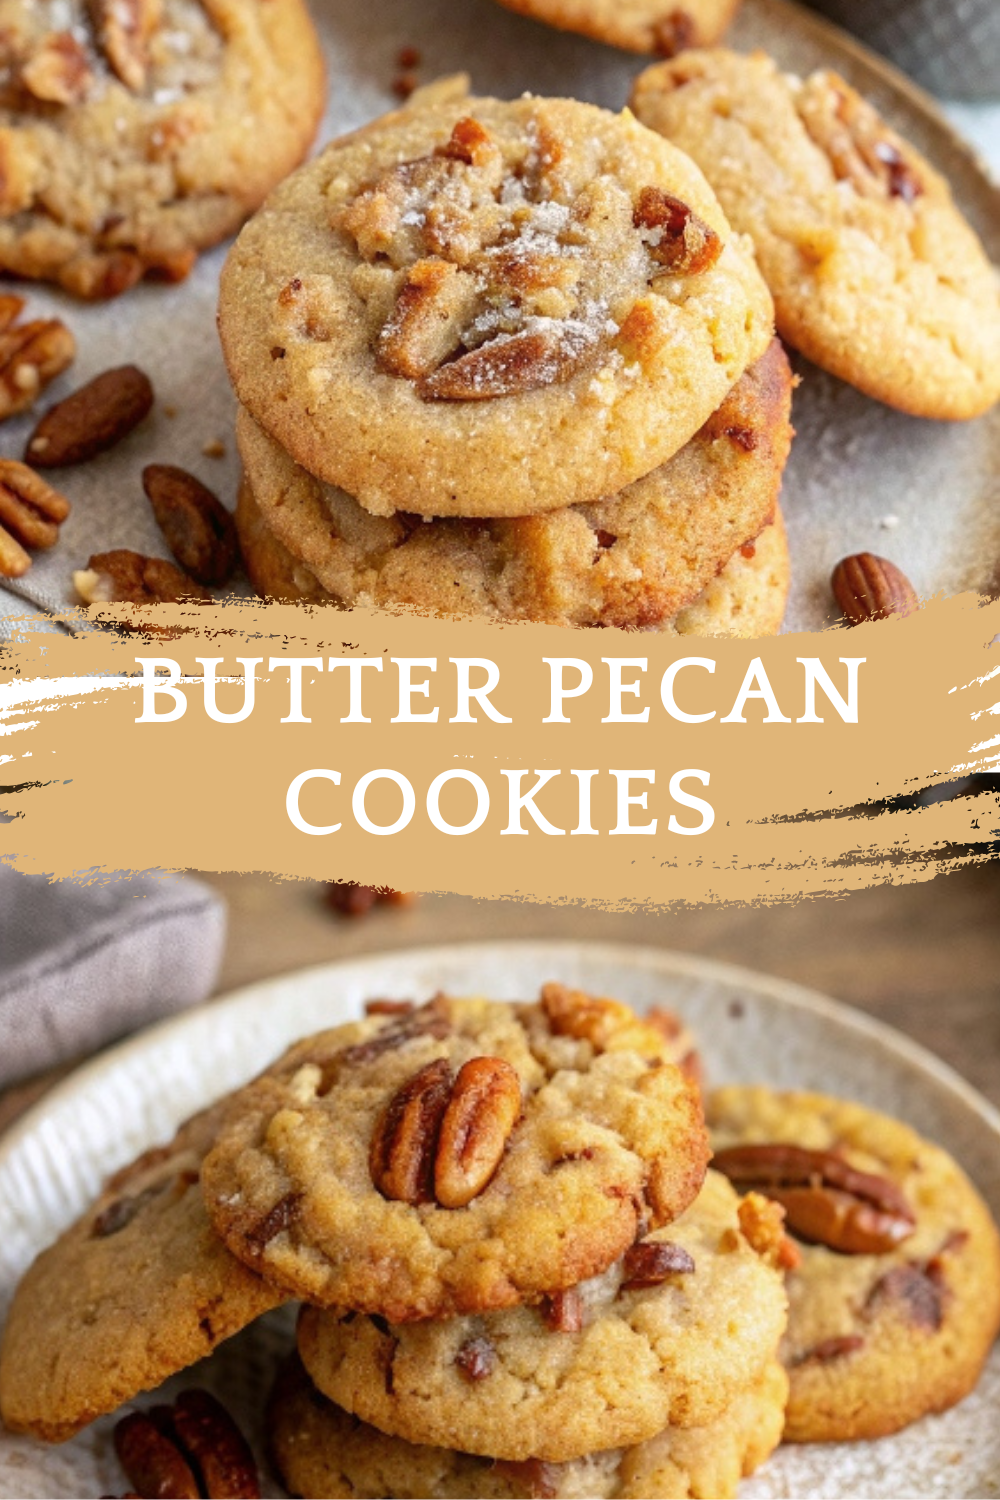
    If you’re searching for a cookie recipe that’s packed with rich, buttery flavor and perfectly toasted pecans, these Butter Pecan Cookies are exactly what you need! 🍪✨ These cookies are soft in the center, slightly crisp at the edges, and absolutely loaded with buttery goodness and nutty crunch. With caramel notes from brown sugar and the irresistible aroma of toasted pecans, every bite is a warm hug in cookie form. They’re perfect for holiday baking, cookie swaps, or anytime you want to treat yourself to something special yet simple. Bonus: they freeze beautifully, making them an excellent make-ahead option! If you love nutty, cozy desserts, you’ll also enjoy this Butter Pecan Cake or try your hand at these Pecan Sandies. Let’s get baking!

    • Nuts:
    • 1 1/2 cups pecans (chopped)
    • 2 tablespoons butter (for toasting the pecans)
    • Cookie Dough:
    • 1 cup unsalted butter (softened)
    • 3/4 cup brown sugar (packed)
    • 1/2 cup granulated sugar
    • 2 large eggs (room temperature)
    • 2 teaspoons vanilla extract
    • Dry Ingredients:
    • 2 1/4 cups all-purpose flour
    • 1 teaspoon baking soda
    • 1/2 teaspoon salt
    • 1/2 teaspoon cinnamon (optional, for a warm touch)
    • Optional Toppings:
    • Flaky sea salt (for garnish)
    • Extra pecan halves (for decoration)

    Step 1: Toast the Pecans

    1. In a skillet over medium heat, melt 2 tablespoons of butter.
    2. Add the chopped pecans and toast for 3–5 minutes, stirring frequently, until fragrant and slightly golden.
    3. Remove from heat and let cool.

    Step 2: Prepare the Dough

    1. In a large mixing bowl, cream together:
    2. Softened butter
    3. Brown sugar
    4. Granulated sugar
    5. Beat until light and fluffy, about 2–3 minutes.

    Step 3: Add Eggs and Vanilla

    1. Add eggs, one at a time, beating well after each addition.
    2. Stir in the vanilla extract.

    Step 4: Combine Dry Ingredients

    1. In a separate bowl, whisk together:
    2. Flour
    3. Baking soda
    4. Salt
    5. Cinnamon (if using)
    6. Gradually add the dry ingredients to the wet mixture, mixing until just combined.

    Step 5: Fold in Pecans

    1. Gently fold in the toasted pecans, ensuring even distribution.

    Step 6: Chill the Dough

    1. Cover the dough and refrigerate for at least 30 minutes.
    2. Tip: Chilled dough spreads less and results in thicker, chewier cookies.

    Step 7: Bake

    1. Preheat your oven to 350°F (175°C).
    2. Line a baking sheet with parchment paper.
    3. Scoop dough into 1.5 tablespoon-sized balls and place 2 inches apart on the prepared baking sheet.
    4. Optionally, press a pecan half into the top of each dough ball for decoration.
    5. Bake for 10–12 minutes, or until the edges are golden and the centers are just set.

    Step 8: Cool and Enjoy!

    1. Allow the cookies to cool on the baking sheet for 5 minutes, then transfer to a wire rack to cool completely.
    2. Sprinkle with flaky sea salt if desired, and enjoy!

    Variations
    Want to get creative with your Butter Pecan Cookies? Try these variations!

    1. Chocolate Drizzle
    Drizzle melted dark or white chocolate over cooled cookies for extra indulgence.

    2. Brown Butter Base
    Swap regular butter for brown butter to deepen the flavor profile.

    3. Add Maple
    Replace some sugar with maple syrup for a cozy maple-pecan twist.

    4. Pecan Chocolate Chip
    Fold in 1/2 cup chocolate chips for a sweet balance.

    5. Gluten-Free
    Use a 1:1 gluten-free flour blend for a gluten-free version.

    6. Extra Crunchy
    Add an extra 1/2 cup pecans for even more nutty crunch.

    Storage and Reheating
    Storage:
    Store cookies in an airtight container at room temperature for up to 5 days.

    Freezing:
    Freeze baked cookies for up to 3 months.

    Freeze cookie dough balls on a baking sheet, then transfer to a freezer bag.

    Reheating:
    Warm cookies in the microwave for 5–10 seconds to bring back that fresh-baked warmth.

    Pro Tip: Add a slice of bread to your cookie container to keep them soft longer!

    10 Frequently Asked Questions (FAQs)
    1. Can I skip toasting the pecans?
    Technically, yes — but toasting greatly enhances their flavor!

    2. Can I use salted butter?
    Yes, but reduce the added salt by half to balance the flavor.

    3. Why chill the dough?
    Chilling prevents spreading and creates thicker, chewier cookies.

    4. Can I make these dairy-free?
    Yes! Substitute butter with a dairy-free butter alternative.

    5. How do I know when the cookies are done?
    Look for golden edges and soft centers — they’ll continue setting as they cool.

    6. Can I make smaller or larger cookies?
    Yes! Adjust the baking time slightly — reduce by 2 minutes for small, add 2–3 minutes for large cookies.

    7. Can I use other nuts?
    Absolutely! Try walnuts, macadamia nuts, or almonds.

    8. Can I freeze the dough?
    Yes! Freeze dough balls and bake from frozen — just add 1–2 extra minutes to baking time.

    9. What’s the best sugar for this recipe?
    A combination of brown sugar and granulated sugar balances sweetness and moisture.

    10. Can I double the recipe?
    Definitely! This recipe doubles beautifully for larger batches.

    Conclusion
    These Butter Pecan Cookies are a little piece of heaven in every bite. 🍪✨

    Buttery, toasty, and perfectly nutty, they’re everything you love about a homemade cookie. Whether you’re baking for a party, filling your holiday cookie tin, or just treating yourself on a cozy afternoon, this recipe is guaranteed to delight.

    Don’t forget to try the variations for even more flavor twists! And if you’re a fan of cozy, comforting bakes, you’ll love these Soft Brown Sugar Cookies or this amazing Pecan Pie Bars.

    Happy baking! 🎉

  • Chocolate Brownie Cake – The Ultimate Fudgy, Chocolaty Delight!

    Chocolate Brownie Cake – The Ultimate Fudgy, Chocolaty Delight!

    Chocolate Brownie Cake – The Ultimate Fudgy, Chocolaty Delight!

    If you’ve ever been torn between baking a cake and whipping up a batch of fudgy brownies, this Chocolate Brownie Cake is the solution to your chocolate dilemma. 🍫✨ Rich like a brownie, yet soft and slightly airy like a cake, this dessert gives you the best of both worlds. Imagine biting into a dense, chewy center with crisp edges, topped with a velvety layer of melted chocolate or dusted with cocoa powder. Every slice is intensely chocolaty and irresistibly decadent! Perfect for celebrations, holidays, or just an indulgent treat, this cake comes together easily with simple pantry staples. And if you’re a chocolate lover, don’t miss this Classic Fudgy Brownies Recipe or try your hand at a show-stopping Chocolate Lava Cake. Now, let’s bake this chocolate masterpiece!

    • Dry Ingredients:
    • 1 cup all-purpose flour
    • 3/4 cup unsweetened cocoa powder
    • 1/2 teaspoon baking powder
    • 1/2 teaspoon salt
    • 1 1/2 cups granulated sugar
    • Wet Ingredients:
    • 3 large eggs
    • 3/4 cup unsalted butter (melted)
    • 2 teaspoons vanilla extract
    • Chocolate Goodness:
    • 1 cup semi-sweet chocolate chips (for folding into the batter)
    • 1/2 cup chocolate chunks or extra chips (for topping)
    • Optional (But Recommended Toppings:)
    • Powdered sugar (for dusting)
    • Chocolate ganache drizzle (melt 1/2 cup chocolate with 1/4 cup cream)
    • Chopped nuts (like walnuts or pecans)
    • Fresh berries (for garnish)

    Step 1: Prep the Oven and Pan

    1. Preheat your oven to 350°F (175°C).
    2. Grease a 9-inch round or square cake pan, or line it with parchment paper for easy removal.

    Step 2: Combine the Dry Ingredients

    1. In a medium bowl, whisk together:
    2. Flour
    3. Cocoa powder
    4. Baking powder
    5. Salt
    6. Sugar

    Step 3: Mix the Wet Ingredients

    1. In a separate large bowl, whisk:
    2. Eggs
    3. Melted butter
    4. Vanilla extract
    5. Whisk until smooth and well combined.

    Step 4: Make the Batter

    1. Gradually add the dry ingredients to the wet ingredients.
    2. Mix just until combined — avoid overmixing for the best texture.
    3. Fold in chocolate chips for extra fudginess.

    Step 5: Pour and Top

    1. Pour the batter into the prepared pan.
    2. Smooth the top with a spatula.
    3. Sprinkle with chocolate chunks or extra chips for that gooey finish.

    Step 6: Bake

    1. Bake for 30–35 minutes, or until the edges are set and a toothpick inserted into the center comes out with moist crumbs (not completely clean — we want it fudgy!).

    Step 7: Cool and Decorate

    1. Let the cake cool in the pan for 15 minutes, then transfer to a wire rack.
    2. Dust with powdered sugar, drizzle with ganache, or garnish with berries and nuts.
    3. Step 8: Slice and Enjoy!
    4. Slice into generous portions and enjoy every rich, chocolatey bite!

    Variations
    Take your Chocolate Brownie Cake to the next level with these exciting variations:

    1. Salted Caramel Swirl
    Swirl in salted caramel sauce before baking.

    2. Nutty Delight
    Fold in chopped walnuts, pecans, or hazelnuts.

    3. Mocha Brownie Cake
    Add 1 tablespoon instant espresso powder to intensify the chocolate flavor.

    4. Peppermint Chocolate
    Add 1/2 teaspoon peppermint extract for a refreshing twist.

    5. Gluten-Free Option
    Use a 1:1 gluten-free flour blend to make this recipe gluten-free.

    6. Double Chocolate Ganache
    Top with a generous layer of chocolate ganache for ultimate richness.

    Storage and Reheating
    Storage:
    Store the cooled cake in an airtight container at room temperature for up to 4 days.

    Refrigerate if you’ve added ganache or toppings with cream.

    Freezing:
    Freeze slices individually wrapped for up to 2 months.

    Thaw at room temperature before serving.

    Reheating:
    Warm slices in the microwave for 15–20 seconds for that fresh-baked gooey texture!

    Pro Tip: Serve warm with a scoop of vanilla ice cream for next-level indulgence.

    10 Frequently Asked Questions (FAQs)
    1. Can I make this cake in advance?
    Yes! Bake it a day ahead and store tightly covered at room temperature.

    2. What’s the difference between brownie cake and regular brownies?
    Brownie cake has a slightly lighter, more cake-like texture but retains that rich, fudgy chocolate flavor.

    3. Can I use dark chocolate instead of semi-sweet?
    Absolutely! Dark chocolate adds a deeper cocoa flavor.

    4. Can I use milk chocolate chips?
    Yes, but the cake will be a bit sweeter and less intense.

    5. How do I know when it’s done baking?
    The edges should be set, and a toothpick inserted should come out with moist crumbs (not wet batter).

    6. Can I make this recipe dairy-free?
    Yes! Use plant-based butter and dairy-free chocolate chips.

    7. What’s the best cocoa powder to use?
    Unsweetened cocoa powder (Dutch-processed or natural) works best for a rich chocolate flavor.

    8. Can I add frosting?
    Of course! A layer of chocolate buttercream or cream cheese frosting works beautifully.

    9. Can I bake this in a bundt pan?
    Yes, just adjust baking time to 40–45 minutes, and be sure to grease the pan well.

    10. Is this cake freezer-friendly?
    Absolutely! Freeze for up to 2 months for future cravings.

    Conclusion
    There’s nothing quite like the joy of baking a rich, fudgy Chocolate Brownie Cake. 🍫✨

    It’s decadent yet simple, with a soft, chewy crumb and pockets of melty chocolate. Whether you’re baking for a birthday, a holiday, or just because you deserve a treat, this cake is sure to become a favorite in your recipe collection.

    Enjoy it plain, dress it up with ganache, or serve it warm with ice cream for the ultimate dessert experience. However you slice it, you’re in for chocolate bliss!

    For more irresistible chocolate desserts, try this Chocolate Lava Cake or these Fudgy Double Chocolate Brownies. Happy baking!