Category: Dinner

  • Broccoli and Mushroom Stir-Fry – Quick, Spicy, and Savory Plant-Based Perfection


    Introduction
    Craving a meal that’s healthy, bold, and bursting with flavor? This Broccoli and Mushroom Stir-Fry is your go-to. Loaded with fresh veggies, spiced with dried Chinese chili peppers, and coated in a light yet savory soy-based sauce, it’s a lightning-fast dish that brings the essence of your favorite takeout right to your kitchen—without the grease or guilt.

    Perfect as a main course or side dish, this stir-fry comes together in under 20 minutes and pairs perfectly with rice, noodles, or tofu. Packed with fiber, antioxidants, and plant-based goodness, it’s a satisfying meal that won’t leave you feeling heavy.

    For more vibrant, plant-forward recipes like this, check out our full stir-fry and veggie collection at recipeservice.net, where we turn produce into craveable comfort.

    🛒 Ingredients
    🥦 Produce
    1 lb broccoli florets

    ½ lb button mushrooms, sliced

    2 green onions, sliced

    4 dried Chinese chili peppers (adjust to heat preference)

    2 cloves garlic, minced

    1 tbsp fresh ginger, minced

    🥫 Canned Goods
    2 tbsp vegetable broth

    🧂 Condiments & Spices
    1½ tbsp light soy sauce

    ½ tsp dark soy sauce

    ¼ tsp ground black pepper

    1 tbsp cornstarch

    Pinch of salt

    1 tsp sugar

    🛢 Oils & Liquids
    2½ tbsp peanut oil

    ½ tsp sesame oil

    2 tbsp water

    👨‍🍳 Directions
    🔥 Step 1: Prepare the Sauce
    In a small bowl, whisk together:

    1½ tbsp light soy sauce

    ½ tsp dark soy sauce

    1 tbsp cornstarch

    1 tsp sugar

    2 tbsp vegetable broth

    2 tbsp water

    ½ tsp sesame oil

    A pinch of salt and ¼ tsp ground black pepper

    Set aside. This sauce is the heart of the dish—umami-rich, glossy, and delicious.

    🍳 Step 2: Stir-Fry the Aromatics
    Heat 2 tbsp peanut oil in a large wok or skillet over medium-high heat.

    Add dried Chinese chili peppers, garlic, and ginger.

    Stir-fry for 30 seconds until fragrant—but don’t burn the garlic!

    🍄 Step 3: Cook the Vegetables
    Add the sliced mushrooms and stir-fry for 2–3 minutes until lightly browned.

    Toss in the broccoli florets and stir-fry for another 2 minutes.

    Pour in 2 tbsp water, cover with a lid, and let steam for 2–3 minutes until the broccoli turns bright green and slightly tender.

    🥣 Step 4: Add Sauce and Finish
    Give the sauce a quick stir and pour it into the pan.

    Stir-fry everything together for another 2–3 minutes, until the sauce thickens and coats the vegetables.

    Drizzle with the remaining ½ tbsp peanut oil and toss in the green onions.

    Remove from heat and serve hot.

    🍽️ Servings and Timing
    Servings: 3–4 as a main, 4–6 as a side

    Prep Time: 10 minutes

    Cook Time: 8–10 minutes

    Total Time: ~20 minutes

    🍴 Serving Suggestions
    Serve over steamed jasmine or brown rice

    Pair with rice noodles or soba

    Add a fried or poached egg for protein

    Sprinkle with toasted sesame seeds or crushed peanuts for crunch

    🧑‍🍳 Variations
    Mild Version: Skip or reduce the dried chili peppers.

    Protein Boost: Add tofu, tempeh, or thin slices of beef, chicken, or shrimp.

    Saucy Stir-Fry: Double the sauce and serve it bowl-style.

    More Veggies: Add bell peppers, snap peas, or shredded carrots.

    Gluten-Free: Use tamari instead of soy sauce.

    🧊 Storage & Reheating
    Refrigerator:
    Store leftovers in an airtight container for up to 3 days.

    Freezer:
    Best eaten fresh. Freezing is not ideal due to broccoli’s texture after thawing.

    Reheating:
    Reheat in a skillet over medium heat until warmed through.

    Add a splash of broth or water if the sauce thickens too much.

    ❓ 10 Frequently Asked Questions (FAQs)

    1. What’s the difference between light and dark soy sauce?
      Light soy sauce is saltier and used for seasoning. Dark soy sauce is thicker and adds color and depth.
    2. Can I use other mushrooms?
      Yes—shiitake, cremini, or oyster mushrooms work great.
    3. What can I use instead of peanut oil?
      Any neutral high-heat oil like canola or avocado oil works. But peanut oil gives a traditional flavor.
    4. Is this dish spicy?
      Yes, slightly—but you can control the heat by adjusting or omitting chili peppers.
    5. Can I add meat to this dish?
      Absolutely! Add cooked chicken, beef, or tofu after the veggies are stir-fried.
    6. Can I use frozen broccoli?
      Yes, but thaw and drain it well to avoid sogginess.
    7. Why is my sauce too thick or too thin?
      Cornstarch thickens quickly. Adjust with a splash of water or broth if it gets too thick.
    8. Can I prep this ahead?
      Yes! Chop veggies and mix the sauce up to a day in advance.
    9. Is this dish vegan?
      Yes, as written, it’s 100% plant-based.
    10. What’s the best pan for stir-frying?
      A wok is traditional, but a large nonstick or cast-iron skillet works just fine.

    📝 Conclusion
    This Broccoli and Mushroom Stir-Fry is proof that plant-based eating doesn’t have to be boring. It’s fast, flavorful, and full of satisfying texture, from the crunch of fresh broccoli to the meaty bite of sautéed mushrooms. The soy-ginger-garlic sauce brings it all together with bold, takeout-inspired flavor.

    Whether you’re looking for a quick weeknight dinner or a meatless main to add to your rotation, this stir-fry delivers comfort, color, and crave-worthiness in every bite.

    For more vegetable-forward meals and one-pan wonders, head over to recipeservice.net and dig into healthy dishes that actually satisfy.

    Broccoli and Mushroom Stir-Fry – Quick, Spicy, and Savory Plant-Based Perfection

    Craving a meal that’s healthy, bold, and bursting with flavor? This Broccoli and Mushroom Stir-Fry is your go-to. Loaded with fresh veggies, spiced with dried Chinese chili peppers, and coated in a light yet savory soy-based sauce, it’s a lightning-fast dish that brings the essence of your favorite takeout right to your kitchen—without the grease or guilt. Perfect as a main course or side dish, this stir-fry comes together in under 20 minutes and pairs perfectly with rice, noodles, or tofu. Packed with fiber, antioxidants, and plant-based goodness, it’s a satisfying meal that won’t leave you feeling heavy. For more vibrant, plant-forward recipes like this, check out our full stir-fry and veggie collection at recipeservice.net, where we turn produce into craveable comfort.

    🥦 Produce

    • 1 lb broccoli florets
    • ½ lb button mushrooms (sliced)
    • 2 green onions (sliced)
    • 4 dried Chinese chili peppers (adjust to heat preference)
    • 2 cloves garlic (minced)
    • 1 tbsp fresh ginger (minced)

    🥫 Canned Goods

    • 2 tbsp vegetable broth

    🧂 Condiments & Spices

    • 1½ tbsp light soy sauce
    • ½ tsp dark soy sauce
    • ¼ tsp ground black pepper
    • 1 tbsp cornstarch
    • Pinch of salt
    • 1 tsp sugar

    🛢 Oils & Liquids

    • 2½ tbsp peanut oil
    • ½ tsp sesame oil
    • 2 tbsp water

    🔥 Step 1: Prepare the Sauce

    1. In a small bowl, whisk together:
    2. 1½ tbsp light soy sauce
    3. ½ tsp dark soy sauce
    4. 1 tbsp cornstarch
    5. 1 tsp sugar
    6. 2 tbsp vegetable broth
    7. 2 tbsp water
    8. ½ tsp sesame oil
    9. A pinch of salt and ¼ tsp ground black pepper
    10. Set aside. This sauce is the heart of the dish—umami-rich, glossy, and delicious.

    🍳 Step 2: Stir-Fry the Aromatics

    1. Heat 2 tbsp peanut oil in a large wok or skillet over medium-high heat.
    2. Add dried Chinese chili peppers, garlic, and ginger.
    3. Stir-fry for 30 seconds until fragrant—but don’t burn the garlic!

    🍄 Step 3: Cook the Vegetables

    1. Add the sliced mushrooms and stir-fry for 2–3 minutes until lightly browned.
    2. Toss in the broccoli florets and stir-fry for another 2 minutes.
    3. Pour in 2 tbsp water, cover with a lid, and let steam for 2–3 minutes until the broccoli turns bright green and slightly tender.

    🥣 Step 4: Add Sauce and Finish

    1. Give the sauce a quick stir and pour it into the pan.
    2. Stir-fry everything together for another 2–3 minutes, until the sauce thickens and coats the vegetables.
    3. Drizzle with the remaining ½ tbsp peanut oil and toss in the green onions.
    4. Remove from heat and serve hot.

    🍴 Serving Suggestions
    Serve over steamed jasmine or brown rice

    Pair with rice noodles or soba

    Add a fried or poached egg for protein

    Sprinkle with toasted sesame seeds or crushed peanuts for crunch

    🧑‍🍳 Variations
    Mild Version: Skip or reduce the dried chili peppers.

    Protein Boost: Add tofu, tempeh, or thin slices of beef, chicken, or shrimp.

    Saucy Stir-Fry: Double the sauce and serve it bowl-style.

    More Veggies: Add bell peppers, snap peas, or shredded carrots.

    Gluten-Free: Use tamari instead of soy sauce.

    🧊 Storage & Reheating
    Refrigerator:
    Store leftovers in an airtight container for up to 3 days.

    Freezer:
    Best eaten fresh. Freezing is not ideal due to broccoli’s texture after thawing.

    Reheating:
    Reheat in a skillet over medium heat until warmed through.

    Add a splash of broth or water if the sauce thickens too much.

    ❓ 10 Frequently Asked Questions (FAQs)
    1. What’s the difference between light and dark soy sauce?
    Light soy sauce is saltier and used for seasoning. Dark soy sauce is thicker and adds color and depth.

    2. Can I use other mushrooms?
    Yes—shiitake, cremini, or oyster mushrooms work great.

    3. What can I use instead of peanut oil?
    Any neutral high-heat oil like canola or avocado oil works. But peanut oil gives a traditional flavor.

    4. Is this dish spicy?
    Yes, slightly—but you can control the heat by adjusting or omitting chili peppers.

    5. Can I add meat to this dish?
    Absolutely! Add cooked chicken, beef, or tofu after the veggies are stir-fried.

    6. Can I use frozen broccoli?
    Yes, but thaw and drain it well to avoid sogginess.

    7. Why is my sauce too thick or too thin?
    Cornstarch thickens quickly. Adjust with a splash of water or broth if it gets too thick.

    8. Can I prep this ahead?
    Yes! Chop veggies and mix the sauce up to a day in advance.

    9. Is this dish vegan?
    Yes, as written, it’s 100% plant-based.

    10. What’s the best pan for stir-frying?
    A wok is traditional, but a large nonstick or cast-iron skillet works just fine.

    📝 Conclusion
    This Broccoli and Mushroom Stir-Fry is proof that plant-based eating doesn’t have to be boring. It’s fast, flavorful, and full of satisfying texture, from the crunch of fresh broccoli to the meaty bite of sautéed mushrooms. The soy-ginger-garlic sauce brings it all together with bold, takeout-inspired flavor.

    Whether you’re looking for a quick weeknight dinner or a meatless main to add to your rotation, this stir-fry delivers comfort, color, and crave-worthiness in every bite.

    For more vegetable-forward meals and one-pan wonders, head over to recipeservice.net and dig into healthy dishes that actually satisfy.

  • Cucumber Avocado Salad – Fresh, Creamy, and Perfectly Crunchy

    Introduction

    When the weather warms up or you’re craving something light, refreshing, and nutrient-packed, few dishes hit the spot like a Cucumber Avocado Salad. This vibrant salad is the ultimate combination of crisp, creamy, and tangy—featuring crunchy cucumbers, buttery avocado, fresh herbs, and a zesty citrus dressing that ties it all together.

    Not only is this salad quick and easy to make (hello, 10-minute prep time!), it’s also gluten-free, dairy-free, low-carb, and bursting with healthy fats and hydration. Whether you serve it as a side at a BBQ, bring it to a potluck, or top it with grilled chicken or shrimp for a complete meal, this salad adapts beautifully to any table.

    For more healthy, vibrant, and easy salads, visit us at recipeservice.net and find your next favorite side or light meal.


    🛒 Ingredients

    🥒 Produce

    • 1 large English cucumber, thinly sliced
    • 2 ripe avocados, cubed
    • ¼ red onion, thinly sliced
    • ¼ cup fresh cilantro or parsley, chopped
    • 1 clove garlic, minced
    • Juice of 1 lime
    • Optional: 1 small jalapeño, thinly sliced (for a spicy kick)

    🧂 Pantry & Spices

    • 1–2 tbsp olive oil
    • Salt and freshly ground black pepper, to taste
    • Optional: ½ tsp crushed red pepper flakes or chili flakes
    • Optional: 1 tsp sesame seeds or everything bagel seasoning for garnish

    👨‍🍳 Directions

    🔪 Step 1: Prep Your Ingredients

    1. Wash and dry your cucumber and avocado.
    2. Thinly slice the cucumber. If using a regular cucumber, peel and seed first.
    3. Dice the avocados into bite-sized chunks.
    4. Thinly slice red onion and optional jalapeño.
    5. Chop the fresh cilantro or parsley.
    6. Mince the garlic.

    🥗 Step 2: Make the Dressing

    In a small bowl or jar, whisk together:

    • Juice of 1 lime
    • 1–2 tbsp olive oil
    • Minced garlic
    • Salt and pepper to taste

    Taste and adjust seasoning or acidity to your liking.


    🥒 Step 3: Assemble the Salad

    1. In a large salad bowl, combine:
      • Sliced cucumber
      • Red onion
      • Cubed avocado
      • Fresh herbs
      • Optional jalapeño
    2. Pour the dressing over the top and gently toss to coat everything evenly. Be careful not to mash the avocado.
    3. Finish with a sprinkle of sesame seeds or red pepper flakes if desired.

    🍽️ Servings and Timing

    • Servings: 4
    • Prep Time: 10 minutes
    • Total Time: 10 minutes

    🍴 Serving Suggestions

    • Serve chilled or room temperature.
    • Top with grilled shrimp, chicken, or salmon for a full meal.
    • Pair with pita chips or crusty bread for dipping.
    • Perfect side for BBQ, tacos, or any summer spread.

    🧑‍🍳 Variations

    • Mediterranean Style: Add crumbled feta cheese, kalamata olives, and cherry tomatoes.
    • Asian-Inspired: Use rice vinegar, soy sauce, and toasted sesame oil instead of lime and olive oil.
    • Creamy Twist: Mix in a spoonful of Greek yogurt or sour cream for a creamy lime dressing.
    • Add Protein: Chickpeas, edamame, or grilled tofu make great additions.
    • Crunch Factor: Add sunflower seeds, sliced almonds, or pepitas for texture.

    ❄️ Storage & Make-Ahead Tips

    Short-Term Storage:

    • Best served fresh.
    • Store leftovers in an airtight container in the fridge for up to 1 day. The avocado may brown slightly but will still taste great.

    Make-Ahead Tips:

    • Slice cucumber, onion, herbs, and mix the dressing up to 1 day in advance.
    • Add avocado and dress the salad right before serving to keep it fresh and green.

    ❓ 10 Frequently Asked Questions (FAQs)

    1. Can I use a regular cucumber?

    Yes, just peel and seed it first for best texture.

    2. What if I don’t like cilantro?

    Swap it for fresh parsley, dill, or basil.

    3. Can I make this ahead of time?

    You can prep components ahead, but mix and add avocado right before serving to prevent browning.

    4. Is this recipe vegan and gluten-free?

    Yes, it’s naturally both!

    5. How do I keep the avocado from turning brown?

    Toss it in lime juice as soon as you cut it to slow oxidation.

    6. Can I add tomatoes?

    Absolutely—grape or cherry tomatoes work best for minimal mess.

    7. What can I serve this with?

    Great with grilled meats, seafood, tacos, burgers, or grain bowls.

    8. Can I double the recipe?

    Yes, just be sure to add avocado right before serving for the freshest flavor and texture.

    9. Can I add cheese?

    Sure! Crumbled feta, cotija, or goat cheese are delicious additions.

    10. What can I use instead of lime juice?

    Fresh lemon juice or a splash of white wine vinegar works as a substitute.


    📝 Conclusion

    This Cucumber Avocado Salad is everything a quick salad should be: fresh, flavorful, fast, and flexible. With minimal prep and max nutrition, it’s perfect for busy days, summer meals, or when you just want something light and wholesome. The mix of creamy avocado, hydrating cucumber, and zesty lime dressing is simple but unforgettable.

    Find more refreshing salads, quick lunches, and healthy recipes at recipeservice.net — and don’t forget to share your creations with us!

    Cucumber Avocado Salad – Fresh, Creamy, and Perfectly Crunchy

    When the weather warms up or you’re craving something light, refreshing, and nutrient-packed, few dishes hit the spot like a Cucumber Avocado Salad. This vibrant salad is the ultimate combination of crisp, creamy, and tangy—featuring crunchy cucumbers, buttery avocado, fresh herbs, and a zesty citrus dressing that ties it all together. Not only is this salad quick and easy to make (hello, 10-minute prep time!), it’s also gluten-free, dairy-free, low-carb, and bursting with healthy fats and hydration. Whether you serve it as a side at a BBQ, bring it to a potluck, or top it with grilled chicken or shrimp for a complete meal, this salad adapts beautifully to any table. For more healthy, vibrant, and easy salads, visit us at recipeservice.net and find your next favorite side or light meal.

    🥒 Produce

    • 1 large English cucumber (thinly sliced)
    • 2 ripe avocados (cubed)
    • ¼ red onion (thinly sliced)
    • ¼ cup fresh cilantro or parsley (chopped)
    • 1 clove garlic (minced)
    • Juice of 1 lime
    • Optional: 1 small jalapeño (thinly sliced (for a spicy kick))

    🧂 Pantry & Spices

    • 1 –2 tbsp olive oil
    • Salt and freshly ground black pepper (to taste)
    • Optional: ½ tsp crushed red pepper flakes or chili flakes
    • Optional: 1 tsp sesame seeds or everything bagel seasoning for garnish

    🔪 Step 1: Prep Your Ingredients

    1. Wash and dry your cucumber and avocado.
    2. Thinly slice the cucumber. If using a regular cucumber, peel and seed first.
    3. Dice the avocados into bite-sized chunks.
    4. Thinly slice red onion and optional jalapeño.
    5. Chop the fresh cilantro or parsley.
    6. Mince the garlic.

    🥗 Step 2: Make the Dressing

    1. In a small bowl or jar, whisk together:
    2. Juice of 1 lime
    3. 1–2 tbsp olive oil
    4. Minced garlic
    5. Salt and pepper to taste
    6. Taste and adjust seasoning or acidity to your liking.

    🥒 Step 3: Assemble the Salad

    1. In a large salad bowl, combine:
    2. Sliced cucumber
    3. Red onion
    4. Cubed avocado
    5. Fresh herbs

    Optional jalapeño

    1. Pour the dressing over the top and gently toss to coat everything evenly. Be careful not to mash the avocado.
    2. Finish with a sprinkle of sesame seeds or red pepper flakes if desired.

    🍴 Serving Suggestions
    Serve chilled or room temperature.

    Top with grilled shrimp, chicken, or salmon for a full meal.

    Pair with pita chips or crusty bread for dipping.

    Perfect side for BBQ, tacos, or any summer spread.

    🧑‍🍳 Variations
    Mediterranean Style: Add crumbled feta cheese, kalamata olives, and cherry tomatoes.

    Asian-Inspired: Use rice vinegar, soy sauce, and toasted sesame oil instead of lime and olive oil.

    Creamy Twist: Mix in a spoonful of Greek yogurt or sour cream for a creamy lime dressing.

    Add Protein: Chickpeas, edamame, or grilled tofu make great additions.

    Crunch Factor: Add sunflower seeds, sliced almonds, or pepitas for texture.

    ❄️ Storage & Make-Ahead Tips
    Short-Term Storage:
    Best served fresh.

    Store leftovers in an airtight container in the fridge for up to 1 day. The avocado may brown slightly but will still taste great.

    Make-Ahead Tips:
    Slice cucumber, onion, herbs, and mix the dressing up to 1 day in advance.

    Add avocado and dress the salad right before serving to keep it fresh and green.

    ❓ 10 Frequently Asked Questions (FAQs)
    1. Can I use a regular cucumber?
    Yes, just peel and seed it first for best texture.

    2. What if I don’t like cilantro?
    Swap it for fresh parsley, dill, or basil.

    3. Can I make this ahead of time?
    You can prep components ahead, but mix and add avocado right before serving to prevent browning.

    4. Is this recipe vegan and gluten-free?
    Yes, it’s naturally both!

    5. How do I keep the avocado from turning brown?
    Toss it in lime juice as soon as you cut it to slow oxidation.

    6. Can I add tomatoes?
    Absolutely—grape or cherry tomatoes work best for minimal mess.

    7. What can I serve this with?
    Great with grilled meats, seafood, tacos, burgers, or grain bowls.

    8. Can I double the recipe?
    Yes, just be sure to add avocado right before serving for the freshest flavor and texture.

    9. Can I add cheese?
    Sure! Crumbled feta, cotija, or goat cheese are delicious additions.

    10. What can I use instead of lime juice?
    Fresh lemon juice or a splash of white wine vinegar works as a substitute.

    📝 Conclusion
    This Cucumber Avocado Salad is everything a quick salad should be: fresh, flavorful, fast, and flexible. With minimal prep and max nutrition, it’s perfect for busy days, summer meals, or when you just want something light and wholesome. The mix of creamy avocado, hydrating cucumber, and zesty lime dressing is simple but unforgettable.

    Find more refreshing salads, quick lunches, and healthy recipes at recipeservice.net — and don’t forget to share your creations with us!

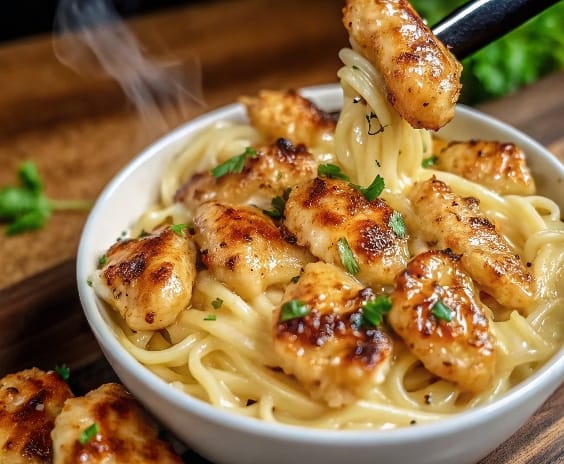
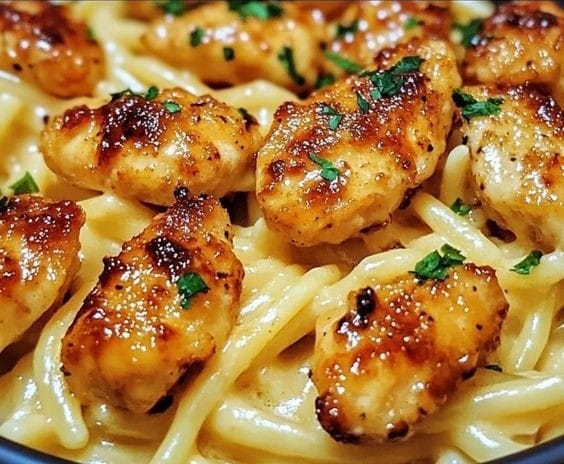
  • Garlic Butter Chicken Bites with Savory Creamy Parmesan Pasta – The Ultimate One-Pan Comfort Meal


    Introduction
    If you’re on the hunt for a dish that’s indulgent, easy to prepare, and downright irresistible, look no further than Garlic Butter Chicken Bites with Savory Creamy Parmesan Pasta. This dish is everything a comforting meal should be: buttery, garlicky chicken bites perfectly seared to golden perfection and tossed with a creamy, cheesy pasta that clings to every bite.

    Perfect for weeknight dinners, date nights, or family meals, this one-pan wonder delivers gourmet taste with pantry-friendly ingredients. The balance of garlic, herbs, and cheese in a rich cream sauce turns ordinary pasta into a crave-worthy main course.

    Want to learn how to make your cream-based sauces restaurant-worthy? Check out this creamy sauce guide from Bon Appétit for professional tips.

    🛒 Ingredients
    🍗 For the Chicken Bites:
    1 lb boneless skinless chicken breast or thighs, cut into bite-sized cubes

    1 tsp paprika

    ½ tsp garlic powder

    Salt and black pepper, to taste

    2 tbsp olive oil

    2 tbsp fresh parsley (chopped for garnish)

    🧄 For the Garlic Butter Sauce:
    5 cloves garlic, finely minced

    4 tbsp unsalted butter

    ½ tsp Italian seasoning

    🍝 For the Creamy Parmesan Pasta:
    8 oz pasta (penne, fettuccine, or linguine recommended)

    1½ cups heavy cream

    ½ cup grated Parmesan cheese

    Salt and black pepper, to taste

    👨‍🍳 Directions
    🔪 Step 1: Cook the Pasta
    In a large pot of salted boiling water, cook pasta according to package instructions until al dente.

    Reserve ½ cup of pasta water, then drain and set aside.

    🍗 Step 2: Prepare the Chicken
    Toss chicken pieces in a bowl with paprika, garlic powder, salt, and black pepper.

    Heat 2 tbsp olive oil in a large skillet over medium-high heat.

    Add chicken and sear for 3–4 minutes per side, or until golden and fully cooked.

    Transfer cooked chicken to a plate and set aside.

    🧄 Step 3: Make the Garlic Butter Sauce
    In the same skillet, reduce heat to medium and add 4 tbsp butter.

    Once melted, stir in the minced garlic and cook for 30–60 seconds until fragrant (don’t let it brown).

    Add ½ tsp Italian seasoning and stir well.

    🧀 Step 4: Make the Creamy Parmesan Sauce
    Pour in the 1½ cups heavy cream and bring to a low simmer.

    Stir in the Parmesan cheese and whisk until fully melted and smooth.

    Add salt and pepper to taste.

    If the sauce is too thick, stir in a few tablespoons of the reserved pasta water.

    🍽 Step 5: Combine and Serve
    Return the cooked chicken and pasta to the skillet.

    Toss everything together until evenly coated in the sauce.

    Garnish with fresh parsley and extra grated Parmesan, if desired.

    🍽️ Servings and Timing
    Servings: 4

    Prep Time: 10 minutes

    Cook Time: 20 minutes

    Total Time: 30 minutes

    🥗 Serving Suggestions
    Pair with a crisp Caesar salad or steamed garlic broccoli.

    Add a slice of warm, crusty bread to mop up every bit of sauce.

    Serve with a glass of chardonnay or sparkling water with lemon.

    🧑‍🍳 Variations
    Spicy Kick: Add red pepper flakes to the garlic butter sauce.

    Veggie-Loaded: Toss in sautéed mushrooms, spinach, or cherry tomatoes.

    Protein Switch: Use shrimp or sliced sausage instead of chicken.

    Low-Carb Option: Serve over zucchini noodles or cauliflower rice.

    🧊 Storage & Reheating
    Refrigerator:
    Store in an airtight container for up to 3–4 days.

    Freezer:
    Freezing is not recommended for cream sauces, as they can separate.

    Reheating:
    Reheat gently in a skillet with a splash of cream or milk to loosen the sauce.

    Microwave in short bursts, stirring between rounds.

    ❓ 10 Frequently Asked Questions (FAQs)

    1. Can I use milk instead of heavy cream?
      You can use whole milk, but the sauce will be thinner. Add a bit of flour or cornstarch to thicken if needed.
    2. What pasta shape works best?
      Short pasta like penne or rigatoni holds the sauce well, but fettuccine and linguine are also great.
    3. Can I use pre-grated Parmesan?
      For best results, use freshly grated Parmesan. Pre-grated can cause clumps or a gritty texture.
    4. Can I prep this in advance?
      Yes! You can cook the chicken and pasta ahead of time. Reheat with the sauce before serving.
    5. Is this dish spicy?
      Not at all. But you can add spice with chili flakes or a dash of hot sauce.
    6. Can I make this gluten-free?
      Absolutely—just use your favorite gluten-free pasta.
    7. Can I double the recipe?
      Yes! Use a larger skillet or cook in batches to avoid overcrowding.
    8. What herbs can I use instead of Italian seasoning?
      Try a blend of basil, oregano, thyme, and parsley.
    9. Will the sauce thicken as it sits?
      Yes. Reheat gently with a splash of cream or pasta water to loosen it.
    10. Can I use leftover chicken?
      Totally! Just skip the searing step and warm the chicken in the garlic butter before combining.

    📝 Conclusion
    This Garlic Butter Chicken Bites with Creamy Parmesan Pasta recipe is a weeknight hero—easy to make, rich in flavor, and comforting in all the right ways. It combines the savoriness of seared chicken with a luxuriously creamy, cheesy pasta sauce that clings to every bite.

    It’s one of those recipes you’ll make again and again, whether you’re feeding picky eaters, impressing guests, or just treating yourself to a little weeknight indulgence. The best part? It’s all done in one pan, making cleanup as easy as the cooking.

    Want more pasta night inspiration? Explore creamy chicken pasta recipes from Delish for more craveable ideas.

    Garlic Butter Chicken Bites with Savory Creamy Parmesan Pasta – The Ultimate One-Pan Comfort Meal

    If you’re on the hunt for a dish that’s indulgent, easy to prepare, and downright irresistible, look no further than Garlic Butter Chicken Bites with Savory Creamy Parmesan Pasta. This dish is everything a comforting meal should be: buttery, garlicky chicken bites perfectly seared to golden perfection and tossed with a creamy, cheesy pasta that clings to every bite. Perfect for weeknight dinners, date nights, or family meals, this one-pan wonder delivers gourmet taste with pantry-friendly ingredients. The balance of garlic, herbs, and cheese in a rich cream sauce turns ordinary pasta into a crave-worthy main course. Want to learn how to make your cream-based sauces restaurant-worthy? Check out this creamy sauce guide from Bon Appétit for professional tips.

    🍗 For the Chicken Bites:

    • 1 lb boneless skinless chicken breast or thighs (cut into bite-sized cubes)
    • 1 tsp paprika
    • ½ tsp garlic powder
    • Salt and black pepper (to taste)
    • 2 tbsp olive oil
    • 2 tbsp fresh parsley (chopped for garnish)

    🧄 For the Garlic Butter Sauce:

    • 5 cloves garlic (finely minced)
    • 4 tbsp unsalted butter
    • ½ tsp Italian seasoning

    🍝 For the Creamy Parmesan Pasta:

    • 8 oz pasta (penne, fettuccine, or linguine recommended)
    • 1½ cups heavy cream
    • ½ cup grated Parmesan cheese
    • Salt and black pepper (to taste)

    🔪 Step 1: Cook the Pasta

    1. In a large pot of salted boiling water, cook pasta according to package instructions until al dente.
    2. Reserve ½ cup of pasta water, then drain and set aside.

    🍗 Step 2: Prepare the Chicken

    1. Toss chicken pieces in a bowl with paprika, garlic powder, salt, and black pepper.
    2. Heat 2 tbsp olive oil in a large skillet over medium-high heat.
    3. Add chicken and sear for 3–4 minutes per side, or until golden and fully cooked.
    4. Transfer cooked chicken to a plate and set aside.

    🧄 Step 3: Make the Garlic Butter Sauce

    1. In the same skillet, reduce heat to medium and add 4 tbsp butter.
    2. Once melted, stir in the minced garlic and cook for 30–60 seconds until fragrant (don’t let it brown).
    3. Add ½ tsp Italian seasoning and stir well.

    🧀 Step 4: Make the Creamy Parmesan Sauce

    1. Pour in the 1½ cups heavy cream and bring to a low simmer.
    2. Stir in the Parmesan cheese and whisk until fully melted and smooth.
    3. Add salt and pepper to taste.
    4. If the sauce is too thick, stir in a few tablespoons of the reserved pasta water.

    🍽 Step 5: Combine and Serve

    1. Return the cooked chicken and pasta to the skillet.
    2. Toss everything together until evenly coated in the sauce.
    3. Garnish with fresh parsley and extra grated Parmesan, if desired.

    🧑‍🍳 Variations
    Spicy Kick: Add red pepper flakes to the garlic butter sauce.

    Veggie-Loaded: Toss in sautéed mushrooms, spinach, or cherry tomatoes.

    Protein Switch: Use shrimp or sliced sausage instead of chicken.

    Low-Carb Option: Serve over zucchini noodles or cauliflower rice.

    🧊 Storage & Reheating
    Refrigerator:
    Store in an airtight container for up to 3–4 days.

    Freezer:
    Freezing is not recommended for cream sauces, as they can separate.

    Reheating:
    Reheat gently in a skillet with a splash of cream or milk to loosen the sauce.

    Microwave in short bursts, stirring between rounds.

    ❓ 10 Frequently Asked Questions (FAQs)
    1. Can I use milk instead of heavy cream?
    You can use whole milk, but the sauce will be thinner. Add a bit of flour or cornstarch to thicken if needed.

    2. What pasta shape works best?
    Short pasta like penne or rigatoni holds the sauce well, but fettuccine and linguine are also great.

    3. Can I use pre-grated Parmesan?
    For best results, use freshly grated Parmesan. Pre-grated can cause clumps or a gritty texture.

    4. Can I prep this in advance?
    Yes! You can cook the chicken and pasta ahead of time. Reheat with the sauce before serving.

    5. Is this dish spicy?
    Not at all. But you can add spice with chili flakes or a dash of hot sauce.

    6. Can I make this gluten-free?
    Absolutely—just use your favorite gluten-free pasta.

    7. Can I double the recipe?
    Yes! Use a larger skillet or cook in batches to avoid overcrowding.

    8. What herbs can I use instead of Italian seasoning?
    Try a blend of basil, oregano, thyme, and parsley.

    9. Will the sauce thicken as it sits?
    Yes. Reheat gently with a splash of cream or pasta water to loosen it.

    10. Can I use leftover chicken?
    Totally! Just skip the searing step and warm the chicken in the garlic butter before combining.

    📝 Conclusion
    This Garlic Butter Chicken Bites with Creamy Parmesan Pasta recipe is a weeknight hero—easy to make, rich in flavor, and comforting in all the right ways. It combines the savoriness of seared chicken with a luxuriously creamy, cheesy pasta sauce that clings to every bite.

    It’s one of those recipes you’ll make again and again, whether you’re feeding picky eaters, impressing guests, or just treating yourself to a little weeknight indulgence. The best part? It’s all done in one pan, making cleanup as easy as the cooking.

    Want more pasta night inspiration? Explore creamy chicken pasta recipes from Delish for more craveable ideas.

  • Dutch Oven Braised Beef Short Ribs (No Wine) – Ultimate Comfort Food Recipe

    Introduction

    If you’re craving a deeply savory, slow-cooked meal but prefer to avoid alcohol, this Dutch Oven Braised Beef Short Ribs (No Wine) recipe is your answer. These bone-in beef short ribs are seared until golden brown and then gently braised in a rich blend of beef broth, tomato paste, and herbs. The result? Fall-off-the-bone tenderness with a flavorful, velvety sauce that tastes like it’s been simmering all day.

    Even without wine, this recipe delivers all the richness and complexity you expect from a braised dish. Using ingredients like tomato paste, garlic, and aromatic vegetables adds layers of flavor that develop beautifully in a Dutch oven. Perfect for a cozy family dinner, holiday feast, or elegant dinner party, this dish is a guaranteed crowd-pleaser.

    Need proof that wine isn’t necessary for depth of flavor? Try this once, and you’ll understand why it’s earned a spot in many home cooks’ regular rotation. For more on cooking with or without alcohol, check this culinary guide to alcohol substitutes in recipes.


    Ingredients

    🥩 Meat

    • 3 lbs bone-in beef short ribs

    🥕 Produce

    • 1 large onion, chopped
    • 2 carrots, peeled and chopped
    • 2 celery stalks, chopped
    • 3 garlic cloves, minced
    • 2 bay leaves
    • 1 sprig fresh thyme
    • 1 sprig fresh oregano

    🥫 Canned Goods

    • 2 tablespoons tomato paste
    • 3 cups beef broth (low sodium)

    🧂 Baking & Spices

    • Salt and freshly ground black pepper, to taste

    🛢️ Oils & Vinegars

    • 2 tablespoons olive oil
    • 1 tablespoon balsamic vinegar (for depth, replaces acidity wine would add)

    Directions

    🔪 Step 1: Prepare the Short Ribs

    1. Pat the short ribs dry with paper towels.
    2. Season liberally with salt and pepper on all sides.

    🔥 Step 2: Sear the Meat

    1. Heat olive oil in a Dutch oven over medium-high heat.
    2. In batches, brown the short ribs on all sides (about 3–4 minutes per side).
    3. Transfer to a plate once seared and browned.

    🧅 Step 3: Sauté the Aromatics

    1. In the same pot, add onion, carrots, and celery.
    2. Cook for 6–8 minutes, stirring occasionally, until softened and lightly browned.
    3. Stir in minced garlic and cook for 1–2 minutes until fragrant.
    4. Add the tomato paste and cook for another 2 minutes to caramelize slightly.

    🍲 Step 4: Add Broth & Herbs

    1. Add the balsamic vinegar and stir to deglaze the pan.
    2. Pour in beef broth and stir well to combine.
    3. Return the short ribs to the pot, ensuring they are mostly submerged.
    4. Add bay leaves, thyme, and oregano.

    🕒 Step 5: Slow Braise in Oven

    1. Preheat oven to 325°F (163°C).
    2. Cover Dutch oven with a tight-fitting lid.
    3. Braise in the oven for 2½ to 3 hours, or until the meat is tender and falls off the bone.

    🍛 Step 6: Final Touches

    1. Carefully remove the ribs from the pot and set aside.
    2. Discard bay leaves and herb stems.
    3. For a smoother sauce, strain the liquid or blend the vegetables into it using an immersion blender.
    4. Skim off excess fat, and simmer the sauce if you prefer it thicker.
    5. Return short ribs to the sauce, or plate with sauce poured on top.

    🍽️ Servings and Timing

    • Servings: 4–6
    • Prep Time: 20 minutes
    • Cook Time: 3 hours
    • Total Time: 3 hours 20 minutes

    🍽️ Variations

    • Boneless Version: Works great with boneless short ribs or chuck roast chunks.
    • More Veggies: Add mushrooms, parsnips, or turnips during the braise.
    • Spiced Option: A pinch of smoked paprika or cumin adds depth.
    • Sweetness: Add 1 tsp brown sugar if you’d like a slightly sweet contrast.
    • Creamy Base: Serve over mashed cauliflower or potato for a classic pairing.

    🧊 Storage and Reheating

    Refrigerator:

    • Store in an airtight container for up to 4 days.

    Freezer:

    • Freeze for up to 3 months in a sealed, freezer-safe container.

    Reheating:

    • Reheat in a covered pot over medium-low heat until warmed through.
    • Add a splash of broth or water to loosen the sauce if needed.

    ❓ 10 Frequently Asked Questions (FAQs)

    1. What can I use instead of wine in braised dishes?

    This recipe uses balsamic vinegar and tomato paste to mimic the acidity and depth of wine.

    2. Can I prepare this a day in advance?

    Yes, the flavor improves overnight. Store in the fridge and reheat gently.

    3. Can I use store-bought beef broth?

    Yes, but opt for low sodium and organic if possible for the best flavor.

    4. Do I have to use a Dutch oven?

    A heavy oven-safe pot with a lid works too. You can also use a slow cooker after searing.

    5. Can I make it gluten-free?

    Yes, this recipe is naturally gluten-free. Just check your broth and vinegar labels.

    6. How do I make the sauce thicker?

    Reduce it by simmering uncovered, or whisk in a cornstarch slurry (1 tsp cornstarch + 1 tbsp water).

    7. Why is my meat not tender yet?

    If it’s still tough after 2.5 hours, cook for another 30–60 minutes. Time = tenderness.

    8. Can I cook this on the stovetop?

    Yes, but keep the heat very low and simmer gently for 3 hours.

    9. Can I add potatoes into the braise?

    Yes, add halved baby potatoes for a complete one-pot meal.

    10. What herbs work best?

    Thyme, oregano, rosemary, and bay leaves are ideal for deep flavor.


    📝 Conclusion

    Even without wine, these Dutch Oven Braised Beef Short Ribs are proof that simple ingredients can still create gourmet results. The secret lies in good technique: searing the meat, layering flavors, and slow-braising for maximum tenderness. Whether you’re serving a crowd or just treating yourself to something special, this meal is an instant classic.

    Pair it with mashed potatoes, creamy polenta, or a crusty loaf of bread—and you’ve got an unforgettable comfort dish. Want more wine-free cooking inspiration? Explore these no-alcohol braising recipes for more creative ideas.

    Dutch Oven Braised Beef Short Ribs (No Wine) – Ultimate Comfort Food Recipe

    If you’re craving a deeply savory, slow-cooked meal but prefer to avoid alcohol, this Dutch Oven Braised Beef Short Ribs (No Wine) recipe is your answer. These bone-in beef short ribs are seared until golden brown and then gently braised in a rich blend of beef broth, tomato paste, and herbs. The result? Fall-off-the-bone tenderness with a flavorful, velvety sauce that tastes like it’s been simmering all day. Even without wine, this recipe delivers all the richness and complexity you expect from a braised dish. Using ingredients like tomato paste, garlic, and aromatic vegetables adds layers of flavor that develop beautifully in a Dutch oven. Perfect for a cozy family dinner, holiday feast, or elegant dinner party, this dish is a guaranteed crowd-pleaser. Need proof that wine isn’t necessary for depth of flavor? Try this once, and you’ll understand why it’s earned a spot in many home cooks’ regular rotation. For more on cooking with or without alcohol, check this culinary guide to alcohol substitutes in recipes.

    🥩 Meat

    • 3 lbs bone-in beef short ribs

    🥕 Produce

    • 1 large onion (chopped)
    • 2 carrots (peeled and chopped)
    • 2 celery stalks (chopped)
    • 3 garlic cloves (minced)
    • 2 bay leaves
    • 1 sprig fresh thyme
    • 1 sprig fresh oregano

    🥫 Canned Goods

    • 2 tablespoons tomato paste
    • 3 cups beef broth (low sodium)
    • 🧂 Baking & Spices
    • Salt and freshly ground black pepper (to taste)

    🛢️ Oils & Vinegars

    • 2 tablespoons olive oil
    • 1 tablespoon balsamic vinegar (for depth, replaces acidity wine would add)

    🔪 Step 1: Prepare the Short Ribs

    1. Pat the short ribs dry with paper towels.
    2. Season liberally with salt and pepper on all sides.

    🔥 Step 2: Sear the Meat

    1. Heat olive oil in a Dutch oven over medium-high heat.
    2. In batches, brown the short ribs on all sides (about 3–4 minutes per side).
    3. Transfer to a plate once seared and browned.

    🧅 Step 3: Sauté the Aromatics

    1. In the same pot, add onion, carrots, and celery.
    2. Cook for 6–8 minutes, stirring occasionally, until softened and lightly browned.
    3. Stir in minced garlic and cook for 1–2 minutes until fragrant.
    4. Add the tomato paste and cook for another 2 minutes to caramelize slightly.

    🍲 Step 4: Add Broth & Herbs

    1. Add the balsamic vinegar and stir to deglaze the pan.
    2. Pour in beef broth and stir well to combine.
    3. Return the short ribs to the pot, ensuring they are mostly submerged.
    4. Add bay leaves, thyme, and oregano.

    🕒 Step 5: Slow Braise in Oven

    1. Preheat oven to 325°F (163°C).
    2. Cover Dutch oven with a tight-fitting lid.
    3. Braise in the oven for 2½ to 3 hours, or until the meat is tender and falls off the bone.

    🍛 Step 6: Final Touches

    1. Carefully remove the ribs from the pot and set aside.
    2. Discard bay leaves and herb stems.
    3. For a smoother sauce, strain the liquid or blend the vegetables into it using an immersion blender.
    4. Skim off excess fat, and simmer the sauce if you prefer it thicker.
    5. Return short ribs to the sauce, or plate with sauce poured on top.

    🍽️ Variations
    Boneless Version: Works great with boneless short ribs or chuck roast chunks.

    More Veggies: Add mushrooms, parsnips, or turnips during the braise.

    Spiced Option: A pinch of smoked paprika or cumin adds depth.

    Sweetness: Add 1 tsp brown sugar if you’d like a slightly sweet contrast.

    Creamy Base: Serve over mashed cauliflower or potato for a classic pairing.

    🧊 Storage and Reheating
    Refrigerator:
    Store in an airtight container for up to 4 days.

    Freezer:
    Freeze for up to 3 months in a sealed, freezer-safe container.

    Reheating:
    Reheat in a covered pot over medium-low heat until warmed through.

    Add a splash of broth or water to loosen the sauce if needed.

    ❓ 10 Frequently Asked Questions (FAQs)
    1. What can I use instead of wine in braised dishes?
    This recipe uses balsamic vinegar and tomato paste to mimic the acidity and depth of wine.

    2. Can I prepare this a day in advance?
    Yes, the flavor improves overnight. Store in the fridge and reheat gently.

    3. Can I use store-bought beef broth?
    Yes, but opt for low sodium and organic if possible for the best flavor.

    4. Do I have to use a Dutch oven?
    A heavy oven-safe pot with a lid works too. You can also use a slow cooker after searing.

    5. Can I make it gluten-free?
    Yes, this recipe is naturally gluten-free. Just check your broth and vinegar labels.

    6. How do I make the sauce thicker?
    Reduce it by simmering uncovered, or whisk in a cornstarch slurry (1 tsp cornstarch + 1 tbsp water).

    7. Why is my meat not tender yet?
    If it’s still tough after 2.5 hours, cook for another 30–60 minutes. Time = tenderness.

    8. Can I cook this on the stovetop?
    Yes, but keep the heat very low and simmer gently for 3 hours.

    9. Can I add potatoes into the braise?
    Yes, add halved baby potatoes for a complete one-pot meal.

    10. What herbs work best?
    Thyme, oregano, rosemary, and bay leaves are ideal for deep flavor.

    📝 Conclusion
    Even without wine, these Dutch Oven Braised Beef Short Ribs are proof that simple ingredients can still create gourmet results. The secret lies in good technique: searing the meat, layering flavors, and slow-braising for maximum tenderness. Whether you’re serving a crowd or just treating yourself to something special, this meal is an instant classic.

    Pair it with mashed potatoes, creamy polenta, or a crusty loaf of bread—and you’ve got an unforgettable comfort dish. Want more wine-free cooking inspiration? Explore these no-alcohol braising recipes for more creative ideas.

  • Easy Teriyaki Chicken (a.k.a. Crack Chicken) with Broccoli

    Introduction

    Craving a quick, flavorful, and satisfying meal that rivals your favorite takeout? Look no further than this Easy Teriyaki Chicken with Broccoli. Often dubbed “crack chicken” for its irresistible taste, this dish combines tender chicken pieces with crisp broccoli florets, all coated in a luscious homemade teriyaki sauce. Ready in just 20 minutes, it’s perfect for busy weeknights or meal prep sessions.

    This recipe not only delivers on taste but also offers a healthier alternative to restaurant versions. By using low-sodium soy and teriyaki sauces, and controlling the amount of added sugar, you can enjoy this delightful dish guilt-free. Plus, it’s versatile—serve it over rice, noodles, or even cauliflower rice for a low-carb option.

    Ingredients

    Meat

    • 1½ lbs boneless, skinless chicken thighs or breasts

    Produce

    • 2 garlic cloves, minced
    • 1 tablespoon garlic powder
    • 4 cups broccoli florets

    Condiments

    • 1 tablespoon honey
    • ¼ cup low-sodium soy sauce
    • ½ cup low-sodium teriyaki sauce

    Baking & Spices

    • 2 tablespoons cornstarch
    • 1 cup all-purpose flour
    • 1 tablespoon paprika
    • Salt and pepper, to taste

    Oils & Vinegars

    • 1 tablespoon sesame oil
    • 1 tablespoon vegetable oil (for cooking)

    Directions

    Step 1: Prepare the Chicken

    1. Cut the Chicken: Slice the chicken into bite-sized pieces.
    2. Season: In a bowl, combine the flour, paprika, garlic powder, salt, and pepper. Dredge the chicken pieces in the flour mixture, ensuring each piece is well-coated.

    Step 2: Cook the Chicken

    1. Heat Oil: In a large skillet, heat the vegetable oil over medium-high heat.
    2. Sauté: Add the coated chicken pieces to the skillet. Cook until golden brown and cooked through, about 5-7 minutes. Remove and set aside.

    Step 3: Prepare the Sauce

    1. Combine Ingredients: In a saucepan, mix the soy sauce, teriyaki sauce, honey, minced garlic, and sesame oil.
    2. Thicken: In a small bowl, dissolve the cornstarch in 2 tablespoons of water. Add this slurry to the saucepan.
    3. Simmer: Bring the sauce to a simmer over medium heat, stirring constantly until it thickens, about 3-5 minutes.

    Step 4: Cook the Broccoli

    1. Steam: In a separate pot, steam the broccoli florets until they are bright green and tender-crisp, about 3-4 minutes. Alternatively, you can microwave them with a splash of water for 2-3 minutes.

    Step 5: Combine and Serve

    1. Mix: Return the cooked chicken to the skillet. Add the steamed broccoli and pour the teriyaki sauce over the top.
    2. Toss: Gently toss everything together until the chicken and broccoli are well-coated with the sauce.
    3. Serve: Serve hot over steamed rice, noodles, or your preferred base.

    Servings and Timing

    • Servings: 4
    • Prep Time: 10 minutes
    • Cook Time: 10 minutes
    • Total Time: 20 minutes

    Variations

    • Vegetarian: Substitute chicken with tofu or tempeh. Ensure you press the tofu to remove excess moisture before cooking.
    • Spicy Kick: Add red pepper flakes or a dash of sriracha to the sauce for heat.
    • Extra Veggies: Incorporate bell peppers, snap peas, or carrots for added nutrition and color.
    • Gluten-Free: Use gluten-free soy sauce and flour alternatives like rice flour or cornstarch for dredging.

    Storage and Reheating

    • Refrigeration: Store leftovers in an airtight container in the refrigerator for up to 4 days.
    • Freezing: Freeze in a freezer-safe container for up to 3 months. Thaw overnight in the refrigerator before reheating.
    • Reheating: Warm in a skillet over medium heat until heated through. Add a splash of water if the sauce has thickened too much. Alternatively, microwave in 1-minute intervals, stirring in between.

    10 FAQs

    1. Can I use frozen broccoli?
      • Yes, just ensure it’s thawed and drained before adding to the dish.
    2. Is there a substitute for honey?
      • Maple syrup or agave nectar can be used as alternatives.
    3. Can I make this dish ahead of time?
      • Absolutely. Prepare and store as directed; reheat when ready to serve.
    4. What can I serve this with besides rice?
      • Noodles, quinoa, or cauliflower rice are great options.
    5. Can I bake the chicken instead of frying?
      • Yes, bake at 400°F (200°C) for 20-25 minutes, flipping halfway through.
    6. How can I make the sauce thicker?
      • Increase the amount of cornstarch slurry added to the sauce.
    7. Is this dish spicy?
      • No, but you can add spice with chili flakes or hot sauce if desired.
    8. Can I use store-bought teriyaki sauce?
      • Yes, but homemade sauce allows for better control over ingredients and taste.
    9. What’s the best way to cut the chicken?
      • Slice against the grain into uniform, bite-sized pieces for even cooking.
    10. How do I prevent the chicken from becoming soggy?
      • Ensure the oil is hot before adding the chicken, and avoid overcrowding the pan.

    Conclusion

    This Easy Teriyaki Chicken with Broccoli is a delightful blend of sweet and savory flavors, offering a healthier and more affordable alternative to takeout. Its quick preparation time and versatility make it a staple for busy households. Whether you’re cooking for family, meal prepping, or simply satisfying a craving, this dish is sure to impress. Give it a try and enjoy a delicious homemade meal that’s both comforting and nourishing.

    Easy Teriyaki Chicken (a.k.a. Crack Chicken) with Broccoli

    Craving a quick, flavorful, and satisfying meal that rivals your favorite takeout? Look no further than this Easy Teriyaki Chicken with Broccoli. Often dubbed “crack chicken” for its irresistible taste, this dish combines tender chicken pieces with crisp broccoli florets, all coated in a luscious homemade teriyaki sauce. Ready in just 20 minutes, it’s perfect for busy weeknights or meal prep sessions. This recipe not only delivers on taste but also offers a healthier alternative to restaurant versions. By using low-sodium soy and teriyaki sauces, and controlling the amount of added sugar, you can enjoy this delightful dish guilt-free. Plus, it’s versatile—serve it over rice, noodles, or even cauliflower rice for a low-carb option.

    Meat

    • 1½ lbs boneless (skinless chicken thighs or breasts)

    Produce

    • 2 garlic cloves (minced)
    • 1 tablespoon garlic powder
    • 4 cups broccoli florets

    Condiments

    • 1 tablespoon honey
    • ¼ cup low-sodium soy sauce
    • ½ cup low-sodium teriyaki sauce

    Baking & Spices

    • 2 tablespoons cornstarch
    • 1 cup all-purpose flour
    • 1 tablespoon paprika
    • Salt and pepper (to taste)

    Oils & Vinegars

    • 1 tablespoon sesame oil
    • 1 tablespoon vegetable oil (for cooking)

    Step 1: Prepare the Chicken

    1. Cut the Chicken: Slice the chicken into bite-sized pieces.
    2. Season: In a bowl, combine the flour, paprika, garlic powder, salt, and pepper. Dredge the chicken pieces in the flour mixture, ensuring each piece is well-coated.

    Step 2: Cook the Chicken

    1. Heat Oil: In a large skillet, heat the vegetable oil over medium-high heat.
    2. Sauté: Add the coated chicken pieces to the skillet. Cook until golden brown and cooked through, about 5-7 minutes. Remove and set aside.

    Step 3: Prepare the Sauce

    1. Combine Ingredients: In a saucepan, mix the soy sauce, teriyaki sauce, honey, minced garlic, and sesame oil.
    2. Thicken: In a small bowl, dissolve the cornstarch in 2 tablespoons of water. Add this slurry to the saucepan.
    3. Simmer: Bring the sauce to a simmer over medium heat, stirring constantly until it thickens, about 3-5 minutes.

    Step 4: Cook the Broccoli

    1. Steam: In a separate pot, steam the broccoli florets until they are bright green and tender-crisp, about 3-4 minutes. Alternatively, you can microwave them with a splash of water for 2-3 minutes.

    Step 5: Combine and Serve

    1. Mix: Return the cooked chicken to the skillet. Add the steamed broccoli and pour the teriyaki sauce over the top.
    2. Toss: Gently toss everything together until the chicken and broccoli are well-coated with the sauce.
    3. Serve: Serve hot over steamed rice, noodles, or your preferred base.

    Variations
    Vegetarian: Substitute chicken with tofu or tempeh. Ensure you press the tofu to remove excess moisture before cooking.

    Spicy Kick: Add red pepper flakes or a dash of sriracha to the sauce for heat.

    Extra Veggies: Incorporate bell peppers, snap peas, or carrots for added nutrition and color.

    Gluten-Free: Use gluten-free soy sauce and flour alternatives like rice flour or cornstarch for dredging.

    Storage and Reheating
    Refrigeration: Store leftovers in an airtight container in the refrigerator for up to 4 days.

    Freezing: Freeze in a freezer-safe container for up to 3 months. Thaw overnight in the refrigerator before reheating.

    Reheating: Warm in a skillet over medium heat until heated through. Add a splash of water if the sauce has thickened too much. Alternatively, microwave in 1-minute intervals, stirring in between.

    10 FAQs
    Can I use frozen broccoli?

    Yes, just ensure it’s thawed and drained before adding to the dish.

    Is there a substitute for honey?

    Maple syrup or agave nectar can be used as alternatives.

    Can I make this dish ahead of time?

    Absolutely. Prepare and store as directed; reheat when ready to serve.

    What can I serve this with besides rice?

    Noodles, quinoa, or cauliflower rice are great options.

    Can I bake the chicken instead of frying?

    Yes, bake at 400°F (200°C) for 20-25 minutes, flipping halfway through.

    How can I make the sauce thicker?

    Increase the amount of cornstarch slurry added to the sauce.

    Is this dish spicy?

    No, but you can add spice with chili flakes or hot sauce if desired.

    Can I use store-bought teriyaki sauce?

    Yes, but homemade sauce allows for better control over ingredients and taste.

    What’s the best way to cut the chicken?

    Slice against the grain into uniform, bite-sized pieces for even cooking.

    How do I prevent the chicken from becoming soggy?

    Ensure the oil is hot before adding the chicken, and avoid overcrowding the pan.

    Conclusion
    This Easy Teriyaki Chicken with Broccoli is a delightful blend of sweet and savory flavors, offering a healthier and more affordable alternative to takeout. Its quick preparation time and versatility make it a staple for busy households. Whether you’re cooking for family, meal prepping, or simply satisfying a craving, this dish is sure to impress. Give it a try and enjoy a delicious homemade meal that’s both comforting and nourishing.

  • Chicken Piccata with Lemon Sauce – A Light, Lively Dinner Favorite

    ✨ Introduction

    Looking for a flavorful yet healthy dinner option that still feels fancy? This Chicken Piccata with Lemon Sauce is just what your weeknight (or weekend) needs. Tender, golden pan-seared chicken breasts are drizzled with a bright and buttery lemon-wine sauce, accented with garlic, Parmesan, and fresh parsley. It’s quick, fresh, and surprisingly easy — and you don’t need to be a chef to pull it off!


    🍽️ Servings & Time

    • Yield: 4 servings
    • Prep Time: 15 minutes
    • Cook Time: 20 minutes
    • Total Time: ~35 minutes

    🛒 Ingredients

    Meat:

    • 8 boneless, skinless chicken breast halves (pounded thin)

    Produce:

    • 3 garlic cloves, minced
    • ¼ cup fresh parsley, chopped

    Refrigerated:

    • ½ cup egg substitute (or 2 large eggs, beaten)

    Canned Goods:

    • 6 tbsp dry white wine or low-sodium chicken broth

    Condiments:

    • 5 tbsp lemon juice (fresh is best!)
    • ⅛ tsp hot pepper sauce (optional, for a kick)

    Baking & Spices:

    • ½ cup all-purpose flour
    • ½ tsp salt
    • Black pepper, to taste

    Oils & Vinegars:

    • 3 tsp olive oil

    Dairy:

    • 2 tbsp butter
    • ½ cup grated Parmesan cheese

    🧑‍🍳 Equipment Needed

    • Large skillet
    • Shallow bowls (for dredging)
    • Meat mallet
    • Tongs or spatula
    • Small saucepan (for sauce, optional)

    🍳 Instructions

    1. Prep the Chicken:

    Pound chicken breasts to even thickness (about ½ inch). Season with salt and pepper. Dredge each piece in egg substitute, then coat with flour.

    2. Sear the Chicken:

    Heat 1½ tsp olive oil in a skillet over medium heat. Add half the chicken and cook 3–4 minutes per side until golden and cooked through. Repeat with remaining oil and chicken. Remove and keep warm.

    3. Make the Lemon Sauce:

    In the same skillet, add garlic and cook for 30 seconds. Pour in white wine (or broth), scraping up browned bits. Add lemon juice, hot pepper sauce (optional), and butter. Simmer until slightly reduced, about 2–3 minutes.

    4. Finish and Serve:

    Return chicken to the pan and coat with sauce. Sprinkle with Parmesan and chopped parsley. Serve immediately over pasta, rice, or steamed vegetables.


    🔁 Variations

    • Capers Version: Add 1 tbsp capers to the sauce for a more classic piccata profile.
    • Dairy-Free: Omit Parmesan and butter, and use olive oil throughout.
    • Gluten-Free: Use a 1:1 gluten-free flour blend instead of regular flour.

    🧊 Storage Tips

    • Fridge: Store leftovers in an airtight container for up to 3 days.
    • Reheat: Gently warm in a skillet with a splash of broth or lemon juice.
    • Freeze: Not ideal for freezing once sauced — better to freeze the chicken alone and make sauce fresh.

    ❓ Frequently Asked Questions

    Can I use chicken thighs?
    Yes! Boneless, skinless thighs work great — just adjust cooking time slightly longer.

    What can I serve this with?
    It pairs beautifully with angel hair pasta, sautéed spinach, mashed potatoes, or cauliflower rice.

    Can I skip the wine?
    Absolutely — chicken broth works as a great substitute.

    Chicken Piccata with Lemon Sauce – A Light, Lively Dinner Favorite

    Looking for a flavorful yet healthy dinner option that still feels fancy? This Chicken Piccata with Lemon Sauce is just what your weeknight (or weekend) needs. Tender, golden pan-seared chicken breasts are drizzled with a bright and buttery lemon-wine sauce, accented with garlic, Parmesan, and fresh parsley. It’s quick, fresh, and surprisingly easy — and you don’t need to be a chef to pull it off!

    • Large skillet
    • Shallow bowls (for dredging)
    • Meat mallet
    • Tongs or spatula
    • Small saucepan (for sauce, optional)

    Meat:

    • 8 boneless (skinless chicken breast halves (pounded thin))

    Produce:

    • 3 garlic cloves (minced)
    • ¼ cup fresh parsley (chopped)

    Refrigerated:

    • ½ cup egg substitute (or 2 large eggs, beaten)

    Canned Goods:

    • 6 tbsp dry white wine or low-sodium chicken broth

    Condiments:

    • 5 tbsp lemon juice (fresh is best!)
    • ⅛ tsp hot pepper sauce (optional, for a kick)

    Baking & Spices:

    • ½ cup all-purpose flour
    • ½ tsp salt
    • Black pepper (to taste)

    Oils & Vinegars:

    • 3 tsp olive oil

    Dairy:

    • 2 tbsp butter
    • ½ cup grated Parmesan cheese

    Prep the Chicken:

    1. Pound chicken breasts to even thickness (about ½ inch). Season with salt and pepper. Dredge each piece in egg substitute, then coat with flour.

    Sear the Chicken:

    1. Heat 1½ tsp olive oil in a skillet over medium heat. Add half the chicken and cook 3–4 minutes per side until golden and cooked through. Repeat with remaining oil and chicken. Remove and keep warm.

    Make the Lemon Sauce:

    1. In the same skillet, add garlic and cook for 30 seconds. Pour in white wine (or broth), scraping up browned bits. Add lemon juice, hot pepper sauce (optional), and butter. Simmer until slightly reduced, about 2–3 minutes.

    Finish and Serve:

    1. Return chicken to the pan and coat with sauce. Sprinkle with Parmesan and chopped parsley. Serve immediately over pasta, rice, or steamed vegetables.

    🔁 Variations
    Capers Version: Add 1 tbsp capers to the sauce for a more classic piccata profile.

    Dairy-Free: Omit Parmesan and butter, and use olive oil throughout.

    Gluten-Free: Use a 1:1 gluten-free flour blend instead of regular flour.

    🧊 Storage Tips
    Fridge: Store leftovers in an airtight container for up to 3 days.

    Reheat: Gently warm in a skillet with a splash of broth or lemon juice.

    Freeze: Not ideal for freezing once sauced — better to freeze the chicken alone and make sauce fresh.

    ❓ Frequently Asked Questions
    Can I use chicken thighs?
    Yes! Boneless, skinless thighs work great — just adjust cooking time slightly longer.

    What can I serve this with?
    It pairs beautifully with angel hair pasta, sautéed spinach, mashed potatoes, or cauliflower rice.

    Can I skip the wine?
    Absolutely — chicken broth works as a great substitute.

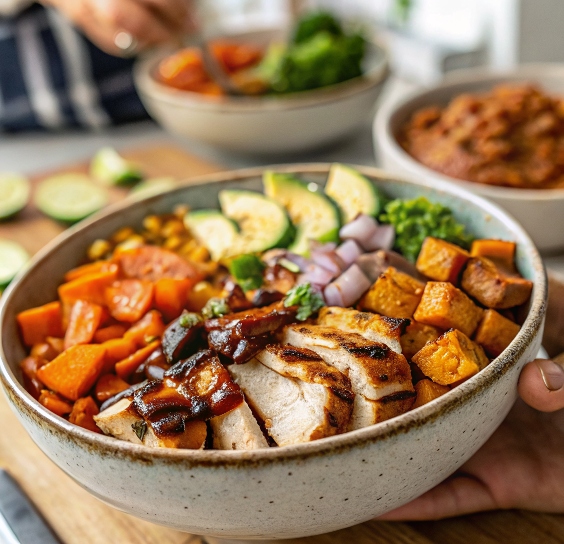
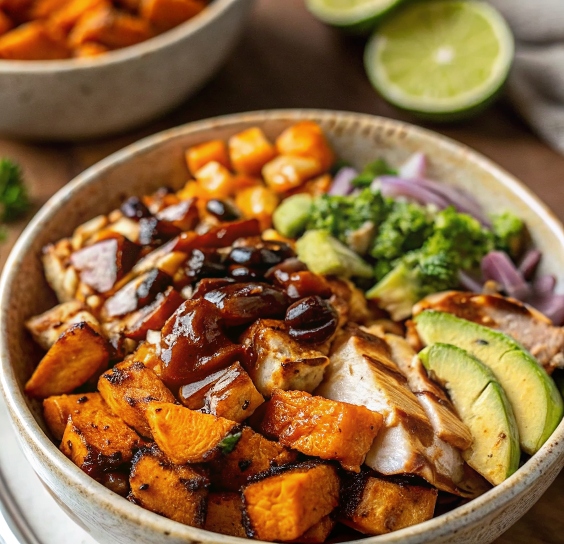
  • BBQ Chicken & Roasted Sweet Potato Bowls – Smoky, Sweet, and Packed with Flavor

    ✨ Introduction

    Healthy meets hearty in these BBQ Chicken & Roasted Sweet Potato Bowls. Juicy grilled or shredded BBQ chicken, caramelized roasted sweet potatoes, and a medley of fresh toppings make every bite satisfying, bold, and full of smoky-sweet flavor. Whether you’re looking for a simple meal prep idea or a colorful, balanced dinner, this bowl hits all the right notes — with minimal effort and maximum flavor.


    🍽️ Servings & Time

    • Yield: 4 servings
    • Prep Time: 15 minutes
    • Cook Time: 30 minutes
    • Total Time: ~45 minutes

    🛒 Ingredients

    For the Bowls:

    • 1 lb boneless, skinless chicken breasts or thighs
    • ½ cup BBQ sauce (use your favorite!)
    • 2 large sweet potatoes, peeled and diced
    • 1 tbsp olive oil
    • ½ tsp smoked paprika
    • ½ tsp garlic powder
    • Salt and pepper, to taste

    Optional Toppings:

    • 1 avocado, sliced
    • ½ cup corn (fresh, frozen, or grilled)
    • ½ cup black beans, drained and rinsed
    • ¼ cup red onion, finely chopped
    • Fresh cilantro or parsley
    • Lime wedges
    • Extra BBQ sauce or ranch drizzle

    🧑‍🍳 Equipment Needed

    • Baking sheet
    • Mixing bowl
    • Grill or stovetop pan (or oven for baking chicken)
    • Knife & cutting board
    • Tongs or spatula

    🍳 Instructions

    1. Roast the Sweet Potatoes:

    Preheat oven to 425°F (220°C).
    Toss sweet potatoes with olive oil, smoked paprika, garlic powder, salt, and pepper.
    Spread on a baking sheet in a single layer and roast for 25–30 minutes, flipping halfway, until tender and caramelized.

    2. Cook the Chicken:

    While potatoes roast, season chicken with salt and pepper.
    Grill or pan-sear chicken over medium heat for 5–7 minutes per side, or until internal temp reaches 165°F (74°C).
    Brush generously with BBQ sauce during the last 2–3 minutes of cooking. Slice or shred when done.

    3. Assemble the Bowls:

    In each bowl, layer roasted sweet potatoes, BBQ chicken, and your choice of toppings like avocado, black beans, corn, red onion, and fresh herbs.
    Drizzle with more BBQ sauce or ranch if desired, and serve with a lime wedge.


    🔁 Variations

    • Vegetarian Option: Use BBQ jackfruit or tofu instead of chicken.
    • Spicy Kick: Add jalapeños or a chipotle BBQ sauce.
    • Low-Carb: Swap sweet potatoes with roasted cauliflower or broccoli.
    • Add Grain Base: Serve over quinoa, brown rice, or farro for a grain bowl twist.

    🧊 Storage Tips

    • Fridge: Store components separately in airtight containers for up to 4 days.
    • Reheat: Reheat chicken and sweet potatoes in a skillet or microwave before assembling bowls.
    • Meal Prep: Portion into containers with toppings for grab-and-go lunches all week!

    ❓ Frequently Asked Questions

    Can I use rotisserie chicken?
    Absolutely! Shred it and toss with warm BBQ sauce for a super quick option.

    Can I roast everything on one pan?
    Yes — add the chicken to the sheet pan with the sweet potatoes, just adjust cooking times as needed.

    What’s the best BBQ sauce to use?
    Any you love! Smoky, sweet, spicy — this recipe works with all styles.

    BBQ Chicken & Roasted Sweet Potato Bowls – Smoky, Sweet, and Packed with Flavor

    Healthy meets hearty in these BBQ Chicken & Roasted Sweet Potato Bowls. Juicy grilled or shredded BBQ chicken, caramelized roasted sweet potatoes, and a medley of fresh toppings make every bite satisfying, bold, and full of smoky-sweet flavor. Whether you’re looking for a simple meal prep idea or a colorful, balanced dinner, this bowl hits all the right notes — with minimal effort and maximum flavor.

    • Baking sheet
    • Mixing bowl
    • Grill or stovetop pan (or oven for baking chicken)
    • Knife & cutting board
    • Tongs or spatula

    For the Bowls:

    • 1 lb boneless (skinless chicken breasts or thighs)
    • ½ cup BBQ sauce (use your favorite!)
    • 2 large sweet potatoes (peeled and diced)
    • 1 tbsp olive oil
    • ½ tsp smoked paprika
    • ½ tsp garlic powder
    • Salt and pepper (to taste)

    Optional Toppings:

    • 1 avocado (sliced)
    • ½ cup corn (fresh, frozen, or grilled)
    • ½ cup black beans (drained and rinsed)
    • ¼ cup red onion (finely chopped)
    • Fresh cilantro or parsley
    • Lime wedges
    • Extra BBQ sauce or ranch drizzle

    Roast the Sweet Potatoes:

    1. Preheat oven to 425°F (220°C).
    2. Toss sweet potatoes with olive oil, smoked paprika, garlic powder, salt, and pepper.
    3. Spread on a baking sheet in a single layer and roast for 25–30 minutes, flipping halfway, until tender and caramelized.

    Cook the Chicken:

    1. While potatoes roast, season chicken with salt and pepper.
    2. Grill or pan-sear chicken over medium heat for 5–7 minutes per side, or until internal temp reaches 165°F (74°C).
    3. Brush generously with BBQ sauce during the last 2–3 minutes of cooking. Slice or shred when done.

    Assemble the Bowls:

    1. In each bowl, layer roasted sweet potatoes, BBQ chicken, and your choice of toppings like avocado, black beans, corn, red onion, and fresh herbs.
    2. Drizzle with more BBQ sauce or ranch if desired, and serve with a lime wedge.

    🔁 Variations
    Vegetarian Option: Use BBQ jackfruit or tofu instead of chicken.

    Spicy Kick: Add jalapeños or a chipotle BBQ sauce.

    Low-Carb: Swap sweet potatoes with roasted cauliflower or broccoli.

    Add Grain Base: Serve over quinoa, brown rice, or farro for a grain bowl twist.

    🧊 Storage Tips
    Fridge: Store components separately in airtight containers for up to 4 days.

    Reheat: Reheat chicken and sweet potatoes in a skillet or microwave before assembling bowls.

    Meal Prep: Portion into containers with toppings for grab-and-go lunches all week!

    ❓ Frequently Asked Questions
    Can I use rotisserie chicken?
    Absolutely! Shred it and toss with warm BBQ sauce for a super quick option.

    Can I roast everything on one pan?
    Yes — add the chicken to the sheet pan with the sweet potatoes, just adjust cooking times as needed.

    What’s the best BBQ sauce to use?
    Any you love! Smoky, sweet, spicy — this recipe works with all styles.

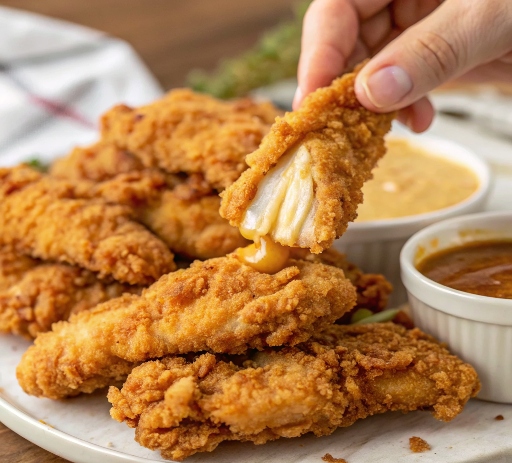
  • Chick-Fil-A Chicken Tenders – Crispy, Juicy, and Better Than the Drive-Thru!

    ✨ Introduction

    Craving that iconic, juicy, and flavorful Chick-Fil-A Chicken Tenders taste at home? You’re in luck! This easy homemade recipe captures everything you love — the tender, flavorful chicken, the perfectly seasoned crispy coating, and the secret ingredient (pickle juice!) that makes all the difference. Serve them with your favorite dipping sauces for a meal that’s even better than the drive-thru!


    🍽️ Servings & Time

    • Yield: 4–6 servings
    • Prep Time: 15 minutes
    • Marinate Time: 30 minutes (or up to 4 hours)
    • Cook Time: 10–12 minutes
    • Total Time: ~1 hour

    🛒 Ingredients

    Meat:

    • 2 lb boneless chicken tenders

    Refrigerated:

    • 1 large egg

    Condiments:

    • 1 cup dill pickle juice

    Baking & Spices:

    • 1 cup all-purpose flour
    • 2 tsp cayenne pepper
    • 1 tbsp confectioner’s sugar
    • 1 tsp paprika
    • 1 tsp black pepper
    • 1 tsp salt

    Oils & Vinegars:

    • ¼ cup peanut oil or canola oil (plus more for frying)

    Dairy:

    • 1 cup milk

    🧑‍🍳 Equipment Needed

    • Mixing bowls
    • Large skillet or deep fryer
    • Wire rack and baking sheet
    • Tongs
    • Paper towels (for draining)

    🍳 Instructions

    1. Marinate the Chicken:

    Place chicken tenders in a bowl. Pour pickle juice over them and let marinate for at least 30 minutes (up to 4 hours for maximum flavor).

    2. Prepare the Breading Station:

    In one bowl, whisk together the egg and milk.
    In another bowl, mix flour, confectioner’s sugar, paprika, cayenne, salt, and pepper.

    3. Bread the Chicken:

    Remove tenders from the marinade (pat lightly dry if too wet).
    Dip each tender first into the milk-egg mixture, then dredge thoroughly in the seasoned flour mixture. Press flour onto chicken to coat well.

    4. Fry the Tenders:

    Heat about 1 inch of oil in a skillet to 350°F (175°C).
    Fry chicken tenders in batches, about 3–4 minutes per side, until golden brown and cooked through (internal temp 165°F/74°C).
    Drain on a wire rack or paper towels.

    5. Serve:

    Serve hot with your favorite sauces — like honey mustard, Chick-fil-A sauce, or ranch!


    🔁 Variations

    • Spicy Chick-Fil-A Style: Increase cayenne and add a dash of hot sauce to the milk-egg mixture.
    • Air Fryer Version: Spray breaded tenders with oil and air fry at 400°F for 10–12 minutes, flipping halfway.
    • Gluten-Free: Use a gluten-free flour blend instead of regular flour.

    🧊 Storage Tips

    • Fridge: Store cooled tenders in an airtight container for up to 3 days.
    • Reheat: Reheat in the oven or air fryer to keep crispy (avoid microwaving if possible).
    • Freeze: Freeze cooked tenders on a baking sheet, then transfer to freezer bags. Reheat from frozen in the oven at 375°F.

    ❓ Frequently Asked Questions

    Why pickle juice?
    The pickle juice tenderizes the chicken and adds that signature tangy flavor Chick-fil-A is famous for!

    Can I bake instead of fry?
    Yes — bake breaded tenders at 425°F (220°C) for 20–25 minutes, flipping halfway, but they won’t be quite as crispy.

    What oil is best for frying?
    Peanut oil is ideal for flavor and crispness (just like Chick-fil-A uses), but canola oil is a great alternative.

    Chick-Fil-A Chicken Tenders – Crispy, Juicy, and Better Than the Drive-Thru!

    Craving that iconic, juicy, and flavorful Chick-Fil-A Chicken Tenders taste at home? You’re in luck! This easy homemade recipe captures everything you love — the tender, flavorful chicken, the perfectly seasoned crispy coating, and the secret ingredient (pickle juice!) that makes all the difference. Serve them with your favorite dipping sauces for a meal that’s even better than the drive-thru!

    • Mixing bowls
    • Large skillet or deep fryer
    • Wire rack and baking sheet
    • Tongs
    • Paper towels (for draining)

    Meat:

    • 2 lb boneless chicken tenders

    Refrigerated:

    • 1 large egg

    Condiments:

    • 1 cup dill pickle juice
    • Baking & Spices:
    • 1 cup all-purpose flour
    • 2 tsp cayenne pepper
    • 1 tbsp confectioner’s sugar
    • 1 tsp paprika
    • 1 tsp black pepper
    • 1 tsp salt

    Oils & Vinegars:

    • ¼ cup peanut oil or canola oil (plus more for frying)

    Dairy:

    • 1 cup milk

    Marinate the Chicken:

    1. Place chicken tenders in a bowl. Pour pickle juice over them and let marinate for at least 30 minutes (up to 4 hours for maximum flavor).

    Prepare the Breading Station:

    1. In one bowl, whisk together the egg and milk.
    2. In another bowl, mix flour, confectioner’s sugar, paprika, cayenne, salt, and pepper.

    Bread the Chicken:

    1. Remove tenders from the marinade (pat lightly dry if too wet).
    2. Dip each tender first into the milk-egg mixture, then dredge thoroughly in the seasoned flour mixture. Press flour onto chicken to coat well.

    Fry the Tenders:

    1. Heat about 1 inch of oil in a skillet to 350°F (175°C).
    2. Fry chicken tenders in batches, about 3–4 minutes per side, until golden brown and cooked through (internal temp 165°F/74°C).
    3. Drain on a wire rack or paper towels.

    Serve:

    1. Serve hot with your favorite sauces — like honey mustard, Chick-fil-A sauce, or ranch!

    🔁 Variations
    Spicy Chick-Fil-A Style: Increase cayenne and add a dash of hot sauce to the milk-egg mixture.

    Air Fryer Version: Spray breaded tenders with oil and air fry at 400°F for 10–12 minutes, flipping halfway.

    Gluten-Free: Use a gluten-free flour blend instead of regular flour.

    🧊 Storage Tips
    Fridge: Store cooled tenders in an airtight container for up to 3 days.

    Reheat: Reheat in the oven or air fryer to keep crispy (avoid microwaving if possible).

    Freeze: Freeze cooked tenders on a baking sheet, then transfer to freezer bags. Reheat from frozen in the oven at 375°F.

    ❓ Frequently Asked Questions
    Why pickle juice?
    The pickle juice tenderizes the chicken and adds that signature tangy flavor Chick-fil-A is famous for!

    Can I bake instead of fry?
    Yes — bake breaded tenders at 425°F (220°C) for 20–25 minutes, flipping halfway, but they won’t be quite as crispy.

    What oil is best for frying?
    Peanut oil is ideal for flavor and crispness (just like Chick-fil-A uses), but canola oil is a great alternative.

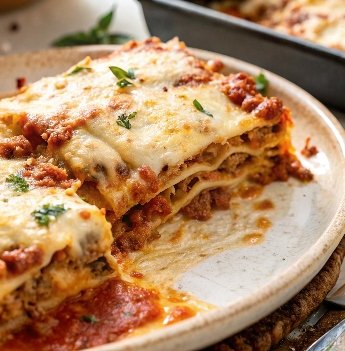
  • The Best Homemade Lasagna Recipe – Classic, Rich, and Made from Scratch

    ✨ Introduction

    There’s nothing quite like a bubbling, golden, hearty pan of homemade lasagna. Layers of savory meat sauce, creamy ricotta, gooey mozzarella, and tender pasta come together to create the ultimate comfort food. Whether you’re cooking for a crowd, prepping meals for the week, or simply treating yourself to a real-deal Italian classic, this Best Homemade Lasagna Recipe will become your go-to. It’s easier than you think — and totally worth every step.


    🍽️ Servings & Time

    • Yield: 8–10 servings
    • Prep Time: 30 minutes
    • Cook Time: 1 hour
    • Rest Time: 15 minutes
    • Total Time: ~1 hour 45 minutes

    🛒 Ingredients

    For the Meat Sauce:

    • 1 lb ground beef
    • ½ lb Italian sausage (optional for extra flavor)
    • 1 small onion, diced
    • 3 cloves garlic, minced
    • 1 (28 oz) can crushed tomatoes
    • 1 (15 oz) can tomato sauce
    • 2 tbsp tomato paste
    • 1 tsp dried oregano
    • 1 tsp dried basil
    • ½ tsp sugar
    • Salt and pepper, to taste

    For the Ricotta Layer:

    • 1 (15 oz) container ricotta cheese
    • 1 egg
    • ½ cup grated Parmesan cheese
    • 1 tbsp chopped fresh parsley (optional)

    Other Ingredients:

    • 9–12 lasagna noodles (regular or oven-ready)
    • 3 cups shredded mozzarella cheese
    • Extra Parmesan for topping

    🧑‍🍳 Equipment Needed

    • 9×13 inch baking dish
    • Large skillet or saucepan
    • Large pot (for noodles)
    • Mixing bowls
    • Aluminum foil
    • Ladle or spoon

    🍳 Instructions

    1. Make the Meat Sauce:

    In a large skillet over medium heat, cook the ground beef, sausage (if using), onion, and garlic until browned. Drain excess grease. Add crushed tomatoes, tomato sauce, tomato paste, oregano, basil, sugar, salt, and pepper. Simmer for at least 15 minutes to develop flavors.

    2. Prepare the Ricotta Mixture:

    In a bowl, mix ricotta cheese, egg, Parmesan, and parsley. Set aside.

    3. Cook the Noodles:

    Boil lasagna noodles according to package directions if using regular noodles. Drain and lay flat on parchment paper to avoid sticking.

    4. Assemble the Lasagna:

    • Spread a thin layer of meat sauce at the bottom of the baking dish.
    • Add a layer of noodles.
    • Spread ⅓ of the ricotta mixture over noodles.
    • Top with ⅓ of the meat sauce and sprinkle mozzarella.
    • Repeat layers two more times, ending with sauce and a generous layer of mozzarella and Parmesan.

    5. Bake:

    Cover with foil (sprayed with cooking spray to prevent sticking) and bake at 375°F (190°C) for 25 minutes. Remove foil and bake an additional 20–25 minutes until the top is golden and bubbly.

    6. Rest Before Serving:

    Let the lasagna rest for 15 minutes before slicing to allow layers to set beautifully.


    🔁 Variations

    • Vegetarian Version: Use sautéed mushrooms, spinach, and zucchini instead of meat.
    • Spicy Kick: Add red pepper flakes to the sauce or use spicy sausage.
    • Three-Cheese Blend: Mix mozzarella, provolone, and Parmesan for an extra cheesy layer.

    🧊 Storage Tips

    • Fridge: Store in an airtight container for up to 5 days.
    • Freeze: Freeze baked lasagna in portions for up to 3 months. Wrap tightly to prevent freezer burn.
    • Reheat: Reheat individual slices in the microwave or whole lasagna in a 350°F oven until heated through.

    ❓ Frequently Asked Questions

    Can I assemble lasagna ahead of time?
    Yes! Assemble the lasagna, cover tightly, and refrigerate for up to 2 days before baking.

    Should I use fresh or dried lasagna noodles?
    Either works! Oven-ready noodles save time, but traditional boiled noodles have a classic texture.

    Why does lasagna need to rest before cutting?
    Resting helps the layers set, so you get neat slices instead of a messy plate.

    The Best Homemade Lasagna Recipe – Classic, Rich, and Made from Scratch

    There’s nothing quite like a bubbling, golden, hearty pan of homemade lasagna. Layers of savory meat sauce, creamy ricotta, gooey mozzarella, and tender pasta come together to create the ultimate comfort food. Whether you’re cooking for a crowd, prepping meals for the week, or simply treating yourself to a real-deal Italian classic, this Best Homemade Lasagna Recipe will become your go-to. It’s easier than you think — and totally worth every step.

    • 9×13-inch baking dish
    • Large skillet or saucepan
    • Large pot (for noodles)
    • Mixing bowls
    • Aluminum foil
    • Ladle or spoon

    For the Meat Sauce:

    • 1 lb ground beef
    • ½ lb Italian sausage (optional for extra flavor)
    • 1 small onion (diced)
    • 3 cloves garlic (minced)
    • 1 28 oz can crushed tomatoes
    • 1 15 oz can tomato sauce
    • 2 tbsp tomato paste
    • 1 tsp dried oregano
    • 1 tsp dried basil
    • ½ tsp sugar
    • Salt and pepper (to taste)

    For the Ricotta Layer:

    • 1 15 oz container ricotta cheese
    • 1 egg
    • ½ cup grated Parmesan cheese
    • 1 tbsp chopped fresh parsley (optional)

    Other Ingredients:

    • 9 –12 lasagna noodles (regular or oven-ready)
    • 3 cups shredded mozzarella cheese

    Extra Parmesan for topping

    Make the Meat Sauce:

    1. In a large skillet over medium heat, cook the ground beef, sausage (if using), onion, and garlic until browned. Drain excess grease. Add crushed tomatoes, tomato sauce, tomato paste, oregano, basil, sugar, salt, and pepper. Simmer for at least 15 minutes to develop flavors.

    Prepare the Ricotta Mixture:

    1. In a bowl, mix ricotta cheese, egg, Parmesan, and parsley. Set aside.

    Cook the Noodles:

    1. Boil lasagna noodles according to package directions if using regular noodles. Drain and lay flat on parchment paper to avoid sticking.

    Assemble the Lasagna:

    1. Spread a thin layer of meat sauce at the bottom of the baking dish.
    2. Add a layer of noodles.
    3. Spread ⅓ of the ricotta mixture over noodles.
    4. Top with ⅓ of the meat sauce and sprinkle mozzarella.
    5. Repeat layers two more times, ending with sauce and a generous layer of mozzarella and Parmesan.

    Bake:

    1. Cover with foil (sprayed with cooking spray to prevent sticking) and bake at 375°F (190°C) for 25 minutes. Remove foil and bake an additional 20–25 minutes until the top is golden and bubbly.

    Rest Before Serving:

    1. Let the lasagna rest for 15 minutes before slicing to allow layers to set beautifully.

    🔁 Variations
    Vegetarian Version: Use sautéed mushrooms, spinach, and zucchini instead of meat.

    Spicy Kick: Add red pepper flakes to the sauce or use spicy sausage.

    Three-Cheese Blend: Mix mozzarella, provolone, and Parmesan for an extra cheesy layer.

    🧊 Storage Tips
    Fridge: Store in an airtight container for up to 5 days.

    Freeze: Freeze baked lasagna in portions for up to 3 months. Wrap tightly to prevent freezer burn.

    Reheat: Reheat individual slices in the microwave or whole lasagna in a 350°F oven until heated through.

    ❓ Frequently Asked Questions
    Can I assemble lasagna ahead of time?
    Yes! Assemble the lasagna, cover tightly, and refrigerate for up to 2 days before baking.

    Should I use fresh or dried lasagna noodles?
    Either works! Oven-ready noodles save time, but traditional boiled noodles have a classic texture.

    Why does lasagna need to rest before cutting?
    Resting helps the layers set, so you get neat slices instead of a messy plate.

  • Potsticker Soup – A Cozy, Flavor-Packed Comfort Bowl

    Introduction

    Craving something cozy, nourishing, and ready in under 30 minutes? Look no further than this Potsticker Soup — the ultimate fusion of convenience and flavor. With tender dumplings swimming in a fragrant, ginger-garlic broth and loaded with mushrooms, spinach, and chili oil for a subtle kick, this soup hits every craving. Whether you’re feeling under the weather or just want a quick dinner that feels like takeout (but better), this recipe delivers.


    🍽️ Servings & Time

    • Yield: 3–4 servings
    • Prep Time: 10 minutes
    • Cook Time: 15 minutes
    • Total Time: 25 minutes

    🛒 Ingredients

    Produce:

    • 2 garlic cloves, minced
    • 2 tsp fresh ginger, grated
    • 2 green onions, sliced
    • ½ cup mushrooms, sliced
    • ½ cup spinach or bok choy

    Canned Goods:

    • 4 cups chicken broth

    Condiments:

    • 1 tbsp soy sauce

    Baking & Spices:

    • 1 tsp chili oil or red pepper flakes (adjust to taste)
    • Salt & pepper, to taste

    Oils & Vinegars:

    • 1 tbsp sesame oil
    • 1 tbsp rice vinegar

    Other:

    • 12–15 frozen potstickers (pork, chicken, or veggie – your choice)

    🧑‍🍳 Equipment Needed

    • Medium soup pot or saucepan
    • Ladle
    • Sharp knife
    • Cutting board
    • Spoon or spatula

    🍳 Instructions

    1. Sauté Aromatics:

    In a soup pot, heat sesame oil over medium heat. Add garlic, ginger, and white parts of green onions. Sauté for 1–2 minutes until fragrant.

    2. Add Broth & Flavor:

    Pour in chicken broth, soy sauce, rice vinegar, chili oil (or flakes), and mushrooms. Bring to a gentle simmer.

    3. Add Potstickers:

    Carefully add frozen potstickers to the simmering broth. Cook uncovered for 6–8 minutes (or according to package instructions), until heated through and slightly plumped.

    4. Finish with Greens:

    Stir in spinach or bok choy and cook for 1–2 more minutes until just wilted. Taste and adjust seasoning with salt and pepper.

    5. Garnish & Serve:

    Ladle into bowls and top with the green parts of green onions. Optional: extra chili oil, sesame seeds, or a squeeze of lime.


    🔁 Variations

    • Vegetarian Version: Use veggie broth and plant-based potstickers.
    • Noodle Soup Twist: Add rice noodles or ramen for a heartier dish.
    • Spicy Miso: Stir in 1 tbsp of miso paste for a deeper umami profile.

    🧊 Storage Tips

    • Fridge: Store leftovers for up to 3 days (potstickers may soften slightly).
    • Reheat: Warm on the stovetop. Add extra broth if needed.
    • Freeze: Not recommended after cooking, but you can prep and freeze the broth separately.

    ❓ Frequently Asked Questions

    Can I make this with homemade potstickers?
    Yes! Just be sure to seal them tightly and cook gently to avoid breakage.

    Do I need to thaw frozen potstickers first?
    Nope! Drop them straight into the broth from frozen.

    What kind of potstickers work best?
    Chicken, pork, shrimp, or veggie all work. Go with what you love!

    Potsticker Soup – A Cozy, Flavor-Packed Comfort Bowl

    Craving something cozy, nourishing, and ready in under 30 minutes? Look no further than this Potsticker Soup — the ultimate fusion of convenience and flavor. With tender dumplings swimming in a fragrant, ginger-garlic broth and loaded with mushrooms, spinach, and chili oil for a subtle kick, this soup hits every craving. Whether you’re feeling under the weather or just want a quick dinner that feels like takeout (but better), this recipe delivers.

    • Medium soup pot or saucepan
    • Ladle
    • Sharp knife
    • Cutting board
    • Spoon or spatula

    Produce:

    • 2 garlic cloves (minced)
    • 2 tsp fresh ginger (grated)
    • 2 green onions (sliced)
    • ½ cup mushrooms (sliced)
    • ½ cup spinach or bok choy

    Canned Goods:

    • 4 cups chicken broth

    Condiments:

    • 1 tbsp soy sauce

    Baking & Spices:

    • 1 tsp chili oil or red pepper flakes (adjust to taste)
    • Salt & pepper (to taste)

    Oils & Vinegars:

    • 1 tbsp sesame oil
    • 1 tbsp rice vinegar

    Other:

    • 12 –15 frozen potstickers (pork, chicken, or veggie – your choice)

    Sauté Aromatics:

    1. In a soup pot, heat sesame oil over medium heat. Add garlic, ginger, and white parts of green onions. Sauté for 1–2 minutes until fragrant.

    Add Broth & Flavor:

    1. Pour in chicken broth, soy sauce, rice vinegar, chili oil (or flakes), and mushrooms. Bring to a gentle simmer.

    Add Potstickers:

    1. Carefully add frozen potstickers to the simmering broth. Cook uncovered for 6–8 minutes (or according to package instructions), until heated through and slightly plumped.

    Finish with Greens:

    1. Stir in spinach or bok choy and cook for 1–2 more minutes until just wilted. Taste and adjust seasoning with salt and pepper.

    Garnish & Serve:

    1. Ladle into bowls and top with the green parts of green onions. Optional: extra chili oil, sesame seeds, or a squeeze of lime.

    🔁 Variations
    Vegetarian Version: Use veggie broth and plant-based potstickers.

    Noodle Soup Twist: Add rice noodles or ramen for a heartier dish.

    Spicy Miso: Stir in 1 tbsp of miso paste for a deeper umami profile.

    🧊 Storage Tips
    Fridge: Store leftovers for up to 3 days (potstickers may soften slightly).

    Reheat: Warm on the stovetop. Add extra broth if needed.

    Freeze: Not recommended after cooking, but you can prep and freeze the broth separately.

    ❓ Frequently Asked Questions
    Can I make this with homemade potstickers?
    Yes! Just be sure to seal them tightly and cook gently to avoid breakage.

    Do I need to thaw frozen potstickers first?
    Nope! Drop them straight into the broth from frozen.

    What kind of potstickers work best?
    Chicken, pork, shrimp, or veggie all work. Go with what you love!