✨ Introduction
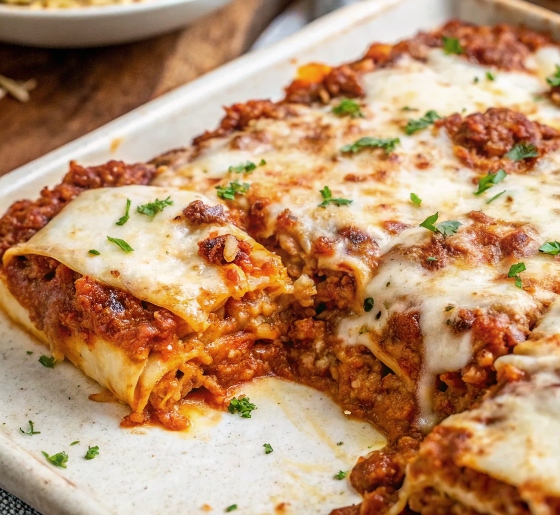
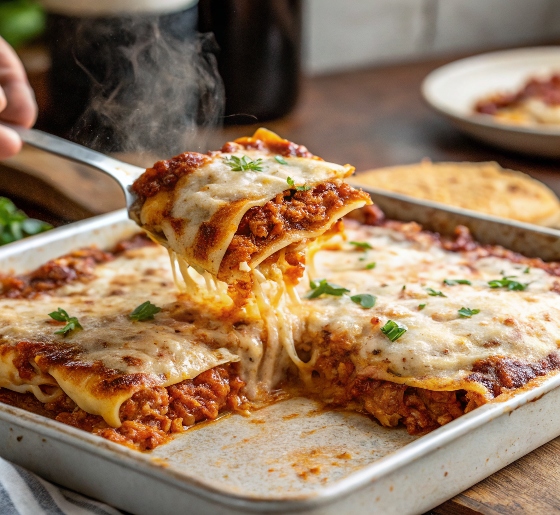
Few dishes say home-cooked love like a classic, bubbling pan of World’s Best Lasagna. This recipe is everything a lasagna should be — rich layers of slow-simmered meat sauce, creamy ricotta, gooey mozzarella, perfectly cooked noodles, and a golden, cheesy crust. Whether you’re hosting a family gathering, preparing a holiday meal, or craving a hearty Sunday dinner, this lasagna will have everyone asking for seconds (and the recipe!).
🍽️ Servings & Time
- Yield: 12 servings
- Prep Time: 30 minutes
- Cook Time: 1 hour 30 minutes
- Rest Time: 15 minutes
- Total Time: ~2 hours 15 minutes
🛒 Ingredients
For the Meat Sauce:
- 1 lb ground beef
- 1 lb Italian sausage (sweet or spicy)
- 1 small onion, diced
- 3 cloves garlic, minced
- 1 (28 oz) can crushed tomatoes
- 2 (6 oz each) cans tomato paste
- 2 (15 oz each) cans tomato sauce
- ½ cup water
- 2 tbsp white sugar
- 1 ½ tsp dried basil
- 1 tsp Italian seasoning
- 1 tbsp chopped fresh parsley (plus more for garnish)
- Salt and pepper, to taste
For the Cheese Filling:
- 16 oz ricotta cheese
- 1 large egg
- ¾ cup grated Parmesan cheese
Other Ingredients:
- 12 lasagna noodles (regular or oven-ready)
- 1 lb mozzarella cheese, shredded
- Extra Parmesan for topping
🧑🍳 Equipment Needed
- Large skillet or Dutch oven
- Large pot (for noodles)
- 9×13 inch baking dish
- Mixing bowls
- Aluminum foil
- Ladle or large spoon
🍳 Instructions
1. Make the Meat Sauce:
In a large skillet or Dutch oven over medium heat, cook the beef, sausage, onion, and garlic until browned. Drain excess fat.
Add crushed tomatoes, tomato paste, tomato sauce, and water. Stir in sugar, basil, Italian seasoning, parsley, salt, and pepper.
Simmer uncovered for at least 30 minutes, stirring occasionally, until thickened.
2. Prepare the Cheese Mixture:
In a bowl, combine ricotta cheese, egg, and Parmesan. Mix until smooth.
3. Cook the Noodles:
Boil lasagna noodles according to package directions if not using oven-ready noodles. Drain and set aside.
4. Assemble the Lasagna:
- Spread 1 cup of meat sauce on the bottom of the baking dish.
- Layer with 3–4 noodles, slightly overlapping.
- Spread ⅓ of the ricotta mixture over noodles.
- Top with ¼ of the mozzarella cheese.
- Spoon over 1 ½ cups meat sauce.
- Repeat layers (noodles, ricotta, mozzarella, sauce) two more times.
- Finish with a final layer of noodles, sauce, mozzarella, and a sprinkle of Parmesan.
5. Bake:
Cover tightly with foil (sprayed with cooking spray) and bake at 375°F (190°C) for 25 minutes.
Remove foil and bake an additional 25 minutes, until the cheese is golden and bubbling.
6. Rest Before Serving:
Let lasagna cool for 15 minutes to set before slicing and serving. Garnish with fresh parsley if desired.
🔁 Variations
- Meatless: Omit meat and add sautéed mushrooms, spinach, or zucchini.
- Extra Cheesy: Add layers of provolone or fontina between the mozzarella and ricotta.
- Spicy Kick: Use hot Italian sausage and add red pepper flakes to the sauce.
🧊 Storage Tips
- Fridge: Store leftovers tightly covered for up to 5 days.
- Freeze: Freeze baked lasagna whole or in slices for up to 3 months.
- Reheat: Reheat covered in a 350°F oven or microwave individual slices.
❓ Frequently Asked Questions
Can I make lasagna ahead of time?
Yes! Assemble it a day ahead, cover, and refrigerate. Bake when ready.
Do I need to boil the noodles first?
If using traditional noodles, yes. Oven-ready noodles can go straight into the dish.
Why let it rest before cutting?
Resting allows the layers to firm up and makes slicing much easier and cleaner.
World’s Best Lasagna – A Legendary Comfort Food Classic

Few dishes say home-cooked love like a classic, bubbling pan of World’s Best Lasagna. This recipe is everything a lasagna should be — rich layers of slow-simmered meat sauce, creamy ricotta, gooey mozzarella, perfectly cooked noodles, and a golden, cheesy crust. Whether you’re hosting a family gathering, preparing a holiday meal, or craving a hearty Sunday dinner, this lasagna will have everyone asking for seconds (and the recipe!).
- Large skillet or Dutch oven
- Large pot (for noodles)
- 9×13-inch baking dish
- Mixing bowls
- Aluminum foil
- Ladle or large spoon
For the Meat Sauce:
- 1 lb ground beef
- 1 lb Italian sausage (sweet or spicy)
- 1 small onion (diced)
- 3 cloves garlic (minced)
- 1 28 oz can crushed tomatoes
- 2 6 oz each cans tomato paste
- 2 15 oz each cans tomato sauce
- ½ cup water
- 2 tbsp white sugar
- 1 ½ tsp dried basil
- 1 tsp Italian seasoning
- 1 tbsp chopped fresh parsley (plus more for garnish)
- Salt and pepper (to taste)
- For the Cheese Filling:
- 16 oz ricotta cheese
- 1 large egg
- ¾ cup grated Parmesan cheese
Other Ingredients:
- 12 lasagna noodles (regular or oven-ready)
- 1 lb mozzarella cheese (shredded)
Extra Parmesan for topping
Make the Meat Sauce:
- In a large skillet or Dutch oven over medium heat, cook the beef, sausage, onion, and garlic until browned. Drain excess fat.
- Add crushed tomatoes, tomato paste, tomato sauce, and water. Stir in sugar, basil, Italian seasoning, parsley, salt, and pepper.
- Simmer uncovered for at least 30 minutes, stirring occasionally, until thickened.
Prepare the Cheese Mixture:
- In a bowl, combine ricotta cheese, egg, and Parmesan. Mix until smooth.
Cook the Noodles:
- Boil lasagna noodles according to package directions if not using oven-ready noodles. Drain and set aside.
Assemble the Lasagna:
- Spread 1 cup of meat sauce on the bottom of the baking dish.
- Layer with 3–4 noodles, slightly overlapping.
- Spread ⅓ of the ricotta mixture over noodles.
- Top with ¼ of the mozzarella cheese.
Spoon over 1 ½ cups meat sauce.
- Repeat layers (noodles, ricotta, mozzarella, sauce) two more times.
- Finish with a final layer of noodles, sauce, mozzarella, and a sprinkle of Parmesan.
Bake:
- Cover tightly with foil (sprayed with cooking spray) and bake at 375°F (190°C) for 25 minutes.
- Remove foil and bake an additional 25 minutes, until the cheese is golden and bubbling.
Rest Before Serving:
- Let lasagna cool for 15 minutes to set before slicing and serving. Garnish with fresh parsley if desired.
🔁 Variations
Meatless: Omit meat and add sautéed mushrooms, spinach, or zucchini.
Extra Cheesy: Add layers of provolone or fontina between the mozzarella and ricotta.
Spicy Kick: Use hot Italian sausage and add red pepper flakes to the sauce.
🧊 Storage Tips
Fridge: Store leftovers tightly covered for up to 5 days.
Freeze: Freeze baked lasagna whole or in slices for up to 3 months.
Reheat: Reheat covered in a 350°F oven or microwave individual slices.
❓ Frequently Asked Questions
Can I make lasagna ahead of time?
Yes! Assemble it a day ahead, cover, and refrigerate. Bake when ready.
Do I need to boil the noodles first?
If using traditional noodles, yes. Oven-ready noodles can go straight into the dish.
Why let it rest before cutting?
Resting allows the layers to firm up and makes slicing much easier and cleaner.