Category: Lunch

  • Deep-Dish Pizza Pie Recipe: A Hearty Slice of Comfort 🍕

    Deep-Dish Pizza Pie Recipe: A Hearty Slice of Comfort 🍕

    When you’re craving something bold, cheesy, saucy, and seriously satisfying, there’s no better fix than a thick slice of homemade deep-dish pizza pie. This recipe takes everything you love about traditional pizza — melty mozzarella, zesty pepperoni, seasoned beef, sautéed veggies, and rich tomato sauce — and tucks it into a buttery, crisp-edged crust you make from scratch. 🔥🧀 This is the ultimate weekend comfort food, date-night dish, or crowd-pleasing dinner. Inspired by the famous Chicago-style pizza, this pie-style version is all about the deep, thick crust that cradles layers of meaty, cheesy goodness. If you love cheesy baked comfort meals, you’ll also love Stuffed Crust Skillet Pizza or Pizza Casserole.

    • 10-inch deep-dish or cast-iron skillet
    • Large mixing bowl
    • Whisk and wooden spoon or stand mixer
    • Small saucepan (optional, for warming sauce or sautéing veggies)
    • Rolling pin – for spreading the dough
    • Measuring cups and spoons
    • Oven preheated to 425°F

    Dough:

    • 2¼ tsp active dry yeast (1 packet)
    • 1 tsp sugar
    • 1 cup warm water (about 110°F)
    • 2½ cups all-purpose flour
    • 1 tsp salt
    • 2 tbsp olive oil

    Meat & Toppings:

    • 1 lb ground beef or Italian sausage (browned and drained)
    • 1 cup sliced pepperoni
    • ½ cup mushrooms (sliced)
    • ½ cup green bell peppers or jalapeños (diced)
    • 1 cup pizza sauce
    • 1 cup shredded mozzarella cheese
    • ½ cup shredded cheddar cheese
    • Extra mozzarella for topping

    ✅ Optional garnishes: dried oregano, red pepper flakes, parmesan, fresh basil

    Step 1: Make the Dough

    1. In a bowl, combine warm water, sugar, and yeast. Let sit for 5–10 minutes until foamy.
    2. Stir in flour, salt, and olive oil until a dough forms.
    3. Knead the dough by hand or using a stand mixer with a dough hook for about 6–8 minutes, until smooth and elastic.
    4. Place dough in a greased bowl, cover with a clean towel, and let rise in a warm place for 1 hour or until doubled in size.
    5. Step 2: Preheat & Prep Fillings
    6. Preheat your oven to 425°F (220°C).
    7. While the dough rises:
    8. Brown the ground beef or sausage, season lightly with salt and pepper, and drain excess fat.
    9. Slice mushrooms and peppers.
    10. Optional: Sauté veggies in a bit of olive oil for added flavor and less moisture.

    Step 3: Shape the Dough

    1. Once risen, punch down the dough and roll it into a 12-inch circle.
    2. Grease your 10-inch deep-dish pan or cast iron skillet.
    3. Press the dough into the pan, working it up the sides. Let it rest for 5 minutes to prevent shrinkage.

    Step 4: Layer the Pie

    1. In this order:
    2. Shredded mozzarella (1 cup) – forms a melty base.
    3. Ground beef or sausage
    4. Sliced pepperoni
    5. Sautéed mushrooms and peppers
    6. Pizza sauce – spread evenly on top
    7. Shredded cheddar + extra mozzarella – for a cheesy, bubbly finish

    Step 5: Bake

    1. Bake at 425°F for 25–30 minutes, or until:
    2. Crust is golden brown
    3. Cheese is bubbly and melted
    4. Sauce slightly caramelized on top

    🔥 Optional: Broil for 1–2 minutes to get the cheese extra golden.

    Step 6: Rest & Serve

    1. Let the pizza pie rest for 5–10 minutes before slicing.
    2. Garnish with dried oregano, red pepper flakes, or grated parmesan.
    3. Serve with a side salad, garlic knots, or just extra napkins — this pie is hearty!

    🔁 Variations
    1. Vegetarian Deep-Dish Pizza
    Omit meat and load up on spinach, olives, mushrooms, onions, artichokes, or roasted veggies.

    2. Spicy Version
    Add red pepper flakes, jalapeños, or spicy sausage to turn up the heat.

    3. BBQ Chicken Style
    Swap pizza sauce for BBQ sauce, use shredded rotisserie chicken, and top with red onion and cilantro.

    4. Four Cheese Pie
    Use a blend of mozzarella, provolone, parmesan, and ricotta for ultra cheesy perfection.

    5. Store-Bought Shortcut
    Use pre-made pizza dough to cut the prep time in half!

    🧊 Storage & Reheating
    Refrigerator:
    Store leftovers in an airtight container for up to 4 days.

    Freezer:
    Freeze slices wrapped in foil for up to 2 months.

    Reheat from frozen in a 350°F oven for 15–20 minutes.

    Reheat:
    For best texture, reheat in a skillet or toaster oven rather than microwave.

    ❓ 10 Frequently Asked Questions (FAQs)
    1. Can I use pre-made dough?
    Absolutely — store-bought pizza dough works great in a pinch.

    2. What’s the difference between deep-dish and regular pizza?
    Deep-dish has a thicker crust, layers of cheese and fillings, and the sauce goes on top.

    3. Can I make this gluten-free?
    Yes — use a gluten-free pizza dough and ensure your toppings are GF-certified.

    4. What pan is best for deep-dish pizza?
    A cast iron skillet or deep cake pan gives the best crisp edges.

    5. Can I use fresh mozzarella?
    Yes, but pat it dry first to avoid excess moisture.

    6. Do I have to pre-cook the meat?
    Yes — raw meat won’t fully cook in the short bake time.

    7. Why does the sauce go on top?
    It prevents the cheese from burning and keeps the crust from getting soggy.

    8. How do I know it’s done?
    Look for bubbly cheese, golden edges, and a firm base that lifts easily from the pan.

    9. Can I double the recipe?
    Yes — just use two pans or a large baking dish.

    10. What side dishes go well with this?
    A simple Caesar salad, garlic knots, or roasted broccoli pairs well.

    ✅ Conclusion
    This Deep-Dish Pizza Pie Recipe is the definition of crave-worthy comfort. With a golden homemade crust, layers of flavorful meats and veggies, gooey cheese, and a rich tomato sauce, it’s everything you want from a slice of pizza — just thicker, cheesier, and even more indulgent.

    Whether you’re making it for pizza night, feeding a crowd, or just treating yourself to something seriously satisfying, this deep-dish pizza will hit the spot every single time.

    Looking for more cheesy crowd-pleasers?

    Pizza Monkey Bread

    Cheesy Lasagna Soup

    Sheet Pan Pizza Party

  • Crispy Chinese Honey Garlic Chicken – Sweet, Sticky & Better Than Takeout!

    Crispy Chinese Honey Garlic Chicken – Sweet, Sticky & Better Than Takeout!

    If you’re craving something crispy, sweet, and garlicky, this Crispy Chinese Honey Garlic Chicken is the ultimate better-than-takeout dinner recipe. 🍯🧄🥡 Imagine tender bites of juicy chicken, coated in a light, golden crust and tossed in a luscious, glossy honey garlic sauce — all made from scratch in under 45 minutes! This recipe brings together the bold, comforting flavors of your favorite Chinese takeout dish with the satisfaction of homemade cooking. Whether you’re serving it with steamed rice, fried noodles, or stir-fried veggies, it’s an easy weeknight winner that will impress every time. If you’re a fan of classic Asian-inspired dishes, you’ll love Sticky Orange Chicken, Sweet and Sour Chicken, or Honey Sesame Chicken.

    • Mixing bowls – for batter and sauce
    • Large skillet or wok – for frying
    • Tongs or slotted spoon
    • Paper towels & plate – for draining fried chicken
    • Whisk – for the sauce
    • Grater or garlic press – for garlic and ginger
    • Measuring cups and spoons
    • Cooking thermometer (optional, for oil temperature)

    For the Chicken:

    • 1 lb boneless skinless chicken breasts or thighs (cut into bite-sized pieces)
    • ½ cup all-purpose flour
    • ½ cup cornstarch
    • ½ tsp baking powder
    • 1 large egg
    • Salt and black pepper (to taste)
    • Vegetable oil (for frying)

    For the Honey Garlic Sauce:

    • 3 garlic cloves (minced)
    • 1 tsp fresh ginger (grated)
    • ¼ cup honey
    • ¼ cup soy sauce (low-sodium preferred)
    • 1 tbsp rice vinegar
    • 1 tbsp sesame oil
    • ½ cup water
    • 1 tsp cornstarch (mixed with 1 tbsp water (slurry))
    • ¼ tsp red pepper flakes (optional for heat)

    Garnish:

    • Chopped green onions
    • Sesame seeds

    Step 1: Prepare the Batter

    1. In a medium bowl, whisk together:
    2. ½ cup flour
    3. ½ cup cornstarch
    4. ½ tsp baking powder
    5. A pinch of salt and pepper
    6. In a separate bowl, beat 1 large egg.
    7. Add the egg and about ¼ cup water to the dry mix and stir to form a thick, smooth batter.

    ✅ Tip: The batter should coat the chicken without dripping too much — adjust with more water or flour if needed.

    Step 2: Coat the Chicken

    1. Toss chicken pieces into the batter, making sure they’re fully coated.
    2. Step 3: Fry the Chicken

    Heat 2 inches of vegetable oil in a deep skillet or wok over medium-high heat (to 350°F/175°C).

    1. Fry the chicken in batches, turning occasionally, for 5–6 minutes, or until golden brown and crispy.
    2. Remove and drain on paper towels.

    ⚠️ Don’t overcrowd the pan — it lowers the oil temp and makes chicken greasy.

    Step 4: Make the Honey Garlic Sauce

    1. In a clean skillet or saucepan, add:
    2. 1 tbsp sesame oil
    3. Minced garlic and grated ginger
    4. Cook for 1 minute, then add:
    5. ¼ cup honey
    6. ¼ cup soy sauce
    7. 1 tbsp rice vinegar
    8. ½ cup water
    9. Red pepper flakes (if using)
    10. Bring to a simmer, then whisk in the cornstarch slurry and cook for another 2–3 minutes, or until the sauce thickens into a glaze.

    Step 5: Toss & Serve

    1. Add the fried chicken to the sauce and toss until fully coated.
    2. Serve immediately over white rice, noodles, or stir-fried vegetables.
    3. Garnish with green onions and sesame seeds.

    🔁 Variations
    1. Air Fryer Version
    Coat chicken and air fry at 390°F for 14–16 minutes, flipping halfway.

    2. Baked Version
    Spread battered chicken on a parchment-lined tray. Bake at 425°F for 20–25 minutes, flipping once. Then toss in sauce.

    3. Extra Spicy
    Add sriracha, chili garlic sauce, or extra red pepper flakes to the glaze.

    4. No Frying Option
    Pan-sear chicken with just a bit of oil, then coat with sauce for a lighter option.

    5. Vegetarian Swap
    Use tofu cubes or cauliflower florets in place of chicken — batter and cook the same way!

    🧊 Storage & Reheating
    Refrigerator:
    Store leftovers in an airtight container for up to 3–4 days.

    Freezer:
    Freeze cooked, sauced chicken for up to 2 months. Reheat in oven or skillet.

    Reheating:
    For best results, reheat in a skillet over medium heat or in a toaster oven to crisp the chicken.

    Avoid microwaving for too long — it may make the chicken soggy.

    ❓ 10 Frequently Asked Questions (FAQs)
    1. Can I use chicken thighs instead of breasts?
    Yes — thighs are juicier and perfect for this recipe.

    2. Is this dish very sweet?
    It’s sweet-savory balanced — reduce honey slightly if you prefer less sweetness.

    3. What can I serve it with?
    White rice, jasmine rice, lo mein noodles, or steamed broccoli are great pairings.

    4. Can I use store-bought honey garlic sauce?
    Sure — but the homemade version is fresher, tastier, and customizable.

    5. How do I make the chicken extra crispy?
    Double-fry: Fry once, rest for 10 minutes, then fry again for 2–3 minutes.

    6. Can I prep it ahead of time?
    Yes — you can fry the chicken earlier in the day and reheat before tossing in sauce.

    7. Is this gluten-free?
    Not by default. Use GF flour, cornstarch, and tamari to make it gluten-free.

    8. Can I make the sauce thicker?
    Yes — increase the cornstarch slurry or simmer longer.

    9. Can I cook this with a stir-fry method instead?
    Yes — skip the batter and sauté chicken pieces in oil until cooked, then toss in sauce.

    10. Does it really taste like takeout?
    Yes — even better! Crispier chicken, cleaner ingredients, and richer flavor.

    ✅ Conclusion
    This Crispy Chinese Honey Garlic Chicken is the perfect homemade comfort dish that satisfies every takeout craving — without leaving the house. Juicy chicken, crackly coating, and a glossy, sticky sauce that hits every flavor note from sweet to savory to just a little spicy — this is the kind of recipe you’ll come back to again and again.

    Whether you’re cooking for family or hosting a dinner night, this chicken will impress — and disappear fast!

    Want more sticky, satisfying meals?

    Korean Popcorn Chicken

    Teriyaki Chicken Stir Fry

    Crispy Beef and Broccoli

  • Bourbon Chicken Copycat Recipe – Sweet, Sticky, and Just Like the Food Court Favorite

    Bourbon Chicken Copycat Recipe – Sweet, Sticky, and Just Like the Food Court Favorite

    Craving that bold, sweet-and-savory chicken from your favorite mall food court? You’re going to love this Bourbon Chicken Copycat Recipe! 🍗🔥 With tender chicken, a rich bourbon-infused glaze, and a balance of brown sugar, soy sauce, ginger, and garlic, this dish is as comforting as it is crave-worthy. Despite its name, Bourbon Chicken is more American-Chinese fusion than Southern barbecue — named after Bourbon Street in New Orleans. And while it’s commonly found at fast-casual food court chains like Panda Express or Asian Chao, it’s super easy to recreate at home. This one-pan meal is perfect for busy weeknights, easy to meal prep, and pairs beautifully with rice, noodles, or steamed veggies. Want more better-than-takeout recipes? Check out General Tso’s Chicken or Sticky Honey Garlic Chicken.

    • Large skillet or sauté pan
    • Mixing bowl – for the sauce
    • Measuring cups & spoons
    • Cutting board & sharp knife
    • Tongs or spatula
    • Pot or rice cooker – if serving with rice
    • Optional: Wok, if you prefer high-heat stir-frying

    Meat:

    • 1 lb boneless skinless chicken thighs or breasts (cut into bite-sized pieces)

    Produce:

    • 1 tsp garlic powder
    • 1 tsp ground ginger
    • 2 green onions (sliced for garnish)

    Condiments:

    • 1 tbsp ketchup
    • ¼ cup soy sauce (use low-sodium if desired)
    • Baking & Spices:
    • ¼ cup brown sugar
    • ¼ tsp black pepper
    • ½ tsp salt
    • ½ tsp red pepper flakes (optional for heat)
    • Oils & Vinegars:
    • 2 tbsp vegetable oil
    • 2 tbsp apple cider vinegar

    Beer, Wine & Spirits:

    • ¼ cup bourbon whiskey

    Pasta & Grains:

    • Cooked white rice (for serving)

    🔁 Optional toppings: sesame seeds, chopped cilantro, or a drizzle of sriracha

    Step 1: Cook the Chicken

    1. Heat vegetable oil in a large skillet over medium-high heat.
    2. Add the chicken pieces, season with a pinch of salt and pepper, and cook for 4–5 minutes, stirring occasionally, until browned and just cooked through.
    3. Remove chicken from skillet and set aside.

    Step 2: Make the Sauce

    1. In the same skillet, lower the heat to medium and add:
    2. ¼ cup soy sauce
    3. ¼ cup brown sugar
    4. 1 tbsp ketchup
    5. 2 tbsp apple cider vinegar
    6. ¼ cup bourbon
    7. 1 tsp garlic powder
    8. 1 tsp ground ginger
    9. ½ tsp red pepper flakes (optional)
    10. Stir to combine, scraping up any browned bits from the pan.

    Step 3: Simmer and Glaze

    1. Bring the sauce to a gentle boil.
    2. Return the cooked chicken to the skillet.
    3. Simmer uncovered for 10–12 minutes, stirring occasionally, until the sauce thickens into a glaze and coats the chicken evenly.

    ✅ Tip: If sauce gets too thick, add 1–2 tbsp of water or chicken broth to loosen it.

    Step 4: Serve

    1. Serve the glazed chicken over a bed of steamed rice.
    2. Garnish with sliced green onions, and if desired, sesame seeds or a lime wedge.

    🔁 Variations
    1. No-Bourbon Version
    Swap bourbon for apple juice, orange juice, or extra broth if you prefer a non-alcoholic version.

    2. Crispy Bourbon Chicken
    Lightly dredge chicken in cornstarch before cooking for a crispy edge.

    3. Bourbon Chicken Bowls
    Build a bowl with rice, steamed broccoli, pickled onions, and a drizzle of spicy mayo.

    4. Slow Cooker Version
    Combine sauce and raw chicken in the slow cooker. Cook on low for 4–5 hours or high for 2–3, then thicken the sauce on the stovetop if needed.

    5. Vegetarian Swap
    Use tofu or cauliflower florets in place of chicken — pan-fry until crispy, then coat in sauce.

    🧊 Storage & Reheating
    Fridge:
    Store in an airtight container for up to 4 days.

    Freezer:
    Freeze cooled chicken and sauce together for up to 2 months.

    Thaw in the fridge overnight.

    Reheat:
    Reheat in a skillet over medium heat or in the microwave for 60–90 seconds until hot.

    ❓ 10 Frequently Asked Questions (FAQs)
    1. Does bourbon chicken actually contain bourbon?
    Yes — traditionally it does. But you can substitute it if you prefer a non-alcoholic version.

    2. Will the alcohol cook off?
    Yes — simmering allows the alcohol to mostly evaporate, leaving only flavor behind.

    3. Can I make it without soy sauce?
    You can use coconut aminos or tamari for a soy-free alternative.

    4. Is it gluten-free?
    Use gluten-free soy sauce or tamari and ensure other ingredients are GF-certified.

    5. Can I use chicken breasts instead of thighs?
    Absolutely — breasts are leaner but still flavorful in this dish.

    6. Is this recipe spicy?
    Only mildly — red pepper flakes are optional and can be adjusted or omitted.

    7. Can I double the recipe?
    Yes! Just use a larger skillet or sauté in batches.

    8. What’s the best bourbon to use?
    Use a smooth, mid-range bourbon — nothing too expensive or harsh.

    9. Can I use raw garlic and ginger?
    Yes — substitute 1 tsp garlic powder with 2 fresh garlic cloves, and 1 tsp ground ginger with 1 tsp fresh grated ginger.

    10. What sides go well with it?
    Steamed rice, stir-fried veggies, garlic green beans, or fried rice are all great choices.

    ✅ Conclusion
    This Bourbon Chicken Copycat Recipe is everything you love about food court comfort — sweet, savory, sticky, and completely satisfying. With a quick glaze that caramelizes around juicy chicken, it’s a dish that tastes like takeout but comes together in your own kitchen in under 30 minutes.

    Serve it over fluffy rice, load it into bowls, or pair with your favorite stir-fry veggies — however you plate it, you’ll want to add it to your weekly rotation.

    Craving more better-than-takeout recipes?

    Orange Chicken Stir-Fry

    Honey Sesame Chicken

  • Bacon Cheeseburger Bombs – Gooey, Meaty, and Totally Addictive!

    Bacon Cheeseburger Bombs – Gooey, Meaty, and Totally Addictive!

    Get ready for all the flavors of a classic cheeseburger — ground beef, melty cheese, smoky bacon, pickles, and even a touch of ketchup and mustard — wrapped up in warm, golden biscuit dough. These Bacon Cheeseburger Bombs are juicy, gooey, and totally satisfying, all in one perfectly poppable bite. 🍔💣 Whether you’re hosting game day, planning a fun family dinner, or looking for a creative way to use ground beef, this recipe is a hit every time. Think of them as burger meets biscuit, with a buttery crust and a gooey center that literally explodes with flavor. If you love hand-held comfort food like Sloppy Joe Sliders or Cheesy Taco Pockets, these cheeseburger bombs are a must-try.

    • Large skillet – to cook the beef and onions
    • Cutting board & knife – to dice onions and chop pickles
    • Mixing bowl – to combine filling
    • Baking sheet – lined with parchment or greased
    • Pastry brush – for brushing with butter
    • Measuring spoons and cups
    • Small spoon or cookie scoop – to portion filling
    • Oven or air fryer – both options work

    Meat:

    • 1 lb ground beef
    • 6 slices bacon (cooked and crumbled)

    Produce:

    • 1 small onion (finely chopped)

    Dairy:

    • 1 cup shredded cheddar cheese
    • 2 tbsp butter (melted)

    Condiments:

    • Ketchup and mustard (to taste)
    • 1 pickle (finely diced (or a few pickle slices))

    Baking & Spices:

    • 1 16 oz can refrigerated biscuit dough
    • Salt and pepper (to taste)
    • 1 tsp sesame seeds (optional for topping)

    Step 1: Cook the Burger Mixture

    1. In a skillet over medium heat, cook ground beef and onion until beef is browned and onions are soft (about 7–8 minutes).
    2. Season with salt and pepper to taste.
    3. Remove from heat and stir in:
    4. Crumbled bacon
    5. Diced pickle
    6. Ketchup and mustard (about 1–2 tbsp total)
    7. Shredded cheddar cheese
    8. Let cool slightly while you prep the biscuits.

    Step 2: Flatten the Dough

    1. Separate biscuit dough into 8 pieces.
    2. Using your fingers or a rolling pin, flatten each into a 4–5 inch circle.

    Step 3: Fill and Seal

    1. Spoon about 2 tablespoons of filling into the center of each biscuit.
    2. Fold the edges over the filling and pinch to seal tightly into a ball.
    3. Place seam-side down on a greased or parchment-lined baking sheet.

    Step 4: Brush and Bake

    1. Brush each bomb with melted butter and sprinkle with sesame seeds.
    2. Bake at 375°F (190°C) for 13–15 minutes, or until golden brown and cooked through.

    🔁 Air Fryer Option: Preheat to 350°F and air fry bombs for 8–10 minutes, checking for golden color.

    Step 5: Serve

    1. Let cool slightly before serving.
    2. Serve with extra ketchup, mustard, or burger sauce on the side.

    🔁 Variations
    1. Double Cheeseburger Bombs
    Add a cube of mozzarella or American cheese inside the filling for an extra gooey center.

    2. Spicy Kick
    Add chopped jalapeños, a dash of hot sauce, or pepper jack cheese.

    3. BBQ Burger Bombs
    Mix BBQ sauce into the filling instead of ketchup and mustard.

    4. Vegetarian Option
    Use plant-based ground beef and skip the bacon.

    5. Breakfast Bombs
    Swap beef for scrambled eggs and sausage, and use cheddar or Monterey Jack.

    🧊 Storage & Reheating
    Refrigerator:
    Store in an airtight container for up to 4 days.

    Freezer:
    Freeze baked bombs in a freezer bag for up to 2 months.

    Thaw overnight in the fridge or microwave from frozen.

    Reheat:
    Microwave for 30–60 seconds OR bake at 350°F for 10 minutes for crispiness.

    ❓ 10 Frequently Asked Questions (FAQs)
    1. Can I make them ahead of time?
    Yes! Prep and refrigerate unbaked bombs for up to 24 hours, then bake as directed.

    2. What kind of biscuit dough works best?
    Use flaky-layer refrigerated biscuits — they bake up buttery and soft.

    3. Can I use puff pastry or crescent rolls?
    Yes — crescent dough works great and is easy to fold.

    4. Can I add lettuce or tomato inside?
    It’s best to serve those on the side to avoid soggy dough.

    5. How can I keep them from bursting open?
    Be sure to seal the dough tightly and place seam-side down.

    6. Can I bake them in a muffin tin?
    Yes! Grease the tin and press the sealed bombs in before baking.

    7. Are these kid-friendly?
    Absolutely — they’re hand-held, cheesy, and customizable.

    8. Can I make these gluten-free?
    Use gluten-free biscuit dough and ensure other ingredients are GF.

    9. What dips go well with them?
    Try ketchup, mustard, burger sauce, ranch, or BBQ sauce.

    10. Can I double the recipe?
    Yes — just use a large baking sheet or two and rotate halfway through baking.

    ✅ Conclusion
    These Bacon Cheeseburger Bombs are the perfect bite-sized twist on a backyard classic. With savory ground beef, crispy bacon, melty cheddar, and all the fixings wrapped in soft biscuit dough, they’re irresistible from the first bite.

    Perfect for game days, parties, or weeknight meals, they’re easy to make and even easier to devour. Customize them with your favorite fillings, serve with fun dips, and enjoy burger night in a whole new way!

    Looking for more craveable comfort food?

    Cheeseburger Sliders on Hawaiian Rolls

    Stuffed Pizza Bombs

    Cheeseburger Quesadillas

  • Ground Turkey Sweet Potato Bake – Healthy, Hearty & Easy to Make

    Ground Turkey Sweet Potato Bake – Healthy, Hearty & Easy to Make

    Looking for a dinner that’s wholesome, satisfying, and easy to throw together? This Ground Turkey Sweet Potato Bake is everything you want in a weeknight meal: one-pan, nutrient-rich, packed with protein and veggies, and loaded with melty cheese and smoky spices. 🍠🧀🦃 It’s a flavor-forward, comforting dish that brings together lean ground turkey, sweet roasted potatoes, colorful bell peppers, and cheesy goodness — all in a hearty, satisfying casserole-style bake. Plus, it’s naturally gluten-free, meal-prep friendly, and totally customizable. If you love easy, feel-good meals, you’ll also enjoy Turkey Taco Skillet or this Sweet Potato Shepherd’s Pie.

    • Large skillet or sauté pan – for cooking the turkey and vegetables
    • Cutting board & knife – for prepping veggies
    • Vegetable peeler – for sweet potatoes (if desired)
    • Large baking dish or casserole dish (9×13 inches works well)
    • Spatula or wooden spoon – for stirring
    • Measuring cups & spoons
    • Cheese grater (if shredding your own cheese)
    • Aluminum foil – for covering while baking

    Meat:

    • 1 lb ground turkey

    Produce:

    • 2 large sweet potatoes (peeled and cubed)
    • 1 red bell pepper (diced)
    • 1 medium onion (diced)
    • 2 garlic cloves (minced)
    • Fresh parsley or cilantro (chopped for garnish)

    Dairy:

    • 1 cup shredded mozzarella or cheddar cheese

    Oils & Vinegars:

    • 1 tbsp olive oil

    Spices & Herbs:

    • 1 tsp smoked paprika
    • ½ tsp ground cumin
    • ½ tsp dried thyme
    • Salt and black pepper (to taste)

    Step 1: Prep & Roast the Sweet Potatoes

    1. Preheat your oven to 400°F (200°C).
    2. Peel and cube the sweet potatoes into ½-inch pieces.
    3. Toss with ½ tbsp olive oil, salt, pepper, and a pinch of paprika.
    4. Spread on a baking sheet and roast for 20–25 minutes, until tender and slightly crispy.

    🔁 Shortcut: You can skip this step and add raw sweet potatoes to the bake — just increase total bake time to ensure they’re tender.

    Step 2: Cook the Turkey & Veggies

    1. While sweet potatoes roast, heat ½ tbsp olive oil in a large skillet over medium heat.
    2. Add ground turkey, season with salt, pepper, cumin, and paprika. Cook until browned (6–8 minutes).
    3. Stir in onion, bell pepper, thyme, and garlic. Cook for another 4–5 minutes, until veggies are softened and fragrant.

    Step 3: Assemble the Bake

    1. Lightly grease a 9×13 baking dish.
    2. Add the roasted sweet potatoes and turkey mixture, stirring to combine.
    3. Top evenly with shredded cheese.

    Step 4: Bake & Serve

    1. Cover with foil and bake at 375°F (190°C) for 10–15 minutes until hot and bubbly.
    2. Uncover and broil for 2–3 minutes to brown the cheese (optional).
    3. Remove from oven and top with chopped parsley or cilantro before serving.
    4. 🍽️ Serve with a simple salad, crusty bread, or a dollop of sour cream or Greek yogurt.

    🔁 Variations
    1. Southwest Style
    Add black beans, corn, and a sprinkle of taco seasoning for a Tex-Mex twist.

    2. Greek-Inspired
    Stir in kalamata olives, feta cheese, and oregano.

    3. Low-Carb Option
    Swap sweet potatoes with cauliflower florets or zucchini slices.

    4. Make it Spicy
    Add chili flakes, jalapeños, or a dash of hot sauce.

    5. Plant-Based Version
    Replace turkey with lentils, chickpeas, or plant-based crumbles.

    🧊 Storage & Reheating
    Refrigerator:
    Store leftovers in an airtight container for up to 4 days.

    Freezer:
    Freeze in portions for up to 2 months.

    Thaw overnight in the fridge before reheating.

    Reheat:
    Microwave individual portions or bake at 350°F until heated through.

    ❓ 10 Frequently Asked Questions (FAQs)
    1. Do I have to pre-roast the sweet potatoes?
    No — you can add them raw, just increase the bake time by about 15–20 minutes.

    2. Can I use ground beef or chicken instead of turkey?
    Yes! This recipe works well with any ground meat — just adjust seasonings to your taste.

    3. Can I make this ahead of time?
    Absolutely! Assemble the bake, cover, and refrigerate for up to 24 hours before baking.

    4. Can I add extra veggies?
    Yes — try spinach, zucchini, mushrooms, or shredded carrots.

    5. Is this gluten-free?
    Yes — all ingredients are naturally gluten-free, just double-check your spice blends.

    6. Can I use pre-shredded cheese?
    Yes, but freshly grated melts better and has no added anti-caking agents.

    7. Can I make it dairy-free?
    Yes — use dairy-free cheese or omit the cheese topping.

    8. What goes well with this dish?
    Serve with a side salad, coleslaw, or warm tortillas.

    9. Can I double the recipe?
    Yes! Use a larger casserole dish or two pans and increase baking time slightly.

    10. Can I freeze it before baking?
    It’s best to freeze after baking — pre-freezing raw meat and potatoes can affect texture.

    ✅ Conclusion
    This Ground Turkey Sweet Potato Bake is everything you want in a go-to recipe: easy, comforting, budget-friendly, and full of flavor. With roasted sweet potatoes, lean turkey, aromatic spices, and melted cheese, it’s a one-pan dish that checks all the boxes.

    Whether you’re feeding a family, meal prepping for the week, or just need a cozy dinner, this recipe will leave everyone full and happy.

    Want more feel-good meals?

    Turkey Zucchini Enchilada Bake

    Sweet Potato Black Bean Skillet

    Cheesy Ground Chicken & Broccoli Bake

  • Dump-and-Bake Chicken Tzatziki with Rice – A Mediterranean One-Dish Marvel

    Dump and Bake Chicken Tzatziki with Rice – A Mediterranean One-Dish Marvel

    Say goodbye to dinnertime stress and hello to this Dump-and-Bake Chicken Tzatziki with Rice — the ultimate easy, flavorful, one-dish meal. Bursting with the vibrant flavors of the Mediterranean — think lemon, garlic, herbs, Greek yogurt, and feta — this oven-baked dish requires no pre-cooking and barely any cleanup. 🙌 Everything — including raw rice and chicken — goes right into the baking dish. As it bakes, the rice absorbs the broth and juices, the chicken becomes tender and infused with herbs, and a dollop of creamy, homemade tzatziki sauce adds a cool, tangy finish. It’s the perfect weeknight meal that’s as delicious as it is wholesome. Pair it with a simple salad or warm pita, and you’ve got dinner on the table in under an hour — with only one pan to wash. If you’re loving Mediterranean flavors, be sure to check out Greek Chicken Souvlaki Bowls or Lemon Rice Pilaf.

    • 9×13-inch baking dish or casserole pan
    • Mixing bowl – for making the tzatziki
    • Whisk – for combining sauce ingredients
    • Cutting board & knife – for prepping produce and herbs
    • Grater or food processor – for shredding cucumber
    • Measuring cups & spoons – for accuracy
    • Aluminum foil – for covering the dish while baking

    For the Bake:

    • 1 lb boneless skinless chicken breasts or thighs (cubed or whole)
    • 1 cup long-grain white rice
    • 1½ cups chicken broth or water
    • 2 garlic cloves (minced)
    • 1 lemon (juiced)
    • 2 tbsp olive oil
    • 1 tsp dried oregano
    • 1/2 tsp ground cumin
    • 1 tsp salt and black pepper (to taste)

    For the Tzatziki:

    • 1 cup plain Greek yogurt
    • 1/3 cup grated cucumber (moisture squeezed out)
    • 1 tsp dried dill
    • 1 garlic clove (grated or minced)
    • 1 tbsp lemon juice
    • Salt (to taste)

    For Garnish:

    • 1/2 cup crumbled feta cheese
    • 1/4 cup chopped fresh parsley or cilantro

    Step 1: Preheat the Oven

    1. Preheat your oven to 375°F (190°C).

    Step 2: Assemble the Bake

    1. Lightly grease a 9×13-inch baking dish.
    2. To the dish, add:
    3. Uncooked rice
    4. Chicken broth or water
    5. Olive oil
    6. Minced garlic
    7. Lemon juice
    8. Oregano
    9. Cumin
    10. Salt and pepper
    11. Stir to combine.
    12. Place chicken (cubed or whole) on top. You can stir it in or leave it on top — either works!

    Step 3: Bake

    1. Cover the dish tightly with foil.
    2. Bake for 45–50 minutes, or until the rice is tender and the chicken is fully cooked (internal temp 165°F).
    3. ✅ Tip: Check at 40 minutes. If the rice still seems undercooked, add a splash more broth and bake uncovered for an additional 5–10 minutes.

    Step 4: Make the Tzatziki

    1. While the dish bakes, make the tzatziki:
    2. In a bowl, combine:
    3. Greek yogurt
    4. Grated cucumber (moisture squeezed out with a towel)
    5. Lemon juice
    6. Garlic
    7. Dill
    8. Salt, to taste
    9. Mix well and refrigerate until ready to use.

    Step 5: Garnish & Serve

    1. Once the bake is out of the oven, fluff the rice with a fork.
    2. Spoon over the tzatziki sauce.
    3. Sprinkle with feta and chopped parsley.
    4. Serve warm with pita wedges or a fresh cucumber-tomato salad.

    🔁 Variations
    1. Tzatziki Chicken Bowls
    Skip the rice and serve the baked chicken with couscous or quinoa instead.

    2. Add Veggies
    Mix in cherry tomatoes, chopped bell peppers, or baby spinach before baking for a veggie boost.

    3. Spicy Mediterranean
    Add crushed red pepper flakes or a dollop of harissa to the rice mixture for a kick.

    4. Dairy-Free Version
    Use a dairy-free yogurt like coconut or almond milk yogurt and skip the feta.

    5. Creamy Feta Rice Bake
    Stir in ½ cup feta crumbles directly into the rice before baking for added richness.

    🧊 Storage & Reheating
    Refrigerator:
    Store leftovers in an airtight container for up to 4 days.

    Store tzatziki separately for freshness.

    Reheat:
    Microwave individual portions until hot, or reheat in a covered dish in the oven at 350°F.

    Freezer:
    Freeze the chicken and rice portion (not tzatziki) in freezer-safe containers for up to 2 months.

    Thaw overnight and reheat as needed.

    ❓ 10 Frequently Asked Questions (FAQs)
    1. Can I use brown rice instead of white?
    Yes, but increase liquid to 2 cups and bake for 60–65 minutes.

    2. Do I need to cook the chicken first?
    Nope! This is a true dump-and-bake recipe — just dice or leave the chicken whole and it’ll cook perfectly.

    3. Is this gluten-free?
    Yes, all the ingredients are naturally gluten-free — just double-check your broth.

    4. Can I use chicken thighs?
    Absolutely! Thighs stay super juicy and work perfectly in this dish.

    5. Can I make this ahead of time?
    Yes — assemble everything (except the tzatziki), cover, and refrigerate up to 24 hours ahead. Bake as directed.

    6. Can I add cheese to the bake?
    Yes — feta or mozzarella stirred into the rice before baking is delicious.

    7. How can I make this vegetarian?
    Use chickpeas or tofu instead of chicken, and swap in vegetable broth.

    8. What should I serve with this?
    Try it with pita bread, Greek salad, or grilled vegetables.

    9. Can I use pre-cooked rice?
    This recipe is designed for uncooked rice. If using cooked rice, reduce liquid and bake time accordingly.

    10. What’s the best yogurt for tzatziki?
    Use full-fat Greek yogurt for the creamiest, most authentic result.

    ✅ Conclusion
    This Dump-and-Bake Chicken Tzatziki with Rice is a total weeknight win: one dish, zero hassle, tons of flavor. With fresh herbs, tangy lemon, tender chicken, and fluffy rice, it brings all the vibrant joy of a Mediterranean meal without the work.

    Top it with creamy, cool tzatziki and a sprinkle of feta, and you’ve got a meal that’s fresh, balanced, and deeply satisfying.

    Perfect for busy nights, make-ahead lunches, or just when you’re craving something bright and wholesome.

    Looking for more no-fuss dinners?

    Greek Chicken Sheet Pan Dinner

    Lemon Herb Chicken and Rice Bake

    Mediterranean Chickpea Bowls

  • Cheesy Garlic Chicken Wraps – Flavor-Packed, Easy & Ready in 30 Minutes!

    Cheesy Garlic Chicken Wraps – Flavor-Packed, Easy & Ready in 30 Minutes!

    If you’re craving something cheesy, garlicky, and downright comforting — but also quick and easy — these Cheesy Garlic Chicken Wraps are about to be your new go-to meal. 🧄🧀🌯 They’re everything you love about a comforting chicken dish, wrapped up in a warm flour tortilla: seasoned chicken, creamy garlic sauce, melty cheddar and mozzarella, and fresh parsley for a pop of color and flavor. It’s a flavor explosion that hits all the right notes — cheesy, savory, a touch smoky, and perfectly balanced. Whether you’re feeding your family on a busy weeknight, prepping lunches for the week, or hosting a casual gathering, these wraps are a guaranteed crowd-pleaser. If you’re a fan of this recipe, don’t miss our Grilled Chicken Caesar Wraps or Cheddar Ranch Chicken Wraps.

    • Cutting board & knife – for chopping chicken and parsley
    • Large skillet or sauté pan – to cook the chicken
    • Spatula or tongs – for flipping and stirring
    • Mixing bowl – for tossing chicken with seasoning
    • Grater (if using block cheese)
    • Measuring spoons
    • Non-stick pan or griddle – to toast the wraps (optional but recommended)
    • Foil or parchment paper – for wrapping if meal prepping

    Makes 4 hearty wraps

    Meat:

    • 2 large boneless (skinless chicken breasts, cut into strips)

    Produce:

    • 2 tsp garlic powder
    • 1 tsp onion powder
    • 1 tablespoon chopped fresh parsley (plus more for garnish)

    Condiments:

    • ½ cup creamy garlic sauce (store-bought or homemade)

    Dairy:

    • 1 cup shredded cheddar cheese
    • ½ cup shredded mozzarella cheese

    Baking & Spices:

    • 1 tsp paprika
    • Salt and pepper (to taste)

    Oils & Vinegars:

    • 1 tbsp olive oil

    Bread & Wraps:

    • 4 large flour tortillas

    Step 1: Prep & Season the Chicken

    1. Slice chicken breasts into thin strips or bite-sized pieces.
    2. In a mixing bowl, toss the chicken with:
    3. Garlic powder
    4. Onion powder
    5. Paprika
    6. Salt & pepper

    Step 2: Cook the Chicken

    1. Heat olive oil in a skillet over medium heat.
    2. Add the seasoned chicken and cook for 5–7 minutes, turning occasionally, until golden and cooked through.
    3. Turn off heat and stir in creamy garlic sauce until the chicken is well coated.

    Step 3: Assemble the Wraps

    1. Lay out the tortillas on a flat surface.
    2. Sprinkle the bottom half of each tortilla with:
    3. ¼ cup cheddar cheese
    4. ⅛ cup mozzarella
    5. Spoon the garlic chicken mixture over the cheese.
    6. Top with a sprinkle of fresh parsley.

    Step 4: Toast (Optional but Delicious)

    1. Fold in the sides of the wrap and roll tightly.
    2. Place seam-side down on a hot non-stick skillet or griddle.
    3. Toast each side for 1–2 minutes, until golden and the cheese is melted.

    Step 5: Serve

    1. Slice in half, sprinkle with more parsley, and serve with garlic aioli, ranch dressing, or a fresh green salad.

    🔁 Variations
    1. Spicy Garlic Chicken Wraps
    Add ½ tsp cayenne pepper or a few dashes of hot sauce to the seasoning mix.

    2. Veggie-Loaded Version
    Add sautéed bell peppers, spinach, or mushrooms before rolling.

    3. Low-Carb Lettuce Wraps
    Skip the tortilla and serve the chicken mixture in butter lettuce cups.

    4. Cheddar Ranch Chicken Wraps
    Swap garlic sauce for ranch dressing and add chopped green onions.

    5. Crispy Garlic Chicken Wraps
    Add a handful of crushed tortilla chips or crispy onions inside the wrap for crunch.

    🧊 Storage & Reheating
    Storage:
    Wrap tightly in foil or place in airtight containers.

    Store in the refrigerator for up to 3 days.

    Reheating:
    For best results, reheat in a skillet over medium heat until warmed through.

    Microwave in 30-second intervals if short on time.

    Freezing:
    Assemble wraps (without fresh parsley), wrap tightly in foil, and freeze for up to 2 months.

    Thaw overnight and reheat in the oven or skillet.

    ❓ 10 Frequently Asked Questions (FAQs)
    1. Can I use rotisserie chicken instead of cooking from scratch?
    Absolutely! Just shred it, warm it up, and toss with the garlic sauce and seasonings.

    2. Is the garlic sauce store-bought or homemade?
    Either works! A good creamy garlic aioli or garlic yogurt sauce is perfect.

    3. Can I make this dairy-free?
    Yes — use dairy-free cheese shreds and a plant-based garlic sauce.

    4. What tortillas are best?
    Large flour tortillas work best for wrapping and toasting without breaking.

    5. Can I bake the wraps instead of pan-toasting?
    Yes — wrap in foil and bake at 375°F for 10 minutes until warm and melty.

    6. Is this kid-friendly?
    Yes! It’s cheesy, mild, and easy to eat — just go easy on the garlic if they’re sensitive to strong flavors.

    7. Can I prep this for lunches?
    Perfectly! These wraps hold up well in the fridge and reheat beautifully.

    8. Can I use other proteins?
    Yes — try it with grilled shrimp, turkey breast, or tofu.

    9. How do I prevent the tortilla from tearing?
    Warm tortillas briefly before wrapping to make them more pliable.

    10. Can I serve it cold?
    Yes — it tastes great cold, especially if wrapped tightly after cooling.

    ✅ Conclusion
    These Cheesy Garlic Chicken Wraps are a perfect balance of comfort and convenience. With juicy garlic-seasoned chicken, a blend of melted cheeses, and fresh herbs, all tucked inside a toasted tortilla — every bite is bursting with flavor.

    Quick to make, easy to customize, and perfect for meal prep or casual dinners, this is the kind of recipe you’ll keep coming back to again and again.

    If you loved this, check out:

    Buffalo Chicken Wraps

    Spicy Chicken Quesadillas

    Creamy Chicken Caesar Wraps

  • Crack Burgers – Juicy, Cheesy, Ranch-Infused Beef Burgers

    Crack Burgers – Juicy, Cheesy, Ranch-Infused Beef Burgers

    These Crack Burgers are everything you love about a good, hearty burger — juicy, cheesy, perfectly seasoned, and ultra satisfying — all without bacon or pork products. 🍔🧀 With rich ground beef, sharp cheddar cheese, and a boost of tangy, herby flavor from ranch seasoning and sour cream, these burgers are downright addictive. They’re perfect for weeknight dinners, game day grilling, or backyard BBQs, and they come together in under 30 minutes with just a handful of simple ingredients. The best part? You don’t need bacon to achieve bold flavor. These burgers stand on their own — juicy, savory, and bursting with cheesy, ranchy goodness in every bite. Craving more bold burger recipes? Try our Jalapeño Ranch Turkey Burgers or Cheddar-Stuffed Beef Sliders.

    • Large mixing bowl – to mix your beef and seasonings
    • Spatula or wooden spoon – for stirring
    • Grill, griddle, or skillet – your cooking method of choice
    • Measuring spoons – for seasonings
    • Burger press (optional) – for evenly shaped patties
    • Tongs or spatula – to flip the burgers
    • Knife and cutting board – to prep toppings
    • Meat thermometer (optional) – for checking doneness

    Makes 4 large burgers or 6 medium burgers.

    Burger Mix:

    • 1½ lbs ground beef (80/20 blend)
    • 1 cup shredded cheddar cheese
    • 3 tablespoons sour cream
    • 2 tablespoons dry ranch seasoning
    • 1 teaspoon garlic powder (optional)
    • 1 teaspoon onion powder (optional)
    • Black pepper (to taste)

    To Serve:

    • Burger buns (brioche, sesame, or whole wheat)
    • Lettuce (sliced tomatoes, pickles, onions)
    • Ranch dressing or mayonnaise (for spreading)

    Step 1: Mix the Burger Blend

    1. In a large bowl, combine the ground beef, cheddar cheese, ranch seasoning, sour cream, and (optional) garlic/onion powder.
    2. Gently mix with your hands or a spatula until just combined — don’t overmix.

    Step 2: Form Patties

    1. Divide the meat into 4 or 6 equal portions.
    2. Shape each into a patty and press a small indentation in the center (to help them cook evenly and prevent puffing).

    Step 3: Cook the Burgers

    1. Preheat a grill, griddle, or skillet over medium-high heat.
    2. Cook the patties for 4–5 minutes per side, or until they reach your desired doneness.
    3. Internal temperature of 160°F (71°C) is ideal for well-done ground beef.

    Step 4: Toast the Buns (Optional)

    1. Toast the cut sides of the buns on the grill or skillet for 1–2 minutes until golden brown.

    Step 5: Assemble

    1. Spread ranch dressing or mayo on the bun bottoms.
    2. Add lettuce, tomato, onion, and pickles.
    3. Top with the hot burger patty.
    4. Finish with the top bun and serve!

    🔁 Variations
    1. Spicy Crack Burgers
    Add chopped jalapeños or a few dashes of hot sauce to the patty mix for heat.

    2. Mushroom-Swiss Ranch Burgers
    Sub cheddar for Swiss cheese and add sautéed mushrooms for a rich twist.

    3. Crack Burger Sliders
    Form mini patties and serve on slider buns for party-ready bites.

    4. Cheddar-Stuffed Burgers
    Place a cube of cheese in the center of each patty before shaping — cheesy surprise inside!

    5. Lettuce Wrap Burgers
    Skip the bun and wrap burgers in large romaine or iceberg leaves for a low-carb version.

    🧊 Storage & Reheating
    Refrigerator:
    Store leftover cooked burgers in an airtight container for up to 3 days.

    Freezer:
    Freeze uncooked patties between parchment paper for up to 3 months.

    Thaw overnight or cook from frozen, adding 2–3 minutes to cook time.

    Reheating:
    Reheat in a skillet over low heat or microwave for 60–90 seconds.

    ❓ 10 Frequently Asked Questions (FAQs)
    1. Is this recipe completely pork-free?
    Yes, this version contains no bacon or pork products of any kind.

    2. Can I use turkey or chicken instead of beef?
    Yes — swap in ground turkey or chicken, and reduce cooking time by 1–2 minutes per side.

    3. Do I have to use sour cream?
    You can leave it out, but it adds moisture and richness to the patty.

    4. What if I don’t have ranch mix?
    Mix together dried parsley, dill, garlic powder, onion powder, salt, and pepper to make your own.

    5. What kind of cheese works best?
    Sharp cheddar melts well and adds bold flavor, but feel free to try pepper jack, gouda, or colby jack.

    6. How do I keep my burgers from puffing in the center?
    Make a slight dent in the center of each patty before cooking.

    7. Can I bake the burgers instead?
    Yes — bake at 400°F for 20–25 minutes, flipping halfway through.

    8. Can I make these ahead of time?
    Yes — prepare patties and store them uncooked in the fridge for up to 24 hours.

    9. What toppings go best with these burgers?
    Crisp lettuce, sliced tomato, dill pickles, red onions, and ranch mayo complement the flavors beautifully.

    10. Can I serve them without buns?
    Absolutely — serve over salad or in a lettuce wrap for a bun-free option.

    ✅ Conclusion
    These Crack Burgers are the ultimate pork-free solution for juicy, flavorful burgers. With ranch seasoning, cheddar cheese, and a creamy texture, they deliver that addictive flavor combo that’s perfect for casual dinners or impressive cookouts.

    No bacon? No problem. These burgers stand on their own and prove you don’t need anything extra to make a burger unforgettable.

    Looking for more dinner inspiration?

    Cheddar Ranch Chicken Wraps

    Beef & Cheddar Stuffed Peppers

    Sweet Potato Fries with Garlic Aioli

    Now get that grill or skillet going — these burgers are calling your name.

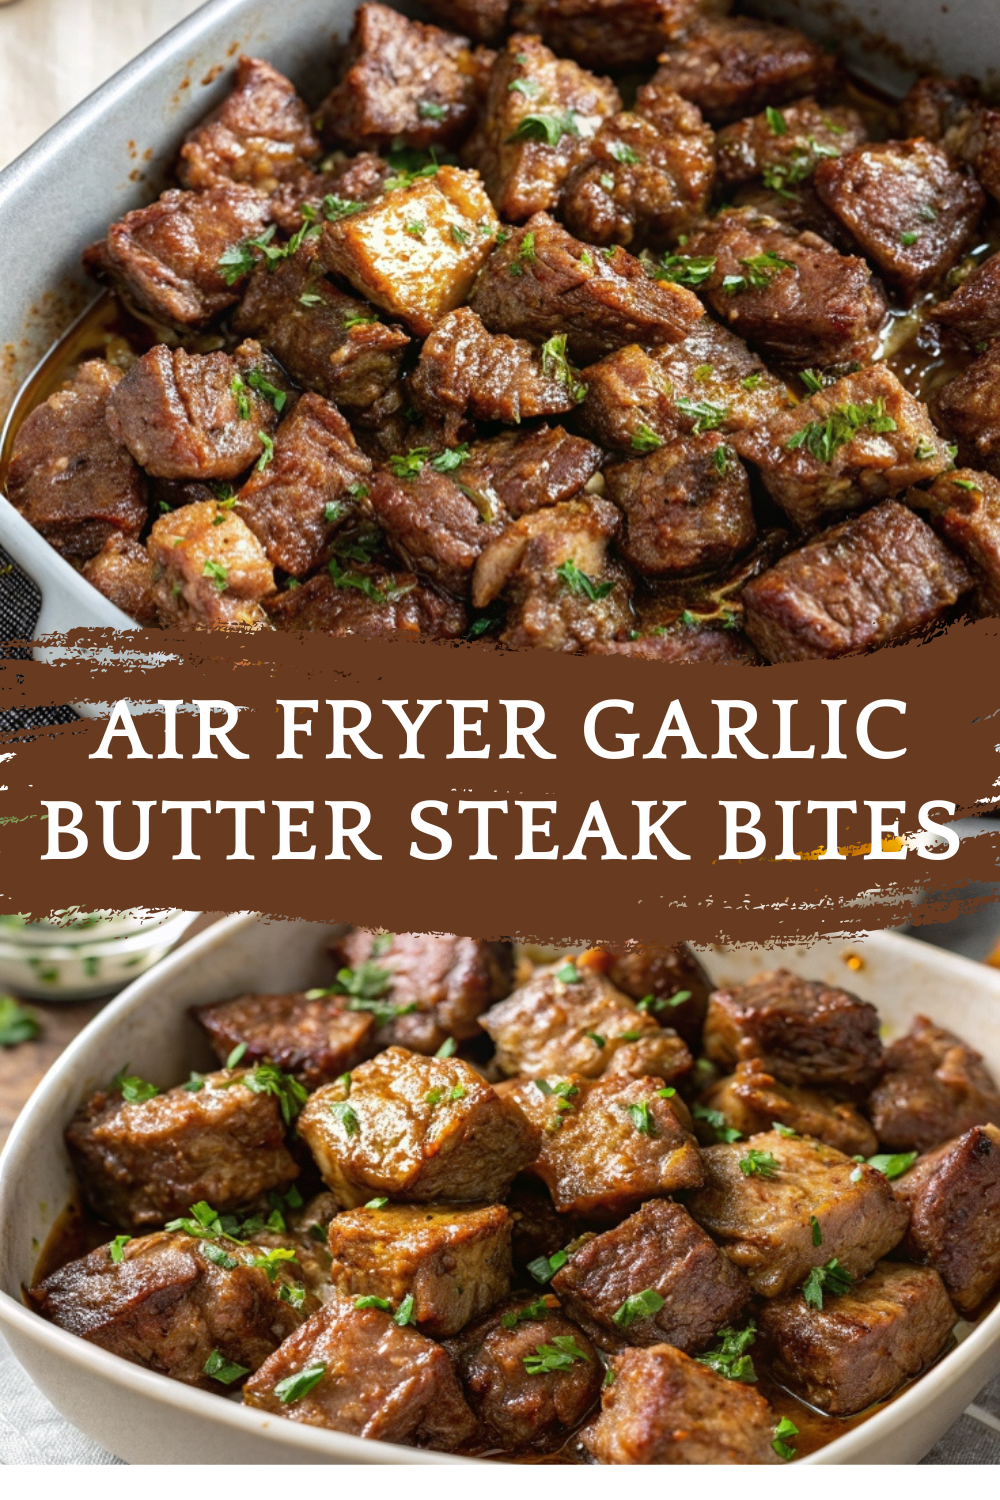
  • Air Fryer Garlic Butter Steak Bites – Juicy, Tender & Ready in 10 Minutes!

    Air Fryer Garlic Butter Steak Bites – Juicy, Tender & Ready in 10 Minutes!

    Air Fryer Garlic Butter Steak Bites – Juicy, Tender & Ready in 10 Minutes!

    Quick, flavorful, and bursting with garlicky goodness — these Air Fryer Garlic Butter Steak Bites are the ultimate weeknight protein. 🥩🔥🧄 With a golden sear on the outside and juicy tenderness on the inside, these steak bites are tossed in a rich garlic butter sauce and finished in the air fryer for an effortless, high-protein dish that’s ready in under 15 minutes. Whether served as a snack, appetizer, or main course, these bites are keto, low carb, and packed with flavor. Perfect for steak lovers and air fryer fans alike, this recipe is easy to make and easy to love. Pair it with a simple salad, cauliflower rice, or garlic butter green beans for the perfect low-carb meal. If you like this, you’ll also enjoy our Air Fryer Lemon Herb Chicken Bites or Garlic Butter Shrimp.

    • Air fryer – basket-style or oven-style works
    • Mixing bowl – to coat the steak in seasoning
    • Tongs or spatula – for flipping and tossing
    • Small saucepan or microwave-safe bowl – for melting butter and mixing sauce
    • Meat thermometer – optional, but helpful for perfect doneness
    • Knife and cutting board – for cubing the steak

    For the Steak:

    • 1.5 pounds sirloin steak (cut into 1-inch cubes)
    • 1 tablespoon olive oil
    • 1 teaspoon salt
    • ½ teaspoon black pepper
    • ½ teaspoon smoked paprika
    • ½ teaspoon garlic powder

    For the Garlic Butter Sauce:

    • 3 tablespoons unsalted butter
    • 3 cloves garlic (minced)
    • 1 tablespoon chopped parsley
    • ½ tablespoon Worcestershire sauce (optional, for depth)
    • Pinch of red pepper flakes (optional, for heat)

    Step 1: Preheat the Air Fryer

    1. Preheat your air fryer to 400°F (200°C) for 5 minutes.

    Step 2: Season the Steak

    1. In a mixing bowl, toss the steak cubes with:
    2. Olive oil
    3. Salt, pepper, paprika, and garlic powder
    4. Mix until well coated on all sides.

    Step 3: Cook in the Air Fryer

    1. Place steak cubes in a single layer in the air fryer basket (you may need to cook in batches).
    2. Air fry for 8–10 minutes, shaking the basket halfway through.
    3. For medium doneness, aim for an internal temperature of 135°F–140°F.

    Step 4: Make the Garlic Butter

    1. While the steak cooks, melt butter in a small pan or microwave.
    2. Stir in minced garlic, Worcestershire, red pepper flakes, and parsley.
    3. Let it simmer for 1 minute to soften the garlic.

    Step 5: Toss and Serve

    1. When steak bites are done, transfer to a bowl and pour the garlic butter sauce over top.
    2. Toss to coat evenly and serve hot!

    🔁 Variations
    1. Garlic Parmesan Steak Bites
    After tossing in garlic butter, sprinkle with grated Parmesan.

    2. Asian-Inspired
    Add a splash of soy sauce, sesame oil, and green onions to the butter sauce.

    3. Tex-Mex Style
    Add cumin, chili powder, and lime juice to the butter for a fajita vibe.

    4. Rosemary & Thyme
    Swap parsley for fresh rosemary and thyme for a more earthy flavor.

    5. Surf & Turf
    Serve with air fryer shrimp or scallops for a fancy but fast meal.

    🧊 Storage & Reheating
    Storage:
    Store leftovers in an airtight container in the fridge for up to 4 days.

    Freezing:
    Freeze cooked steak bites for up to 2 months. Reheat directly from frozen or thaw overnight.

    Reheating:
    Reheat in the air fryer at 350°F for 3–4 minutes to regain crispiness.

    Or microwave for 30–60 seconds, though texture may soften.

    ❓ 10 Frequently Asked Questions (FAQs)
    1. Can I use a different cut of steak?
    Yes! Ribeye, strip, or filet mignon work well, though sirloin is most budget-friendly.

    2. What temperature should steak bites be cooked to?
    For medium, aim for 135°F–140°F internal temp.

    3. Can I make this recipe dairy-free?
    Yes! Use a vegan butter substitute or olive oil + garlic.

    4. Can I cook them without preheating the air fryer?
    Technically yes, but preheating gives better browning and more even cooking.

    5. Can I cook frozen steak cubes?
    It’s best to thaw first for even cooking, but you can air fry frozen cubes at 390°F for 12–14 minutes.

    6. Do I need to rest the steak bites?
    Not necessary with small bites, but a 2-minute rest helps retain juices.

    7. How do I avoid overcrowding?
    Cook in two batches if needed. Crowding = steaming, not browning.

    8. Can I make this ahead of time?
    Yes — cook the steak, refrigerate, then reheat and toss in garlic butter before serving.

    9. How do I serve these?
    Serve over mashed cauliflower, zoodles, rice, or with a simple side salad.

    10. What’s the best dipping sauce for these?
    Try garlic aioli, chimichurri, or a spicy horseradish cream.

    ✅ Conclusion
    These Air Fryer Garlic Butter Steak Bites are the definition of easy gourmet. 🧈🔥🥩

    Crispy on the outside, juicy on the inside, and drenched in a rich, garlicky butter sauce — this dish turns any weeknight into a steakhouse-style dinner without the price tag or time commitment.

    Whether you’re low-carb, keto, gluten-free, or just a lover of great flavor — this recipe will become a staple in your rotation.

    More air fryer favorites:

    Air Fryer Chicken Thighs

    Crispy Air Fryer Tofu

    Air Fryer Brussel Sprouts

    Get your air fryer ready — dinner is about to get delicious.

  • Cottage Cheese Egg Bake – Easy, Protein-Packed, and Perfect for Breakfast or Meal Prep

    Cottage Cheese Egg Bake – Easy, Protein-Packed, and Perfect for Breakfast or Meal Prep

    Cottage Cheese Egg Bake – Easy, Protein-Packed, and Perfect for Breakfast or Meal Prep

    If you’re looking for an easy, high-protein, and veggie-loaded breakfast that’s perfect for meal prep, this Cottage Cheese Egg Bake checks all the boxes. 🧀🥚🌱 With creamy cottage cheese, wholesome veggies, and six hearty eggs, this crustless breakfast casserole delivers a rich and savory flavor with a fluffy, custard-like texture. It’s naturally low in carbs, gluten-free, and loaded with protein, making it an ideal option for busy mornings, brunch with friends, or even a light dinner with a side salad. Best of all, it’s completely customizable — mix and match veggies, cheeses, or herbs based on what’s in your fridge. Love this idea? Be sure to try this High Protein Egg Muffin Recipe or this Crustless Quiche with Spinach next!

    • Large mixing bowl – for whisking the eggs and combining all ingredients
    • Whisk or fork – to beat the eggs smoothly
    • 9×9 or 8×8-inch baking dish – for even baking
    • Nonstick spray or oil – to grease the dish
    • Spatula or wooden spoon – for mixing and serving
    • Cutting board + knife – for chopping veggies
    • Measuring cups and spoons

    Core Ingredients:

    • 6 large eggs
    • 2 cups cottage cheese (small curd preferred for smoother texture)
    • 1 cup shredded cheese (cheddar, mozzarella, or a blend)
    • 1 cup chopped spinach (fresh or frozen, thawed and squeezed)
    • ½ cup diced bell pepper (any color)
    • ½ cup chopped onion

    Seasonings:

    • ½ teaspoon garlic powder
    • ½ teaspoon onion powder
    • ½ teaspoon salt
    • ¼ teaspoon black pepper

    Optional Garnishes:

    • Fresh herbs like chives (parsley, or dill)
    • Sliced avocado or tomatoes for serving

    Step 1: Prep the Oven and Dish

    1. Preheat your oven to 375°F (190°C).
    2. Lightly grease a 9×9-inch baking dish with cooking spray or olive oil.

    Step 2: Whisk the Eggs

    1. In a large bowl, crack the 6 eggs and whisk until fully combined.

    Step 3: Add the Cottage Cheese and Cheese

    1. Stir in the cottage cheese and shredded cheese.
    2. Mix until creamy and well blended.

    Step 4: Add Veggies and Seasonings

    1. Fold in the spinach, bell peppers, and onion.
    2. Add garlic powder, onion powder, salt, and pepper.
    3. Mix everything until well distributed.

    Step 5: Pour and Bake

    1. Pour the mixture into your prepared baking dish.
    2. Smooth the top with a spatula and bake for 35–40 minutes, or until the center is set and the edges are golden.

    Step 6: Cool and Serve

    1. Let the egg bake rest for 5–10 minutes before slicing.
    2. Garnish with fresh herbs, avocado, or sliced tomato if desired.

    Perfect for make-ahead breakfasts, brunch spreads, or a light lunch option.

    🔁 Variations
    This cottage cheese egg bake is super versatile. Try these flavor twists:

    1. Meat Lover’s
    Add crumbled cooked bacon, turkey sausage, or ham cubes.

    2. Mediterranean
    Use feta cheese, sun-dried tomatoes, spinach, and olives.

    3. Southwest Style
    Add black beans, green chiles, and Monterey Jack cheese.

    4. Mushroom & Swiss
    Sauté mushrooms and onions, and use Swiss cheese for a café-style bake.

    5. Broccoli Cheddar
    Replace spinach with steamed broccoli florets and use cheddar cheese.

    🧊 Storage and Reheating
    Refrigerator:
    Store cooled egg bake slices in an airtight container for up to 4 days.

    Freezer:
    Freeze individual portions wrapped tightly or stored in containers for up to 2 months.

    Thaw overnight in the refrigerator before reheating.

    Reheating:
    Microwave on medium for 30–60 seconds until heated through.

    Or reheat in a 350°F oven for 10–15 minutes.

    Pro Tip: Add a sprinkle of fresh cheese before reheating for that melty magic.

    ❓ 10 Frequently Asked Questions (FAQs)
    1. Can I use egg whites only?
    Yes! Use about 12 egg whites to replace 6 whole eggs.

    2. Is this recipe keto-friendly?
    Absolutely — it’s low in carbs and high in protein and fat.

    3. Can I use frozen spinach?
    Yes — just thaw and squeeze out any excess liquid before adding.

    4. What’s the best cheese to use?
    Cheddar, mozzarella, feta, or any melting cheese you like!

    5. Can I prep this the night before?
    Yes! Assemble the egg mixture, cover, and refrigerate overnight. Bake fresh in the morning.

    6. Can I add more vegetables?
    Definitely — try zucchini, mushrooms, or tomatoes.

    7. Is this good for meal prep?
    Yes! Slice and store in the fridge or freezer — it’s great for grab-and-go breakfasts.

    8. Can I make this in muffin tins?
    Totally — pour into greased muffin tins and bake for 18–22 minutes.

    9. How do I know when it’s done?
    The center should be firm and no longer jiggly; a toothpick should come out clean.

    10. Does cottage cheese make it watery?
    Not if you mix well — small curd cottage cheese works best, and the eggs set everything.

    ✅ Conclusion
    This Cottage Cheese Egg Bake is everything you want in a breakfast: hearty, healthy, cheesy, and totally satisfying. 🧀🍳💪

    It’s an easy, protein-packed meal you can prep in advance and enjoy all week long. With endless ways to customize, it fits into low-carb, keto, gluten-free, and even vegetarian diets — making it a must-have in your recipe rotation.

    More breakfast favorites:

    Veggie Egg Muffins

    Sweet Potato Breakfast Hash

    Savory Cottage Cheese Bowl

    Try it once — and you’ll make it every week!